2 Installation
Before you start:
Check the package contents and make sure that the device in the package is in good
condition and all the assembly parts are included.
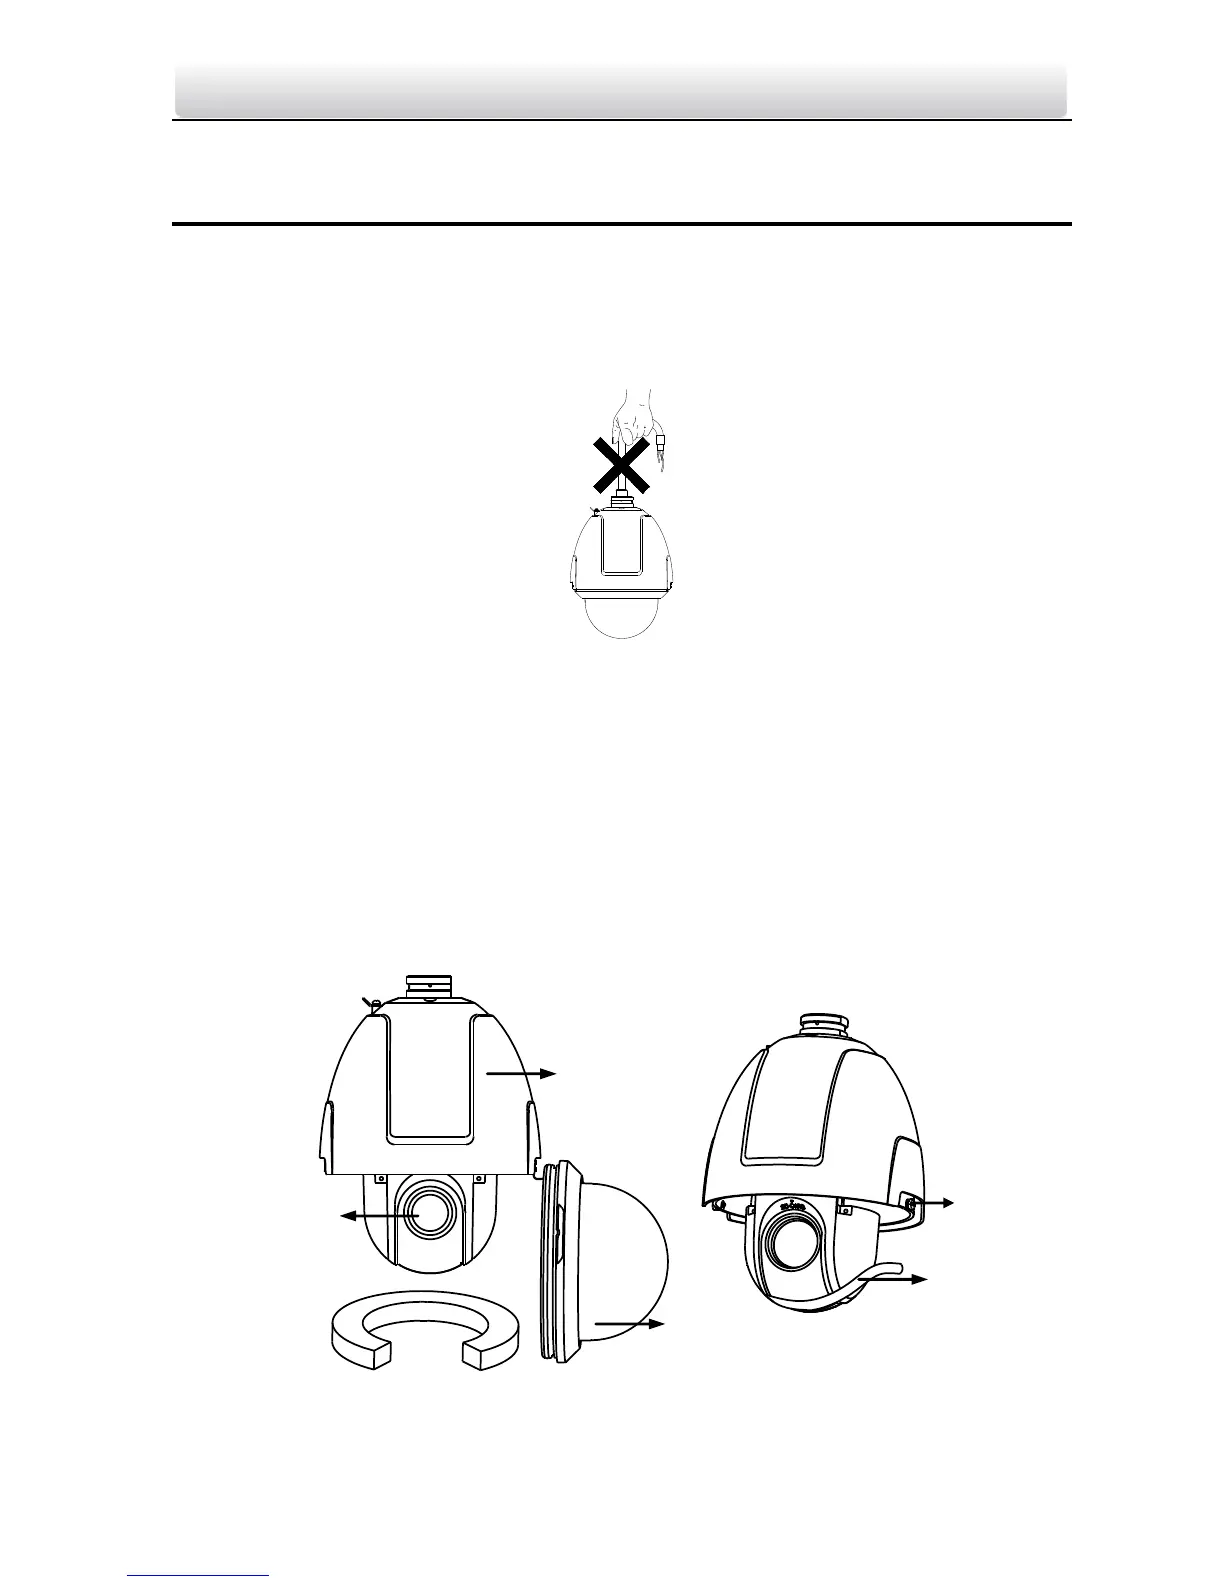
Note: Do not drag the speed dome with its waterproof cables as shown in Figure 2-1,
otherwise the waterproof performance is affected.
Figure 2-1 Do Not Drag the Cables
2.1 Wall Mounting
Note: The long-arm wall mount is taken as the example for following mounting steps.
Steps:
1. Loosen the two lock screws on the both side of the speed dome. Pull the lower dome
to separate it from the back box as shown in Figure 2-2.
2. Remove the protective lens cover, foam and sticker from the dome drive.
Note: Please do not remove the lock screws from the dome.
Figure 2-2 Remove the Lower Dome