This document is the instruction manual for the AEG 11680 sewing machine, providing comprehensive guidance on its operation, maintenance, and safety. The manual is presented in both German and English, ensuring accessibility for a wider user base.
Function Description
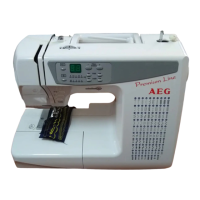
The AEG 11680 is a household sewing machine designed for a variety of sewing tasks, from basic straight stitches to more complex decorative patterns, buttonholes, and zipper insertions. It features an electronic control system, indicated by the LED display for stitch patterns, width, and length, as well as indicators for needle position and auto-stop functions. The machine is equipped with a foot controller for speed adjustment, but also offers a Start/Stop button for operation without the foot control. Its primary function is to facilitate sewing by providing precise stitch control, various stitch patterns, and user-friendly features for both beginners and experienced sewers.
Important Technical Specifications
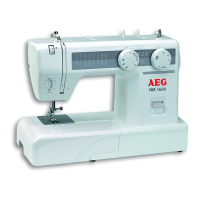
- Measures of machine: (L) 390 x (H) 280 x (W) 214 mm
- Weight: 7.5 kg
- Power Supply: 230V, 50 Hz
- Motor: 41 W
- Lamp: 12 V, 5 W
- Total Power Consumption: 60 W
- Certifications: TÜV/GS and CE certified
Usage Features
The AEG 11680 offers a wide array of features to enhance the sewing experience:
- Stitch Patterns: The machine provides 99 different stitch patterns, including straight stitches, zigzag stitches, overlock stitches, stretch stitches, blind stitches, and various decorative patterns. A detailed chart in the manual illustrates each pattern and its corresponding presser foot.
- Electronic Controls:
- Pattern Selection Button: Allows users to select desired stitch patterns by pressing right or left buttons. For quick selection of a specific pattern number, the button can be held for 5 seconds, and the LED display will rapidly cycle through numbers until released at the desired pattern.
- Stitch Width Setup Button: Adjusts the width of the stitch. The machine beeps three times if an adjustment exceeds the pattern's limit.
- Stitch Length Setup Button: Adjusts the length of the stitch. Similar to width adjustment, a three-beep alert indicates exceeding the pattern's length limit.
- Needle Position Button: Toggles the needle position between up and down. The needle automatically sets to the "top" position when the Start button is pressed. An indicator light signals when the needle is in the "bottom" position.
- Reverse Button: Enables reverse stitching for patterns 01 and 02, useful for securing seams at the beginning and end.
- Start/Stop Button: Initiates or halts sewing. The machine starts slowly and then speeds up to the set speed. This button is inactive when the foot controller is connected.
- Speed Adjustment Lever: Allows manual control over the sewing speed, limiting the maximum speed of the machine.
- PES Auto Stop Button: When pressed for a decorative stitch pattern, the machine will automatically stop after completing the entire pattern. An indicator light confirms this function is active.
- Mirror Button: Enables sewing patterns in a mirrored orientation. An indicator light confirms when the mirror function is active.
- Thread Tension Adjustment: Separate controls for upper and bobbin thread tension, with specific recommendations for different stitch types (e.g., lower tension for zigzag and embroidery).
- Automatic Needle Threader: Simplifies threading the needle, though it cannot be used with twin needles.
- Bobbin Winding: A dedicated bobbin winder with a stopper ensures even and efficient winding of the bobbin thread. Adjustments can be made if winding is uneven.
- Removable Extension Table/Accessory Box: Provides a flat sewing surface and doubles as a storage compartment for accessories. It can be removed to convert the machine into a free-arm configuration for sewing sleeves, trouser hems, and other tubular items.
- Presser Feet: The machine comes with several presser feet, including an all-purpose foot, buttonhole foot, zipper foot, button foot, gathering foot, and blind hem foot, allowing for diverse sewing applications. The manual details how to remove and attach presser feet and their shanks.
- Stitch Balance Dial: Used to adjust pattern balance, particularly for decorative stitches, to prevent overlapping or separation of patterns.
- Quilter Guide: An optional accessory that slides into the presser foot holder to maintain consistent stitch distance for quilting.
- Safety Functions: The machine displays specific error codes (e.g., "JC" for bobbin winding, "FC" for foot controller interference, "OL" for torque problems) to alert users to operational issues and ensure safe use.
Maintenance Features
The manual outlines essential maintenance procedures to ensure the longevity and optimal performance of the sewing machine:
- Cleaning: Regular cleaning is crucial. Users are instructed to unplug the machine before cleaning. Specific areas to clean include:
- Needle Plate: Remove by loosening screws on both sides.
- Bobbin Case and Shuttle Race: Remove the bobbin case and brush away fluff and lint from around the feed dog and bobbin case.
- Feed Dog: Clean lint and dust from the feed dog area.
- Oiling: Moving parts require periodic oiling. Users should unplug the machine, open the face cover, and apply one drop of oil to designated moving points, as illustrated in the manual.
- Needle Replacement: Instructions are provided for replacing the needle, emphasizing the correct orientation (flat side away from the user) and the importance of using good quality, straight needles to prevent skipped stitches, thread breakage, and fabric damage.
- Bulb Replacement: Detailed steps for safely removing and replacing the 12V ~ 5W light bulb, including waiting for the bulb to cool down.
- Troubleshooting Chart: A comprehensive "Fault Finding Chart" lists common problems, their probable causes, and possible solutions, covering issues like tangled threads, irregular stitches, broken needles, fabric puckering, skipped stitches, and machine malfunctions.
Safety Instructions
The manual begins with critical safety instructions, emphasizing the importance of reading all instructions before use. Key safety points include:
- Always unplug the machine when unattended, after use, or before cleaning/changing the lamp.
- Use a maximum 5W bulb.
- Do not allow children to use the machine as a toy.
- Use only manufacturer-recommended accessories and original replacement parts.
- Never operate the machine with damaged cords/plugs or if it's malfunctioning, dropped, or wet.
- Keep ventilation openings clear of lint and dust.
- Avoid using outdoors or where aerosol products/oxygen are administered.
- Keep fingers away from moving parts, especially the needle area.
- Always switch off the machine before making adjustments in the needle area.
- Do not pull or push fabric while stitching.
- Use only the original foot controller.
- Exercise caution when working near the needle to prevent injury.
- Run the machine without thread for a few minutes during first use to wipe off any excess oil.
The AEG 11680 sewing machine is a versatile and user-friendly device, designed for a wide range of domestic sewing projects, with clear instructions for safe operation and maintenance.