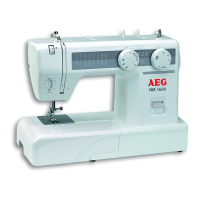
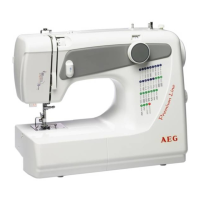
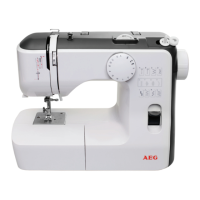
This document is an instruction manual for the AEG Sewing Machine models NM 1600/1800. It provides comprehensive guidance on the operation, maintenance, and various sewing functions of the device.
Function Description:
The AEG Sewing Machine NM 1600/1800 is designed for domestic use, enabling users to perform a wide range of sewing tasks. It supports various stitch types, including straight sewing, zigzag sewing, tricot stitch, witchcraft or herringbone stitch, zipper insertion, buttonhole creation, hemming, button sewing, and blind hem sewing. The machine is equipped with controls for stitch selection, stitch length adjustment, and reverse stitching, offering flexibility for different fabric types and project requirements. The free arm sewing feature allows for easier sewing of tubular components like sleeves and trouser legs.
Important Technical Specifications:
- Power: 230 Volts, 50 Hertz
- Power Input: 85 Watts
- Including Engine: 70 Watts
- Workplace Lighting: 15 Watts (light bulb socket with thread E 14, max 15 Watts). The manual emphasizes that the light bulb's maximal power is 15 watts and that the machine is supplied with a commercial screw light bulb (thread name E14).
- Stitch Rate: Max 800 stitches per minute
- Safety: The devices are provided with the CE sign and are safety and GS tested.
- Guarantee: 24 months guarantee, with the receipt of purchase serving as the certificate.
Usage Features:
The manual details several key usage features:
- Needle Change: Instructions are provided for safely changing the needle, emphasizing the importance of positioning the balance wheel correctly and ensuring the flat side of the new needle faces the back. Users are warned against using bent or blunt needles.
- Presser Foot Management: The process of removing and attaching different presser feet (zigzag foot, zipper foot, buttonhole foot, hem foot, blind hem foot) is explained, highlighting the presser foot lever and foot switch.
- Threading Tension Adjustment: Guidance is given on adjusting both upper and lower threading tension to ensure correct stitch formation. The lower threading tension is factory-set for general sewing but can be regulated for very light or heavy materials.
- Bobbin Winding and Insertion: A step-by-step guide covers winding the bobbin and correctly inserting the bobbin case into the machine.
- Stitch Selection and Length: The machine features a stitch selection dial for choosing various stitch patterns and a stitch length selection dial (0.3 – 4 mm) to adjust the stitch density.
- Reverse Stitch: A dedicated button allows for reverse stitching, useful for strengthening stitches at the beginning and end of a seam.
- Specialized Sewing Functions:
- Buttonhole: A four-step process for creating buttonholes using the buttonhole foot, involving switching between "A," "B," and "C" symbols on the stitch selection dial. Trial runs on corresponding material are recommended for better results.
- Hemming: Instructions for hemming with the hem foot, including folding the selvage and guiding the material.
- Blind Hem: Detailed steps for blind hem sewing with the blind hem foot, focusing on material folding and adjusting the zigzag over-lock for an invisible stitch.
- Free Arm Sewing: The removable cloth plate converts the machine to a free arm, simplifying sewing on sleeves and trouser legs.
Maintenance Features:
Regular maintenance is crucial for the machine's longevity and performance:
- Cleaning the Bobbin Case: This involves removing the shutter, bobbin case, retaining ring, and shuttle to clean out dirty parts.
- Cleaning the Feed Dog: Users are instructed to remove the presser foot and needle, open the needle plate screws, and use a small brush to remove dust and remnants from the feed dog. This should be done every 2-3 months for frequent users.
- Oiling the Machine: The manual specifies areas to be oiled (marked with arrows) after cleaning. It strictly advises using only special oil for sewing machines every second or third month. A warning is included to sew a remnant after oiling to absorb any excess oil.
- Light Bulb Change: Instructions are provided for safely changing the electric light bulb, emphasizing unplugging the machine from the wall socket before proceeding.
The manual stresses the importance of reading all instructions carefully before use to ensure easy and successful operation, and to familiarize oneself with the machine's functions. It also highlights safety precautions, such as unplugging the machine during maintenance or when unattended.