Installation and connection instructions
39
3
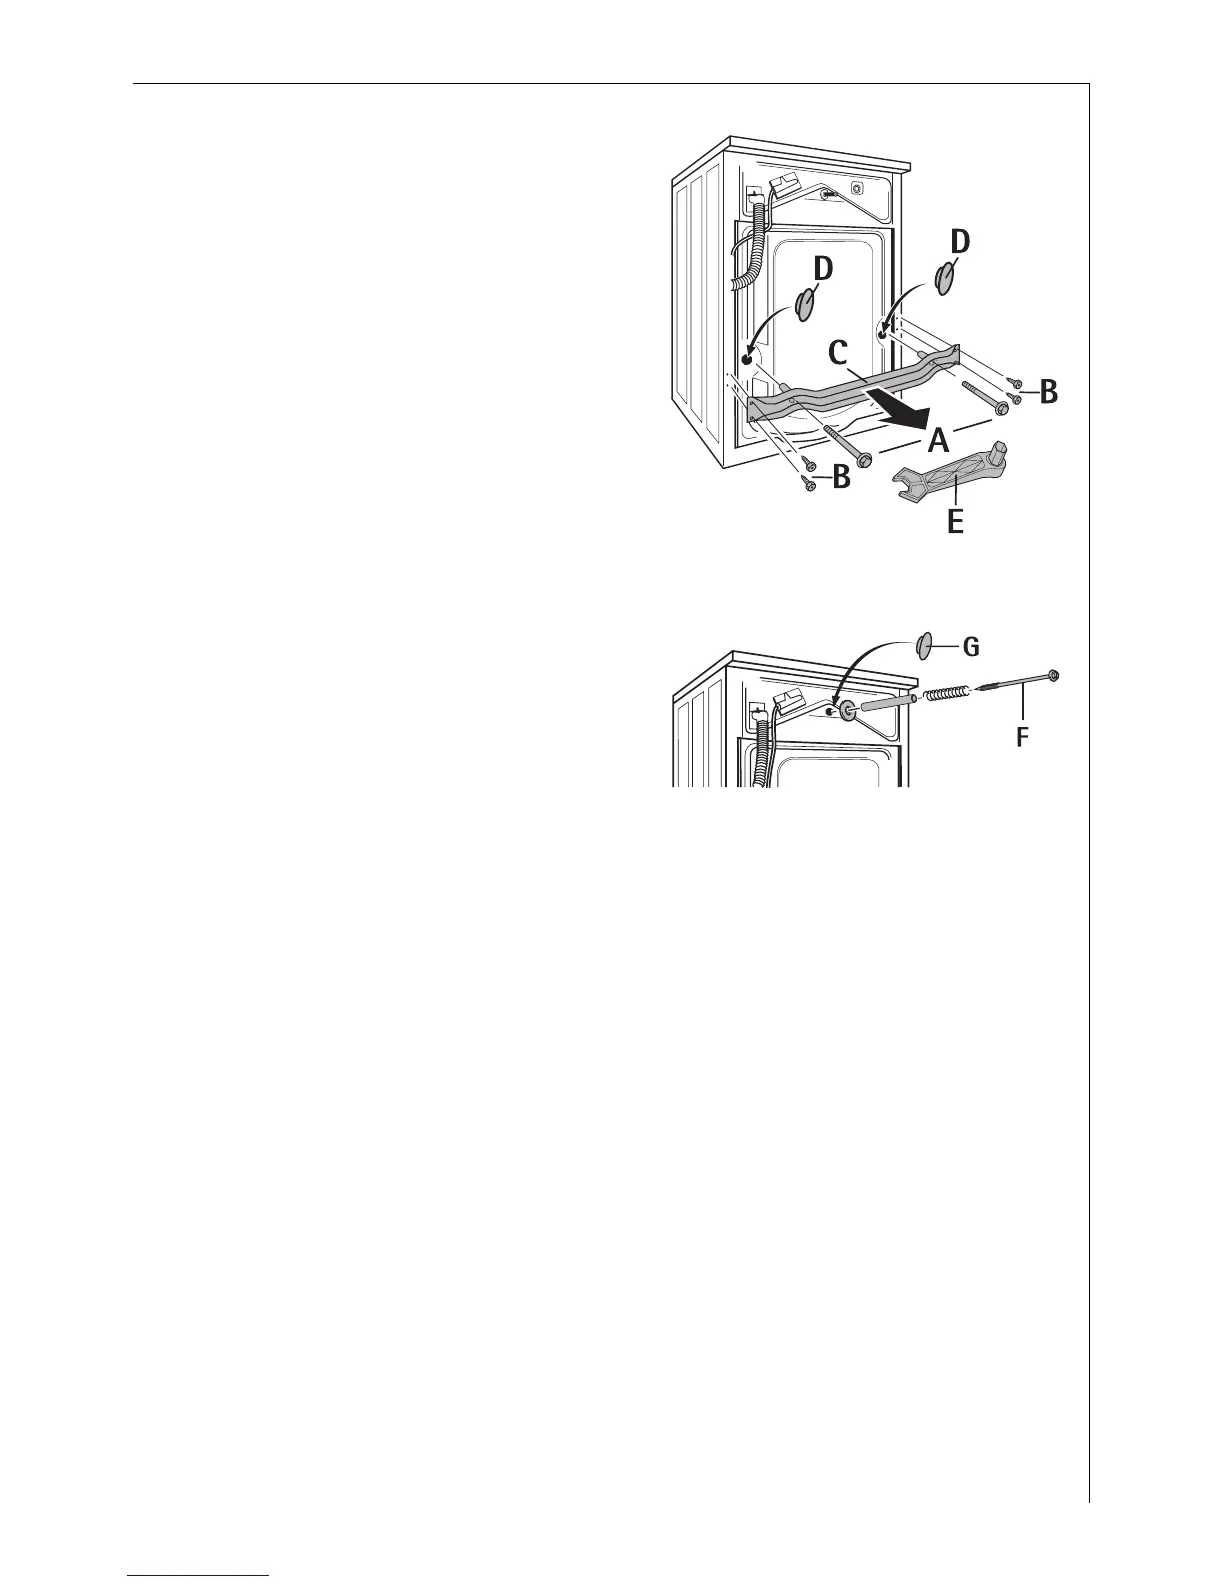
The special spanner (E) and the
caps (D) (2 each) and (G) (1 each)
are supplied with it.
3. Remove the two screws (A) with
the special spanner.
4. Remove the 4 screws (B).
5. Remove the transit bar (C).
6. Screw the 4 screws (B) back in for
safe keeping.
7. Close the 2 large holes with the
caps (D).
Important! When fitting the
plastic caps, press until they snap
into the rear panel securely.
8. Remove the screw F, including the
sleeve, compression spring and
washer, with the special spanner
E.
9. Cover the hole with the cap G.
Important! When fitting the
plastic caps, press until they snap
into the rear panel securely.