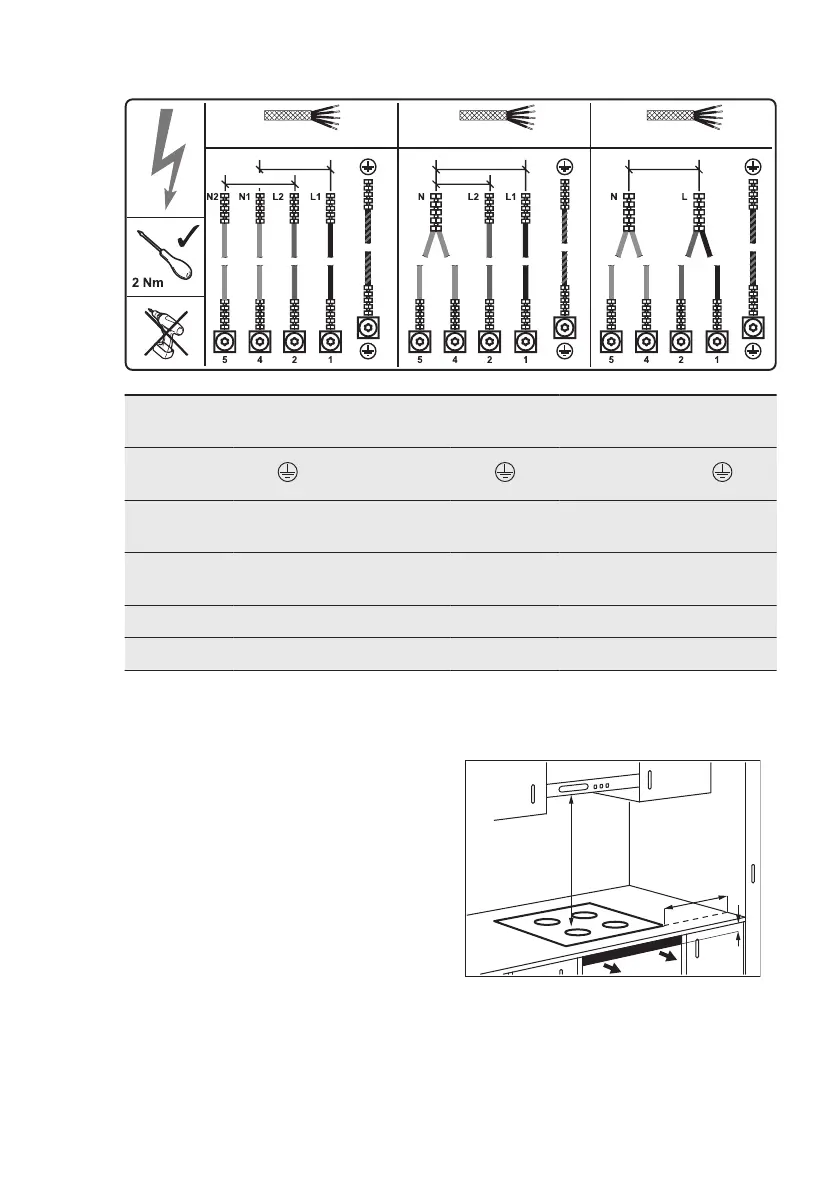
3.8 Connection diagram
380-415V 2N~ 220-240V 2L/2N~
220-240V 1N~
220 - 240V ~
220 - 240V ~
220 - 240V ~
220 - 240V ~
220 - 240V ~
Two-phase connection:
220-240V 2L/2N~
Two-phase connection:
380-415V 2N~
One-phase connection:
220 - 240V 1N ~
Green - yel‐
low
Green - yel‐
low
Green - yel‐
low
Blue N1
Blue and
blue
N
Blue and
blue
N
Blue N2 Black L1
Black and
brown
L
Black L1 Brown L2
Brown L2
3.9 Attaching the seal - On-
top installation
1. Clean the worktop around the cut out
area.
2. Attach the supplied seal stripe to the
lower edge of the hob, along the
outer edge of the glass ceramic. Do
not stretch it. Make sure that the
ends of the seal stripe are located in
the middle of one side of the hob.
3. Add some millimetres to the length
when you cut the seal stripe.
4. Join the two ends of the seal stripe
together.
3.10 Assembly
ON-TOP INSTALLATION
1.
min.
450mm
min.
650mm
min.
2mm
www.aeg.com12
 Loading...