6
Mark two points on the wall that are 80 mm apart to lay the fixing centres as shown below.
BE CAREFUL to check that there are no pipes or electrical wires hidden in the wall.
Fix two screws (7mm head screws required, not supplied) at the marked locations, leaving approximately
7mm between the wall and the screw head.
Hang the telephone on the screws using the wall mount slots. You may need adjust the screws so that
the telephone is securely fixed and does not wobble.
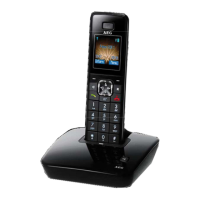
Place the handset on the cradle with the parking hook on the cradle arranged to fit in the parking
recess under the earpiece on the handset.
7 SETTING UP YOUR PHONE
Press the menu or store button to enter the menu and then use up and down buttons to
cycle through the following options:
tSET 1 DATE
tSET 2 LCD
tSET 3 FLASH
Note:
The system will time out if you leave more than 8 seconds between key presses.
7.1 Set time/date
You will need to set the time and date so they can be shown correctly on the display.
If you subscribe to a caller display service, the time and date will be set automatically on receipt of your
first incoming call, but you may still need to set the correct year.
tIn standby mode, press the store button
.
>The display shows “SET 1 DATE“.
tPress the store button
to confirm.
>The “year” icon will be blinking.
tPress the up or down button
to set the year.
tPress the store button
to confirm.
>The “month” icon will be blinking.
tPress the up or down button
to set the month.
tPress the store button
to confirm.
>The “date” icon will be blinking.
tPress the up or down button
to set the date.
tPress the store button
to confirm.
>The “hour” icon will be blinking.
tPress the up or down button
to set the hour (24 hour format only).
parking hook
lay the centres as
80 mm
parking recess
rotate