English
GREAT BRITAIN • customer service tel: 0845 300 9799 e-mail: customerservice@clasohlson.co.uk internet: www.clasohlson.com/uk
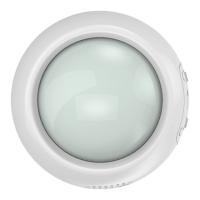
1
2
4
3
5
6
7 8
Ver. 20140722
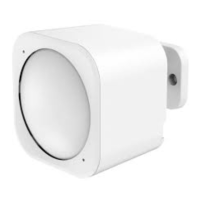
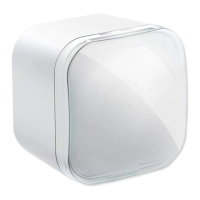
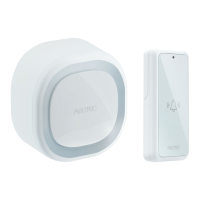
Z-Wave Multisensor
Art.no 36-5746 Model DSB05-ZWEU
Please read theentire instruction manual before using theproduct
and then save it for future reference. We reserve theright for any
errors in text or images and any necessary changes made to
technicaldata. In theevent of technical problems or other queries,
please contact our Customer Services.
Things to consider:
• Other wireless equipment using thesame frequency band can
reduce thetransmissionrange.
• Therange of all wireless equipment depends on thetype of
obstacles located between thetransmitter and thereceiver
(e.g. aconcrete wall will interfere with thesignal more than
aplasterboard wall).
If you experience problems, try thefollowing:
• Turn off any other existing wireless equipment to check whether
this is thecause of theproblem.
• Reposition thewireless equipment, shorten thedistance
between thetransmitter and thereceiver or reduce thenumber
of obstacles (walls, furniture,etc.) betweenthem.
Safety
• Never subject thesensor to high temperature, dust, heavy
vibration, impacts, humidity or moisture.
• Never attempt to dismantle or modify thesensor as it contains
no user-serviceableparts.
Product description
Z-Wave DSB05-ZWEU 4-in-1 Multisensor
Battery powered, wireless sensor for use with Zipabox Duo and
other Z-wave-system products, regardless ofmake. Motion sensor,
temperature sensor, humidity sensor and light sensor.
PIR sensor/motion sensor
ThePIR sensor can be used to actuate themajority of thedevices
in your Z-wave system, such as activate aburglar alarm, turn alight
on or execute other commands.
Temperature and humidity sensor
By monitoring thetemperature and humidity of aspace it is possible
to programme theZ-Wave system to remotely control devices to
create theperfect atmosphere.
Light sensor
By programming in commands or scenarios, thelight sensor can be
used to control devices depending on thelevel of light at theplace
where thesensor is placed.
Thesensor comes with mounting plates for attaching it to thewall
or ceiling. Itcan be used indoors or outdoors and can send signals
to up to six other Z-Wave devices.
For more information please visitwww.aeotec.com for acomplete
instruction manual.
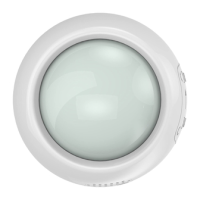
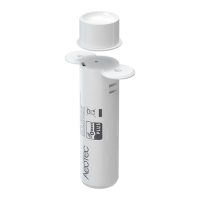
1. Motion sensor
2. LED indicator
3. [ Sensitivity ] Sensitivitydial
4. Temperature and Humidity sensor
5. Z-Wave Button – Button for pairing to Z-Wave system
6. USBport
7. Mounting arm (ball-joint mount for wall or ceiling)
8. Mounting plate (fixed mount for wall or ceiling)
USB or batterypower
• Batteries should be used for periodicuse.
• TheUSB port should be used for continuoususe.
Batteries
4. If your Z-Wave system can display thebattery level of
themultisensor, thebattery status will be displayed once
themultisensor has been paired to thesystem.
5. If your system does not have amethod of displaying thebattery
level, it is recommended that thebatteries are checked regularly.
USBport
Mounting
Fixed mountingplate
1. Twist thebattery cover to
theunlocked position and
removeit.
2. Insert 4×AAA/LR03 batteries.
Notethepolarity markings in
thebattery holder to ensure
correct battery insertion.
3. Refit thebattery cover and twist it
to thelocked position.
1. Twist thebattery cover to
theunlocked position and
removeit.
2. Connect theincluded USB
lead to thecharging port (6)
on themultisensor and to
acomputer or other USB
charger.
3. Refit thebattery cover
and twist it to thelocked
position.
Motion sensor effectiverange
When mounted on theceiling
Ceiling
Floor/Ground
Floor/Ground
When mounted on awall
Installation/Pairing
1. Set your Z-Wave control device to learningmode.
2. Push theZ-Wave button (5) on thesensor to connect it to your
existing Z-Wave network.
3. TheZ-Wave button can also be used to test whether
theconnection/pairing process was successful. IftheLED
indicator (2) flashes when theZ-Wave button is pressed,
thesensor is not paired. IftheLED indicator shines steadily for
afew seconds when theZ-Wave button is pressed, thesensor
is paired.
1. Mount thefixed mounting plate
(8) to theceiling or wall using
suitable screws and wallplugs.
Makesure that there are no
hidden electrical cables or water
pipes in thewall/ceiling which
could be damaged by drilling
themountingholes.
2. Hook thesensor onto
themountingplate.
Mountingarm
1. Mount themounting arm (7) to theceiling or wall using suitable
screws and wallplugs. Makesure that there are no hidden
electrical cables or water pipes in thewall/ceiling which could be
damaged by drilling themountingholes.
2. Remove thescrew
from thecentre (ball) of
themountingarm.
4. Hook thesensor onto
themountingplate.
5. Themounting arm can be
locked in various angles
by turning theFriction
Lock clockwise, adjusting
theangle, and then
turning theFriction Lock
anticlockwise.
3. Screw thefixed mounting
plate to themountingarm.
Care and maintenance
• Clean theproduct using alightly moistenedcloth. Useonly mild
cleaning agents, never solvents or corrosive chemicals.
• Remove thebatteries and disconnect theUSB cable from
thesensor if theproduct is not to be used for anextended
period.
Disposal
This product should be disposed of in accordance with local
regulations. Ifyou are unsure how to proceed, contact your
localcouncil.