EasyManua.ls Logo

Aeotec MultiSensor 7 - User Manual

Aeotec MultiSensor 7
8 pages
Print Icon
To Next Page IconTo Next Page
Loading...
22/07/2021
MultiSensor 7 user guide : Aeotec Help Desk
https://aeotec.freshdesk.com/support/solutions/articles/6000232605-multisensor-7-user-guide
1/8
MultiSensor 7 user guide
Modified on: Mon, 26 Apr, 2021 at 6:57 PM
Aeotec MultiSensor 7 was developed to detect ambient values and movement and to transmit them with Z-Wave Plus
(http://aeotec.com/z-wave-plus). It is powered by Aeotec’sGen7 (https://aeotec.com/z-wave-home-automation/z-wave-
gen7.html) technology. You can find out more about MultiSensor 7 (https://aeotec.com/z-wave-sensor/) by following that
link.
To see whether MultiSensor 7 is known to be compatible with your Z-Wave system or not, please reference our Z-Wave
gateway comparison (http://aeotec.com/z-wave-gateways) listing. The technical specifications of MultiSensor 7
(https://help.aeotec.com/a/solutions/articles/6000246153) can be viewed at that link.
Get to Know your MultiSensor.
Your MultiSensor comes packaged with a number of accessories that will help with its installation and operation.
Package Contents:
1. MultiSensor
2. Battery Cover
3. USB Cable
4. Double-Sided Tape
5. Screws (×2)
6. Back Arm Mount
Question and Answer IconNeed help?

Do you have a question about the Aeotec MultiSensor 7 and is the answer not in the manual?

Summary

Get to Know Your MultiSensor

Button Functions

1 x Tap (Factory Reset)

Enters Z-Wave pair mode, flashes white/green 4 times upon success.

1 x Tap (Already Paired)

Sends NIF or starts exclusion if controller is in unpair mode.

Press and Hold [1-2 Sec]

Initiates Quick Wakeup; LED disappears on release.

Press and Hold [2-5 Sec]

Sends a wakeup report to the Z-Wave Controller.

Press and Hold [5-9 Sec]

Activates Long Wakeup Mode; LED remains solid Orange.

Press and Hold [9-15 Sec]

Performs Communication Health Test with Z-Wave Controller.

Press and Hold [15-20 Sec]

Allows cancellation of Factory Reset.

Press and Hold [20+ Sec]

Initiates Factory Reset.

Important Safety Information

Quick Start

Determine Power Type

Select between battery or USB power before pairing.

USB Powered Installation

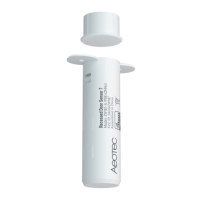
Steps to connect and power the MultiSensor 7 via USB.

Battery Powered Installation

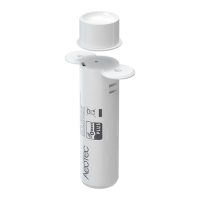
Steps to insert batteries and power the MultiSensor 7.

Adding to Z-Wave Network

Using an Existing Gateway

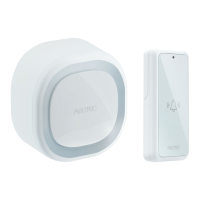
Procedure for including the MultiSensor 7 into a Z-Wave network.

Advanced Functions

Z-Wave Resetting MultiSensor 7

Instructions to remove the MultiSensor 7 from a Z-Wave network.

Manual Hard Resetting MultiSensor 7

Procedure for performing a manual factory reset.

Waking Up MultiSensor 7

Quick Wakeup

Process for a quick manual wakeup of the sensor.

Long Wakeup

Process for a long manual wakeup of the sensor.

Advanced Settings

Overview

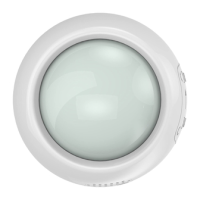
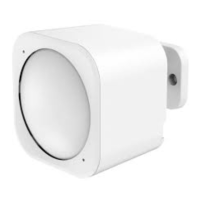
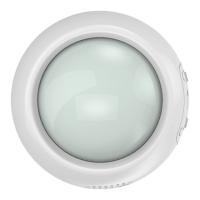
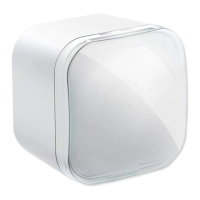
The Aeotec MultiSensor 7 is a versatile smart home device designed to detect ambient environmental values and movement, integrating seamlessly into a Z-Wave Plus network. It leverages Aeotec's Gen7 technology for enhanced performance and reliability. The sensor can be powered either by USB, acting as a Z-Wave repeater, or by batteries, functioning as a sleeping device to conserve power.

Function Description:

The MultiSensor 7 primarily acts as a multi-sensor, detecting various environmental parameters and motion. When powered via USB, it functions as a Z-Wave repeater, extending the range and reliability of your Z-Wave network. When battery-powered, it operates as a sleeping device, waking up periodically to report data or receive commands, which helps in conserving battery life. The device is capable of sending a Node Information Frame (NIF) and can be excluded from a Z-Wave network. It also features a communication health test to assess its direct connection to the Z-Wave controller.

Important Technical Specifications:

  • Connectivity: Z-Wave Plus, Gen7 technology.
  • Power Options: USB (5V adapter) or 2x CR123A lithium batteries.
  • Battery Compatibility: Not compatible with rechargeable CR123A batteries (3.6V). Can operate on a single CR123A battery, though with reduced battery life.
  • LED Indicators: Various LED colors (Yellow, White/Green, White/Red, Blue, Red, Orange, Cyan) indicate different statuses and functions, such as pairing mode, factory reset, wakeup modes, and communication health.
  • Physical Features: Action button, USB port (microUSB), battery slot, threaded hole for mounting, unlock button for battery cover.

Usage Features:

Package Contents:

  • MultiSensor
  • Battery Cover
  • USB Cable
  • Double-Sided Tape
  • Screws (x2)
  • Back Arm Mount

Installation and Powering:

  1. Determine Power Type: Decide whether to use USB power (for repeater functionality) or battery power (for sleeping device functionality).
  2. USB Powered Installation:
    • Remove the battery cover by sliding the Unlock button LEFT.
    • Insert the microUSB cable into the sensor's port.
    • Connect the larger end of the USB cable to a computer or a 5V adapter.
    • Replace the battery cover and slide the Unlock button RIGHT to lock it.
  3. Battery Powered Installation:
    • Remove the battery cover by sliding the Unlock button LEFT.
    • Insert two CR123A lithium batteries, ensuring correct polarity. The device can operate with a single battery, but battery life will be halved.
    • Replace the battery cover and slide the Unlock button RIGHT to lock it.
    • Warning: Do not use rechargeable CR123A batteries.

Z-Wave Network Integration (Pairing/Inclusion):

  1. Set your Z-Wave gateway into Z-Wave pair (inclusion, pair, connect) mode.
  2. Tap the Action Button on your MultiSensor once.
  3. The LED will be solid Yellow during inclusion. Upon successful pairing, it will flash White/Green 3 times. If pairing fails, it will flash White/Red.

Z-Wave Network Removal (Exclusion):

  1. Set your Z-Wave gateway into Z-Wave unpair (exclusion) mode.
  2. Tap the Action Button once; the Purple LED will light up.
  3. If successfully removed, the Blue LED will fade in and out, indicating readiness for pairing to a new hub.

Wakeup Modes:

  • Quick Wakeup: Press and hold the Action Button until the LED turns Red (1-2 seconds), then release. The LED will turn off, and any queued commands from the Z-Wave controller will be sent.
  • Long Wakeup: Press and hold the Action Button until the LED turns solid Orange (2-5 seconds), then release. The LED will remain solid Orange while awake. This mode allows for easier configuration. Tap the Action Button again or wait 5 minutes to put the sensor back to sleep.

Communication Health Test:

  • Press and hold the Action Button for 5-9 seconds. The LED will remain solid Orange for up to 5 minutes, allowing for easy configuration.
  • Press and hold the Action Button for 9-15 seconds. The LED will remain Cyan while testing direct communication to the Z-Wave controller.
  • Upon completion, the LED will turn solid for 2 seconds:
    • Red: Bad health (no communication).
    • Yellow: Moderate health (some communication missed).
    • Green: Great health.

Maintenance Features:

Factory Reset:

  • Soft Reset (via Z-Wave Controller): Follow the Z-Wave network removal steps. If the device is successfully removed, it will be factory reset.
  • Manual Hard Reset:
    1. Ensure the device is powered.
    2. Press and hold the Action Button for 20 seconds.
    3. When the Red LED flashes, release the button to cancel the factory reset.
    4. To confirm factory reset, press and hold the Action Button for 20+ seconds. The Blue LED will fade in/out for 2 seconds, indicating a successful factory reset.
    • Important: Manual hard reset is not fully advised if the device is paired to a working network, as it may leave a "phantom" or "ghost" device in your Z-Wave network.

Battery Replacement:

  • When using battery power, ensure to replace batteries as needed. The device is not compatible with rechargeable CR123A batteries. Always ensure correct polarity when inserting new batteries.

Safety Information:

  • Read all device guides carefully.
  • Use only in dry locations; avoid damp, moist, or wet environments.
  • Keep product and batteries away from open flames and extreme heat.
  • Avoid direct sunlight or heat exposure.
  • Remove all batteries from products that are being stored or not used to prevent damage from leakage.
  • Contains small parts; keep away from children.

Advanced Settings:

Further advanced parameter settings (Configuration Command Class) and group association settings (Association Command Class) are available in the advanced engineering sheet, which can be downloaded separately.

Aeotec MultiSensor 7 Specifications

General IconGeneral
BrandAeotec
ModelMultiSensor 7
CategoryAccessories
LanguageEnglish

Related product manuals