Do you have a question about the Aeotec ZW187 and is the answer not in the manual?
Guidelines for safe handling, storage, and use of the sensor and batteries, including fire and heat warnings.
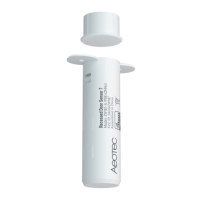
Steps to open and activate the main sensor component by removing the pull tab and reinserting internals.
Instructions for pairing the sensor using SmartStart or Classic inclusion methods with a Z-Wave network.
Guidance on drilling the correct size and depth hole for the main sensor into the doorframe.
Instructions for drilling the correct size and depth hole for the magnetic sensor component into the door.
Steps for securing the main sensor and magnet, and verifying the final gap between them.
Procedure for removing the sensor from your Z-Wave network using the controller.
Steps to reset the sensor to factory default settings when the primary controller is unavailable.
Instructions on how to wake the sensor to communicate with the Z-Wave gateway for configuration.
How to test the sensor's direct connection health to the Z-Wave gateway using button presses.
Information on available device configurations and where to find the configuration sheet.
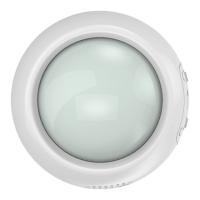
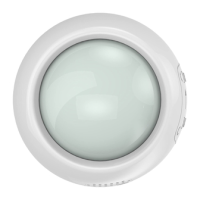
The Aeotec Recessed Door Sensor Gen7 is a discreet, Z-Wave Plus enabled device designed to detect the open/closed status of a door. It integrates seamlessly into a Z-Wave smart home network, providing real-time updates on door activity. The sensor is powered by Aeotec's Gen7 technology, ensuring reliable performance and compatibility with a wide range of Z-Wave gateways and controllers. Its recessed design allows for a nearly invisible installation, blending into the doorframe for an aesthetically pleasing solution.
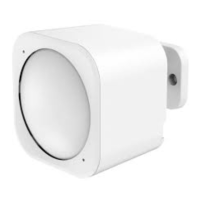
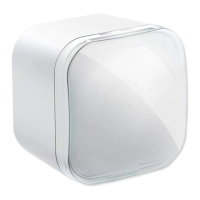
The primary function of the Recessed Door Sensor Gen7 is to monitor the state of a door (open or closed) and transmit this information wirelessly to a connected Z-Wave gateway. This allows users to receive notifications, trigger automations, or simply check the status of their doors from anywhere. The sensor operates using two main components: the Main Sensor and the Magnetic Sensor. When the door is closed, the Main Sensor and Magnetic Sensor are in close proximity, indicating a closed state. When the door opens, the Magnetic Sensor moves away from the Main Sensor, triggering an open state detection. This information is then relayed to the Z-Wave network. The device supports both SmartStart Inclusion for easy pairing with compatible gateways and Classic Inclusion for broader compatibility. It also features S2 encryption for enhanced security during communication within the Z-Wave network.
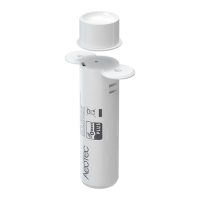
Installation of the Recessed Door Sensor Gen7 involves two key steps: physically installing both parts of the sensor and connecting it to your Z-Wave network. To prepare the Main Sensor, you first press a latch with a slotting screwdriver to remove its lid. Then, you squeeze the sides of the sensor casing to slide out the internal chipboard. A "Pull Tab" must be removed to engage the pre-installed battery, which will cause the LED to slowly fade in and out red, indicating power is on. After removing the battery insulator, the internal components are reinserted into the Main Sensor's enclosure, ensuring the button aligns with the buttonhole on the lid.
Adding the sensor to your Z-Wave network can be done via two methods:
For physical installation, the sensor should be placed at the top or side of a door, away from metal objects that could interfere with its magnetic or wireless functions. It requires a clear separation of 1mm to 5mm between the Main Sensor and Magnetic Sensor when the door is closed. The Main Sensor and Magnetic Sensor must be positioned exactly above or beside each other. The installation process involves drilling two holes:
The Recessed Door Sensor Gen7 offers several maintenance and advanced configuration features:
The Recessed Door Sensor Gen7 is intended for indoor use in dry locations only and should not be used in damp, moist, or wet environments. It contains small parts and should be kept away from children. Batteries should be kept away from open flames and extreme heat, and direct sunlight or heat exposure should be avoided. Batteries should be removed from products being stored or not in use to prevent leakage and potential appliance damage. Rechargeable batteries should not be used, and correct polarity must be ensured when inserting batteries to prevent product damage.
| Dimensions | 43.5x63x23 mm |
|---|---|
| Weight | 45 g |
| Compatibility | Z-Wave |
| Z-Wave Version | Z-Wave Plus |
| Operating Temperature | 0°C to 40°C |
| Operating Humidity | 8% to 80% |
| Frequency | 908.42 MHz (US) |
| Z-Wave Frequency | 908.42 MHz (US) |