EasyManua.ls Logo

Aeotec Door / Window Sensor 7 User Manual

Aeotec Door / Window Sensor 7
9 pages
To Next Page IconTo Next Page
Page #1 background imageLoading...
Page #1 background image
1.8.2019 Door / Window 7 user guide : Aeotec Group
https://aeotec.freshdesk.com/support/solutions/articles/6000218764-door-windows-sensor-7-user-guide 1/9
Door / Windows Sensor 7 user guide
Modified on: Mon, 15 Jul, 2019 at 12:56 AM
Aeotec Door / Window Sensor 7.
Aeotec Door / Window Sensor 7 has been crafted to power connected lighting using Z-Wave Plus (http://aeotec.com/z-wave-plus). It is
powered by Aeotec’s Gen5 (http://aeotec.com/z-wave-gen5) technology and S2 framework. You can find out more about Door / Window
Sensor 7 (https://aeotec.com/z-wave-door-window-sensor) by following that link.
To see whether Door / Window Sensor 7 is known to be compatible with your Z-Wave system or not, please reference our Z-Wave
gateway comparison (http://aeotec.com/z-wave-gateways) listing. The technical specifications of Door / Window Sensor
(https://aeotec.freshdesk.com/a/solutions/articles/6000218908-door-window-sensor-7-technical-specifications-)7 can be viewed at that link.
Familiarize yourself with your Door / Window Sensor 7.
Package contents:
1. Sensor Unit.
2. Cover
3. Big Magnet.
4. Small Magnet.
5. Double-Sided Tape large (×2).
6. Double-Sided Tape small (x2).
7. Screws (×4).
8. Dowels( x4).
Question and Answer IconNeed help?

Do you have a question about the Aeotec Door / Window Sensor 7 and is the answer not in the manual?

Aeotec Door / Window Sensor 7 Specifications

General IconGeneral
BrandAeotec
ModelDoor / Window Sensor 7
CategoryAccessories
LanguageEnglish

Summary

Aeotec Door Window Sensor 7 Overview

Package Contents

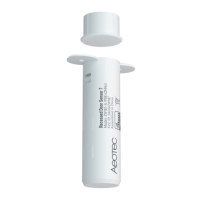
Lists all items included in the product package, such as the sensor unit, magnets, tape, screws, and dowels.

Safety and Pre-Installation

Crucial safety guidelines for handling the device and batteries, plus initial steps for preparing the sensor.

Installation Guide

Mounting and Magnet Placement

Details on mounting the sensor using tape or screws and positioning magnets correctly for optimal detection.

Tilt Detection Requirements

Explains the minimum angle requirement and specific placement for tilt detection functionality on windows.

Flat Magnet Installation and Z-Wave Pairing

Instructions for installing the flat magnet and the step-by-step process to connect the sensor to a Z-Wave network.

Functions and Operation

Open Close and Tilt Status Reporting

How the sensor reports door window open close and tilt status changes to the Z-Wave controller.

External Connections and Dry Contact Mode

Using screw terminals for external sensors and configuring the device as a dry contact sensor.

Scene Control Communication and Updates

Using the sensor as a scene controller, performing communication tests, and updating firmware.

Z-Wave Network Management

Instructions for waking the sensor to receive commands and removing the device from the Z-Wave network.

Parameter Configurations and Reset

Device Reset Procedure

Procedure to factory reset the sensor without a Z-Wave controller, useful when the primary controller is inoperable.

Core Operation and State Parameters

Configures operation mode, door window state definition, LED indications, and Z-Wave range test activation.

Association and Command Parameters

Sets association triggers, ON/OFF commands for associated devices, and time delays for commands.

Advanced Functionality Parameters

Controls tamper alarm reporting, central scene events, tilt sensor functionality, and tilt sensitivity.

Related product manuals