11
IVEDPY 1902 - 4460510_00
STANDARD
1 2 3 4 5 6 7
Max
1 2 3 4 5 6 7
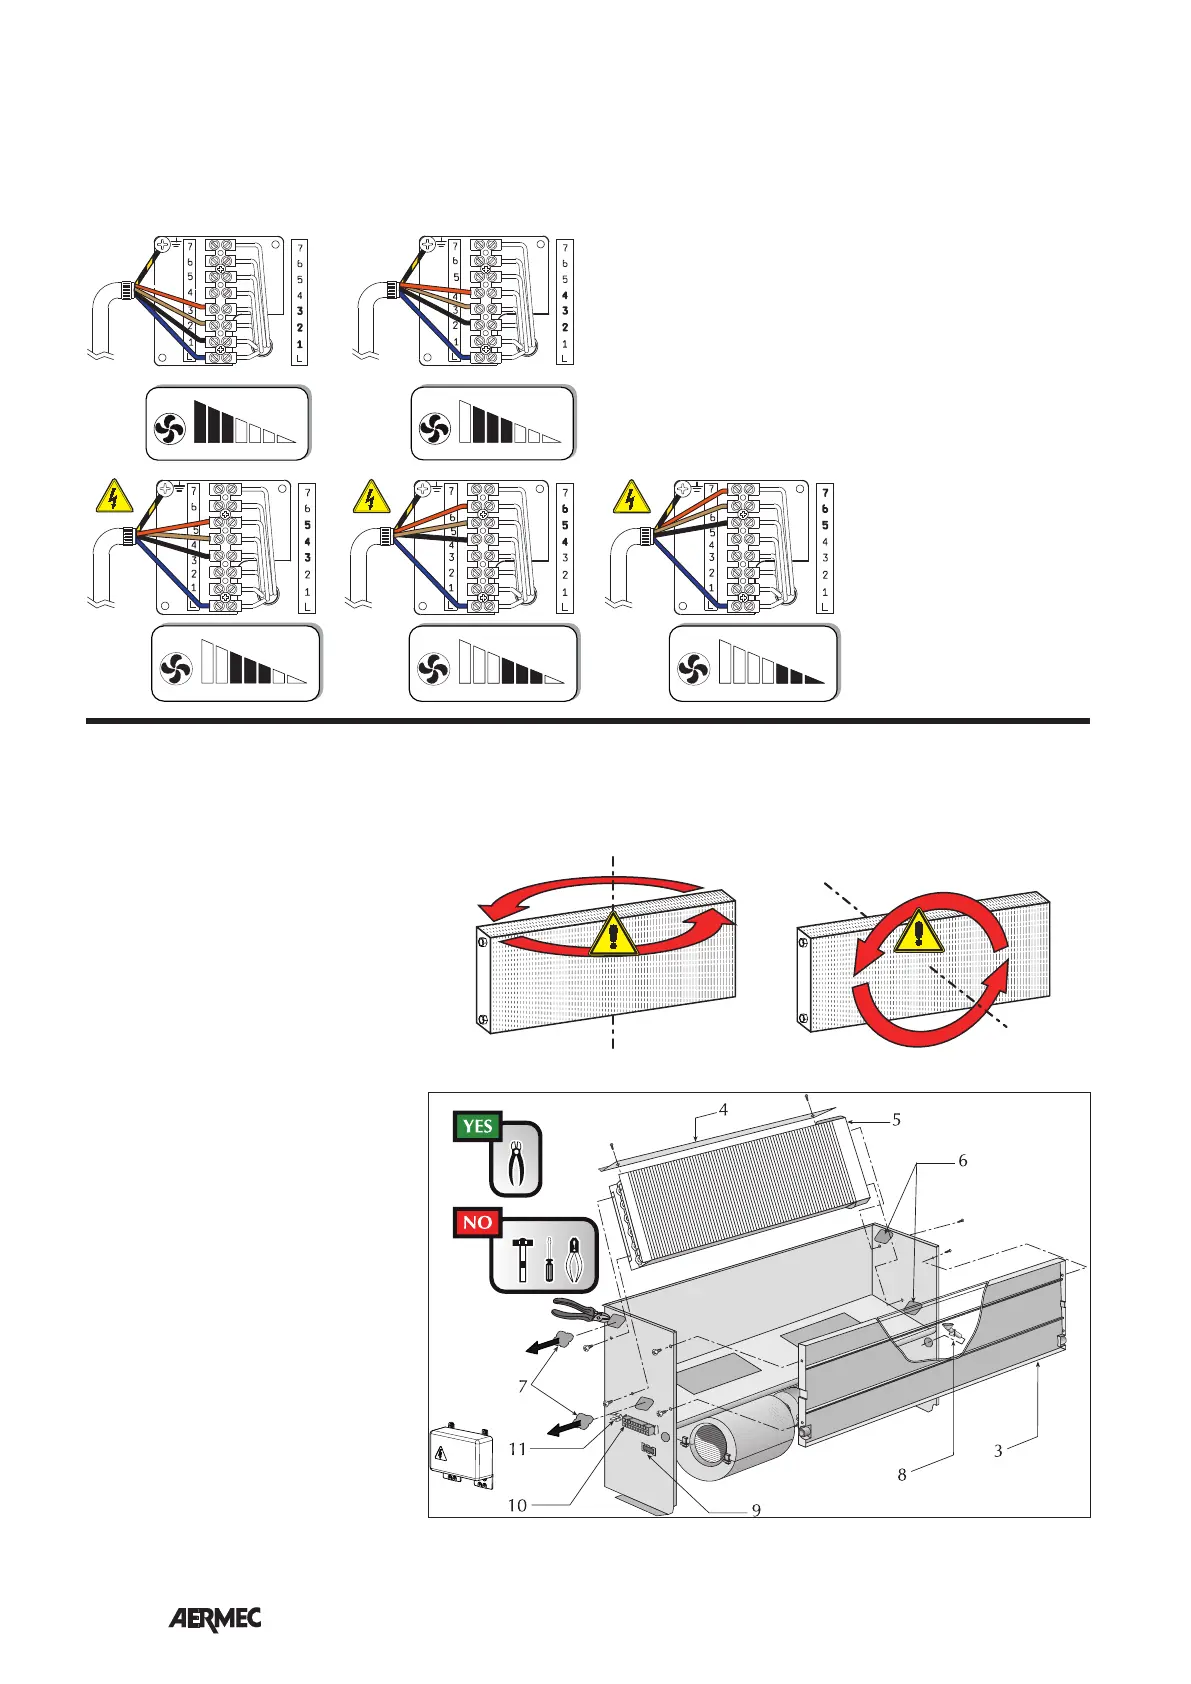
If the hydraulic connections require the
rotation of the coil, then after removal
of the frontal enclosure panel proceed
as follows:
– remove the condensate drain pan (3)
– remove the coil sealing cover (4) undo-
ing the screws
– remove the screws that fix the coil (5)
and extract the coil
– remove the knock-outs (6) of the right
side
– rotate the coil and fix with the screws
previously removed
– WARNING! Before rotating the coil refer
to the coil rotation drawing.
It is important that the coil is correctly
rotated and installed.
Correctly rotate the coil (5) and fix with the
screws previously removed. The spaces
between drain pan and the hole on the
side must be completely filled and closed
with insulating material.
– refit the cover (4) and fix with the screws
– mount the plastic caps (7) supplied
loose into the holes left empty by the
hydraulic connections; all the drain pans
are provided with condensate discharg-
es on both sides.
– remove the electrical connections from
the right side, remove the knock-out and
move the grommet (9) from right to left
– move the electrical connections to the
left side passing through the grommet
(9)
– move the terminal block (10) and the earth
connection (11) to the left side.
ROTATING THE COIL
A
B
180°
COIL ROTATION DRAWING
VED040
VED140
VED240
VED340
A
B
180°
VED030
VED130
VED230
VED330
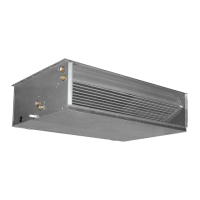
Motor
terminal
block
VED3_ is supplied with connections to
terminals 2 - 3 - 4 of the motor terminal
block.
To access remove the protective cover.
The three speeds must always be in sequence.
To use the higher speeds (terminal 1):
- disconnect the 3 cables from terminals
2 - 3 - 4
- connect the 3 cables to terminals 1 - 2 - 3
To use the lower speeds (terminals 5 / 6 / 7):
- disconnect the 3 cables from terminals
2 - 3 - 4
- connect the 3 cables to terminals 3 - 4 - 5
, 4 - 5 - 6 or to terminals 5 - 6 - 7 to have
the lowest speeds.
SPEED SELECTION: VED 330 - 340
min
1 2 3 4 5 6 7
min
1 2 3 4 5 6 7
min
1 2 3 4 5 6 7
The motor terminal block is protected by a protective cover.
To access remove the protective cover.
WARNING! After having made the connections refit the
protective cover and fix with the screws.