79
81
Fig. 16
80
80
87
Fig. 17
85
84
86
86
88
92
91
92
2x93
Left-hand side panel 90 not shown for clarity.
90
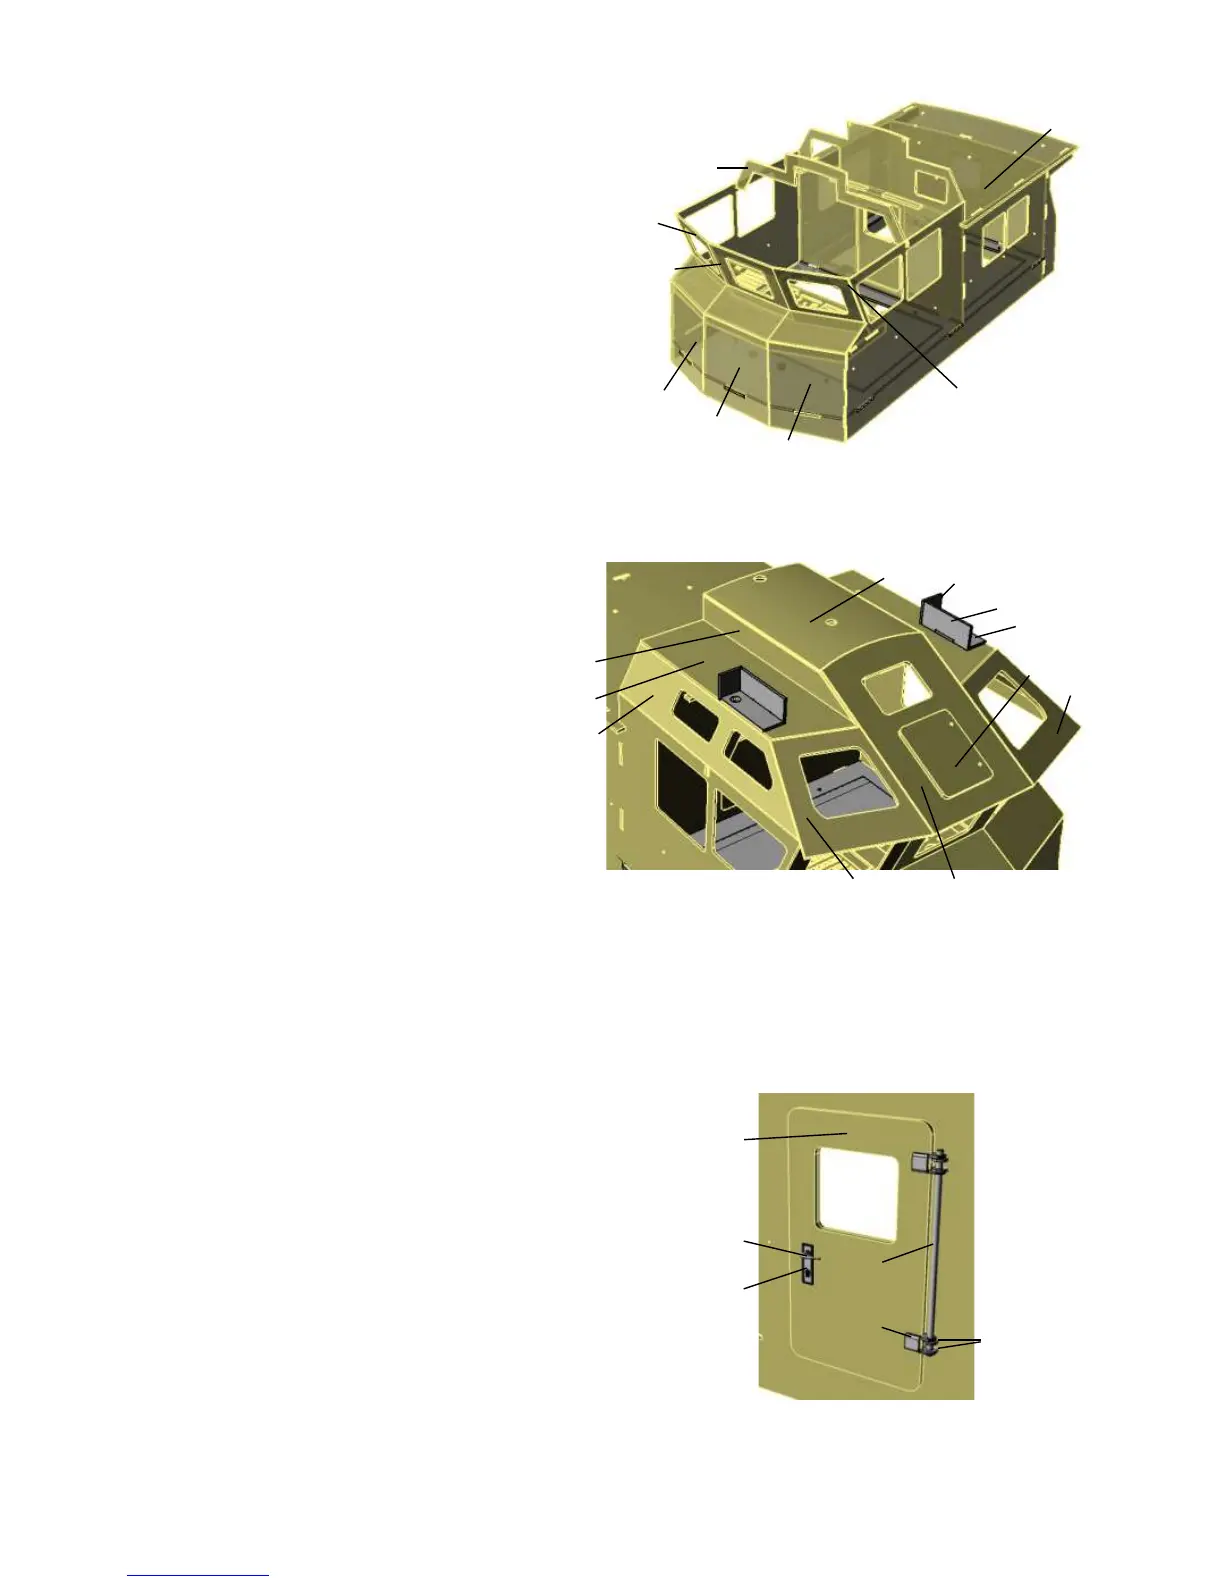
Fig. 18
Glue together parts 79 to 81 to form the instrument
panel. Apply the instrument decal 83 to the panel.
Stick the etched bezel 82 to the decal sheet using
contact adhesive. Apply low-tack masking film to part
82, keeping accurately to the edges, to protect it from
subsequent painting.
3 mm LEDs can be inserted in the underside of the
fairing 81 to illuminate the instruments.
Fix the retaining lugs 85 to the deckhouse frame 86
using the screws 87, then glue the lugs to the floor
panels 84. Allow the glue to set hard before removing
the floor panels; they are removable separately,
together with the seats. The holes in the corners of the
deckhouse frame 86 are to accommodate cables.
Fit the deckhouse partition 88 through the
deckhouse frame 86. Glue the reinforcements 93 to
the underside on both sides. Glue all the glazing
panels in the side panels and roof, but without
removing the protective film; the film is only peeled
off after painting. Glue the rear wall 89 to the
deckhouse.
Fit the side walls 90 on the tongues of parts 86, 88
and 89, and glue the parts together. Slide the
instrument panel into the slots between the side
walls, then glue the joints. When the adhesive has
set hard, glue the front centre and side panels 91
and 92 to the structure.
Bild 18
89
90
Etched parts The illustration shows the rear face
114
66
60
61
61
65
82
111
112
Fig. 19
91
92
95
94
98
97
96
97
95
99
92
100
102
Fig. 20
101
103
105
106
108
107
109
105
104
111
114
116
115
113
Fig. 21
112
Bend the front windows 94 and 95 to the rear
along the engraved lines, and glue them in the
slots in the instrument panel 79. Bend the centre
and side cover panels 96 and 97 along the
engraved lines, and glue them to the front
panels 91 and 92, the side walls 90 and the front
windows. Sand off the excess material from
parts 96 and 97. Glue the roof frame 98 in place,
then slide the roof 99 into the slots in the
partition 88. Press the roof onto the lugs of the
side walls and rear wall, and glue the parts
together. Apply tape over the curved part of the
roof until the glue has set hard.
Glue the upper side windows 100 to the centre
wall 88 and the roof former 98.
Glue the side panels 101 to the deckhouse, then
glue the sides of the roof to part 102 on the roof
former and the centre wall. Curve the roof 103
and glue it on top. Bend the upper windows
along the engraved lines before gluing them in
place, followed by the hatch cover 109.
Assemble the lamp brackets from parts 106 -
108 as a mirror-image pair, and glue them over
the cable holes.
Glue the doors 110 and 115 to the door jamb of
the partition and the rear wall.
Paint the deckhouse inside and out, then peel
off the protective film from the glazing panels
and the instrument panel.
Bend the two hinge bands 112 to shape as
shown, place the hinges 111 between them, and
slip the hinge pin 113 through both hinges.
Fit the hinges 111 in the slots of the rear wall 89.
Glue the hinge bands 112 to the doors, and the
hinges to the rear wall. Glue the escutcheon 114
to the door, then bend the handle 116 to shape
and insert it in the hole.
 Loading...