Fig. 23
127
128
129
130
131
132
133
134
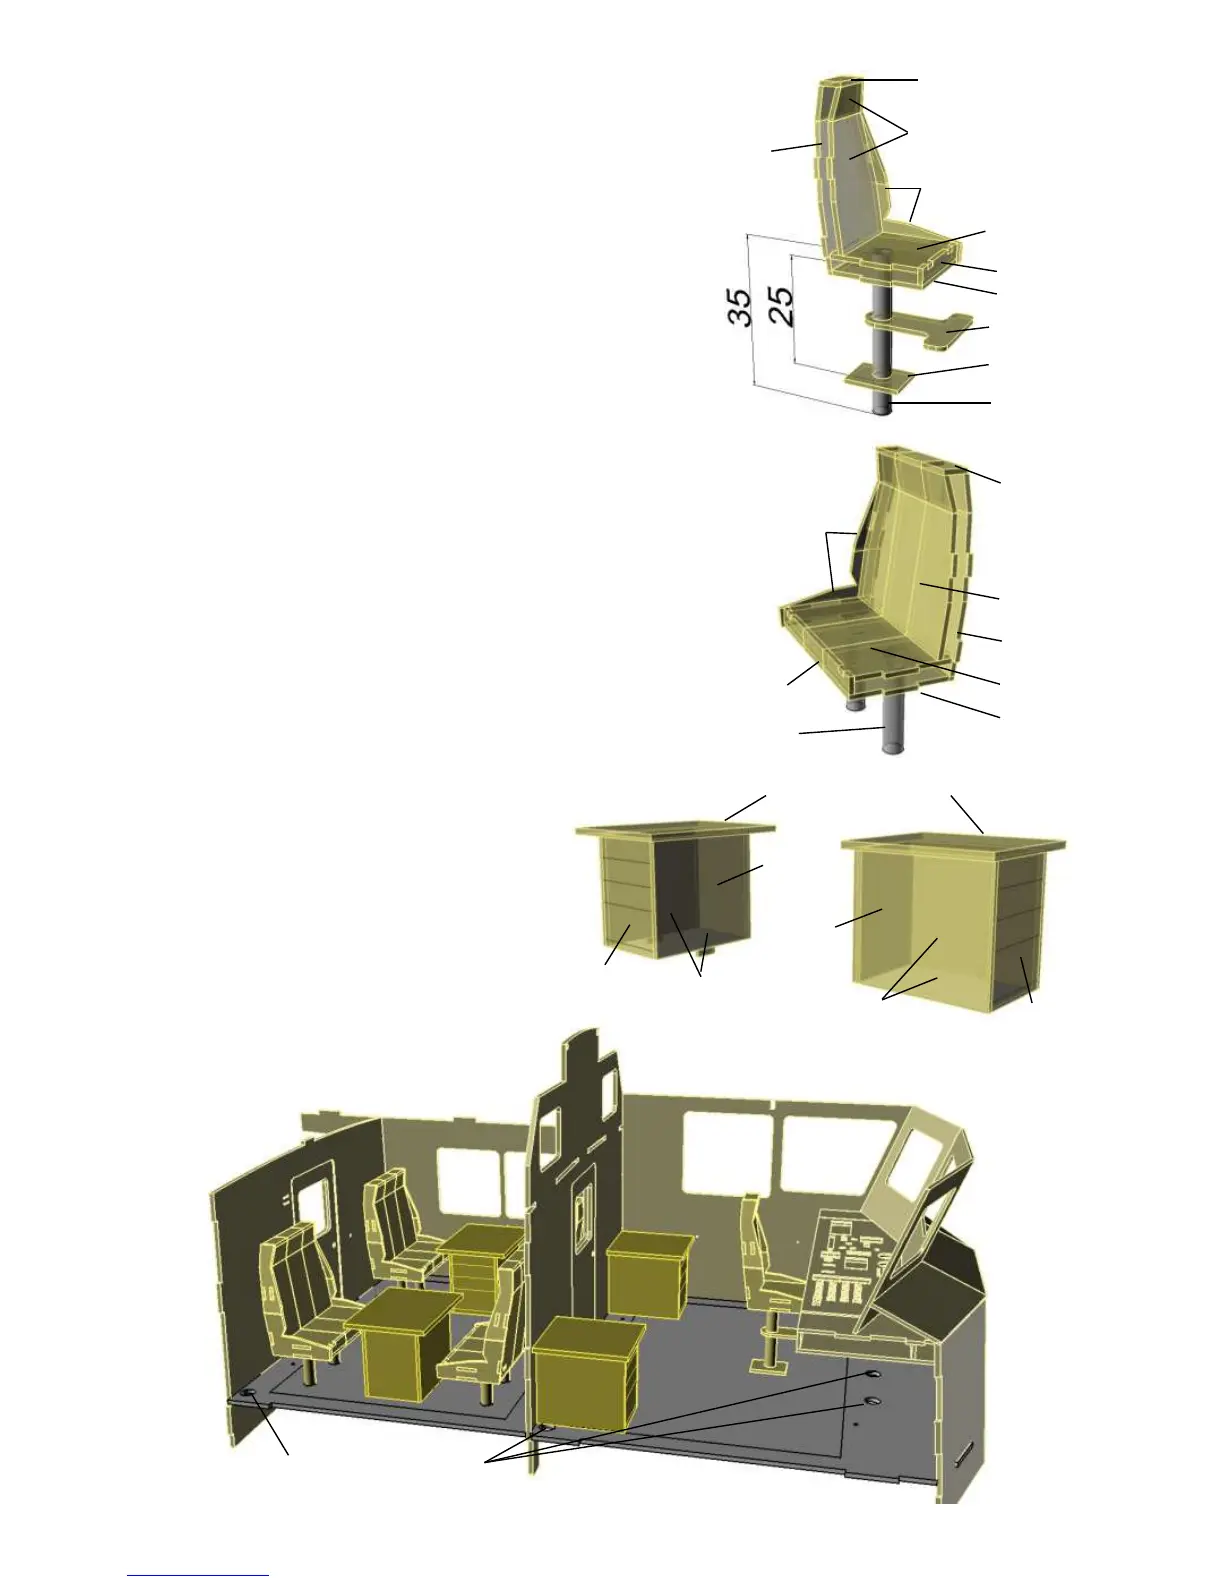
Fig. 22
124
125
117
119
118
122
126
120
121
123
Fig. 25
Cable openings
137
Fig. 24
138
135
137
138
136
139 140
Front tables
Glue the seat squab 118 to the front section 119 and the
bottom section 117. Bend the side panel 120 inwards slightly
along the engraved lines. Fit the seat squabs in the side
panels. Insert the backrest 121 and the backrest side fairings
122. Add the second side panel, and glue all the parts
together.
Cut the seat column 126 to a length of 35 mm. Fit the
footrest 125 on the column, and glue the parts together. Fit
the plate 124 on the pillar, and glue it in place 25 mm below
the seat bottom.
Paint the seat, and insert it in the hole in the forward
deckhouse floor.
Assemble the four rear seats in the same manner as the
front seat.
Insert the seat pillars in the holes, set them to a height of 13
mm above the floor, and glue them in place.
Glue together parts 135, 137, 138 and 139 to form the two
rear tables, then glue them in the slots in the floor.
Glue the front tables to the wheelhouse frame and the
partition and side walls.
Don't glue them to the floor!
Fig. 28
153
Stern light
154
155
152
151
156
Fig. 29
157
159
158
Fig. 27
149
150
148
Remove the connecting lugs
Fig. 26
142
2x141
144
145
147
146
167
143
Glue the two inner mast sections 141 to one
outer section 142, cut away the connecting lugs
as shown, then glue the other outer section 142
on top.
Thread the cables for the LEDs through the
mast, and glue the spreaders 143 in place. Glue
the locating pin 147 in the mast; it is used later to
secure the roof. Glue together parts 144 - 146 to
form the GPS unit. Round off the outside edges
of the discs 144 - 145.
Assemble the rings 148 and lenses 149 to form
the lamp housings. If you prefer coloured lenses,
they can be tinted using modelling paints. (Fig.
27). Fit the lamp housings over the 3mm LEDs,
and glue them in place.
Repeat the procedure to make the side,
masthead, stern and panoramic lamps. The
appropriate areas can be rendered opaque with
black paint.
Paint the mast, and glue it to the roof on the
inside using the locating pin 147 for strength.
Cut the roof railing to length, bend it to follow the
shape of sheet 2, and solder these parts
together.
Paint the railing white before gluing it to the roof.
Glue the aerial rods 155 in the aerial bases 154,
paint them white, and glue two of them in the
rear roof. The third one is glued in the left-hand
side roof 101.
Bend the handrail 158 and the rails 159 to follow
the shape formed by the slots in the deck for the
railing stanchions 156, and fit it on the
stanchions. Form loops in the front end of the
handrails, curving back to the stanchions as
shown.
Fit the bases 157 on the bottom end of the
railing stanchions. Paint them white, and glue
them to the deck.
Rear tables
 Loading...