Installation
3.3 ADJUSTMENTS AND SETTINGS (INITIALIZATION)
IMPORTANT!
After pressing the final confirmation button, self-learning is no longer possible.
To perform the self-learning again it is necessary to access the advanced menu
(3.4).
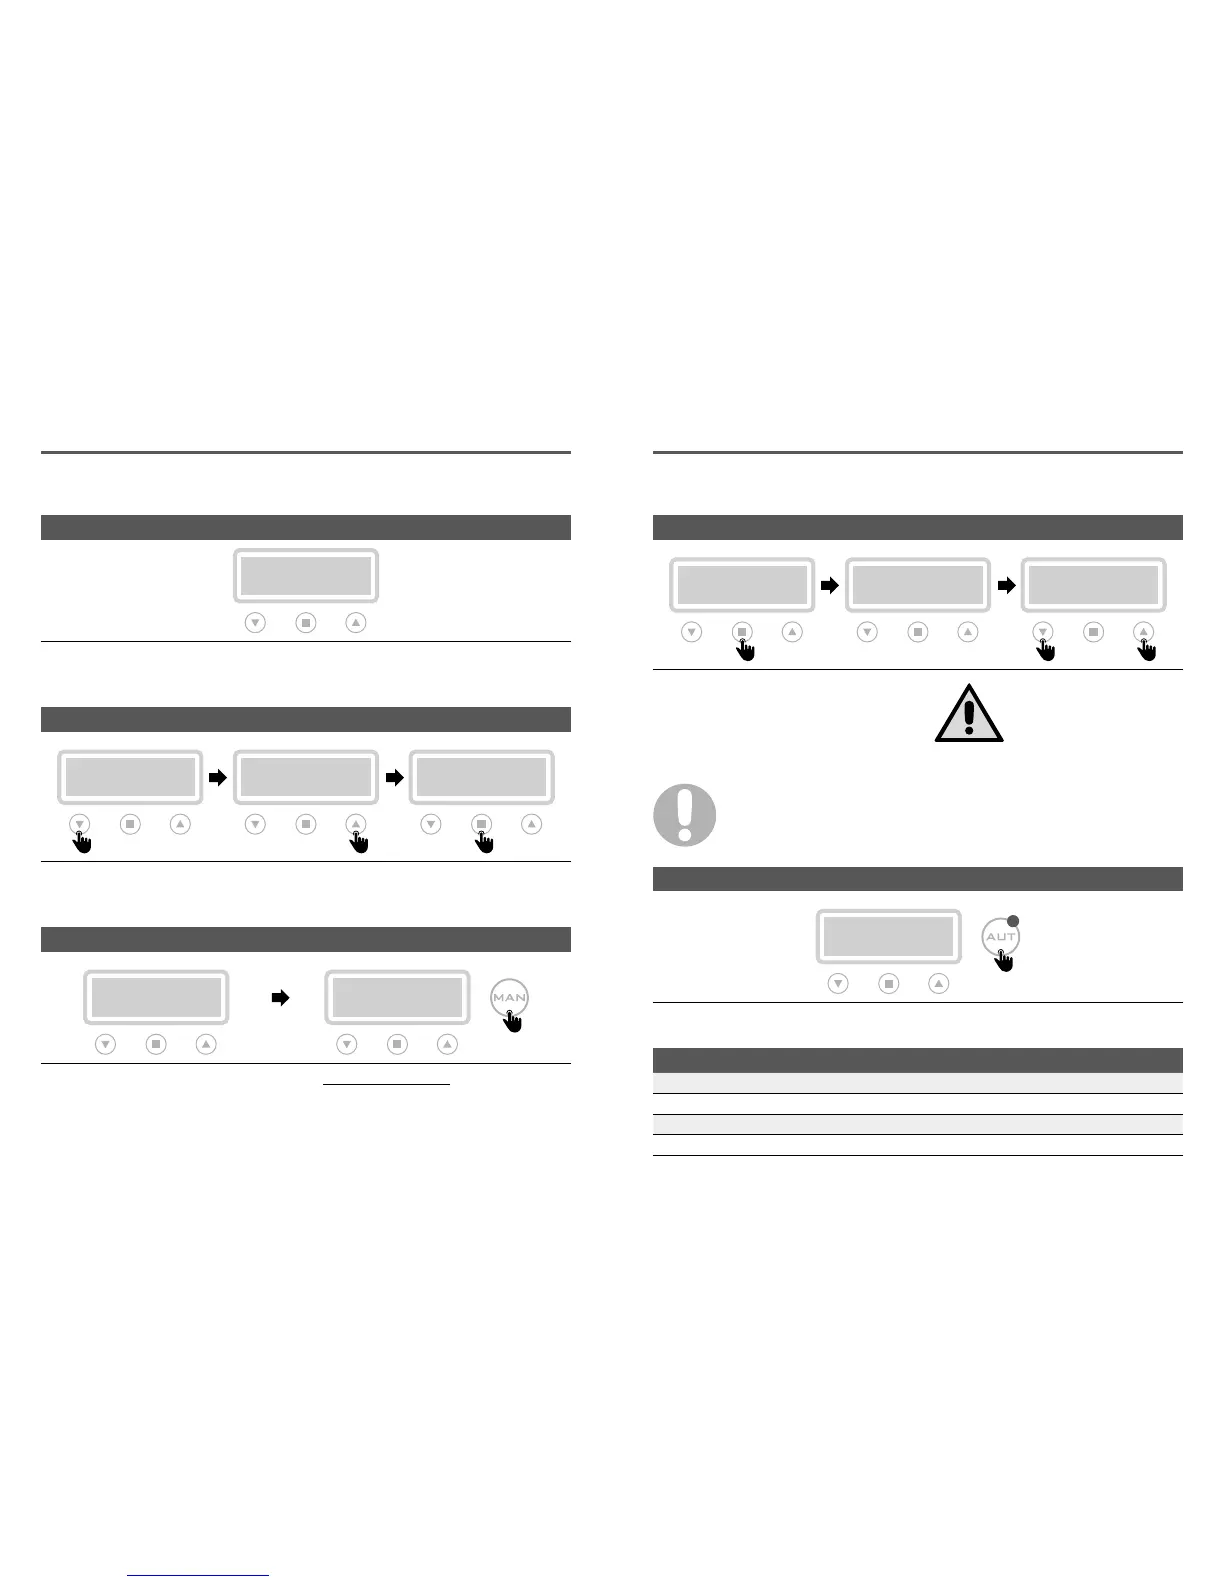
After making all the electrical connections,
switch on the control panel and wait for the
initial message to appear on the display.
To proceed with
self-learning procedure
, the
pump must first be triggered.
Do not press confirm, but start the pumps,
keeping the “MAN” button pressed (for 3 sec.).
Select the display language by scrolling the menu
with the appropriate arrows (step 1 and 2).
When completed, press the confirm button (step 3)
to continue.
LANGUAGE SETTING (OBLIGATORY)
>LANGUAGE
>ITA
>LANGUAGE
>ITA
>LANGUAGE
>ENG
Step 1 Step 2 Step 3
PUMP TRIGGER
AUTOTUNING: P1
PUSH CONFIRM
MANUAL PX
Step 4
P1
3 sec.
CONTROL PANEL TURN ON
>LANGUAGE
>ITA
Installation
To start the self-learning of the pump data,
type reply (step 5).
For the final confirmation of the data (step 7) type
“YES”, or enter “NO” to go back (to step 5).
AUTOTUNING (OBLIGATORY)
AUTOTUNING: P1
PUSH CONFIRM
AUTOTUNING: P1
xxxV xxA 09
CONFIRM DATA?
YES no
Step 5 Step 6 Step 7
Before starting the self-learning
procedure, it is necessary to
check with a tester that the
mains voltage corresponds to
the nominal one or at least to
the mains voltage.
Once the self-learning phase is completed, the
display of the panel displays the data learned.
By pressing the “AUT” P1 button the panel
becomes operational.
CONTROL PANEL OPERATIVITY
xxxV xxHZ
POTABLE EMPTY
Step 8
P1
PRESET PARAMETERS
LANGUAGE: selected STOP DELAY: 1 sec.
TURN ON DELAY: 2 sec. OPERATION: emptying
MANUAL KEY: unstable TYPE: potable
START DELAY: 4 sec. SELF HOLDING: on