1312
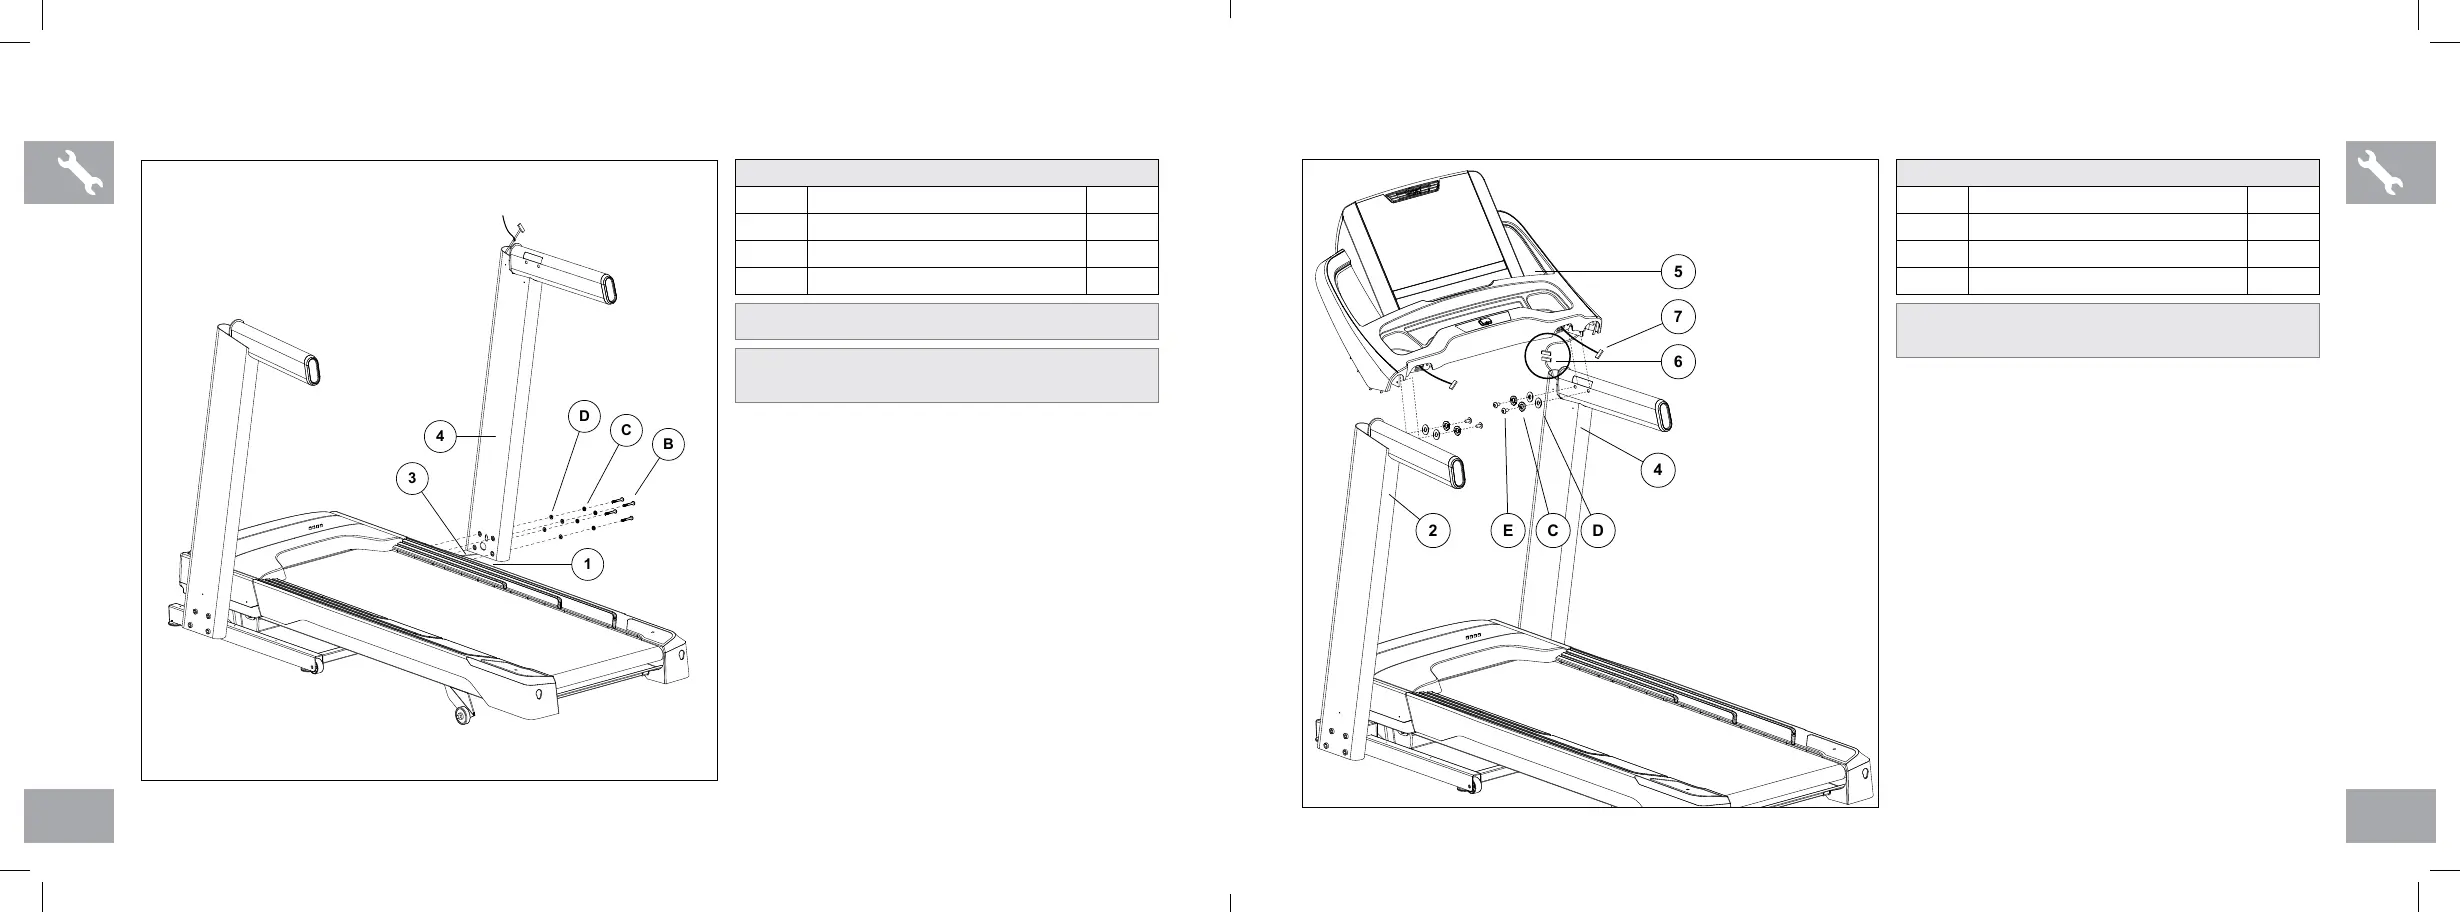
A Pull the CONSOLE CABLE (3) out of the
treadmill base frame using the LEAD WIRE.
Attach CONSOLE CABLE to the CONSOLE
CABLE in the bottom of the mast. The other
end of the CONSOLE CABLE should be
located at the top of the mast. Detach and
discard LEAD WIRES.
B Align the RIGHT CONSOLE MAST (4) so that
BOLT (A) sits in the NOTCHED HOLE in the
bottom of the CONSOLE MAST.
C Attach CONSOLE MAST (4) to MAIN FRAME
BRACKET (1) using 4 BOLTS (B), 4 SPRING
WASHERS (C), and 4 FLAT WASHERS (D).
ASSEMBLY STEP 2 (continued)
HARDWARE FOR STEP 2
PART TYPE QTY
B BUTTON HEAD BOLT 8
C SPRING WASHER 8
D FLAT WASHER 8
NOTE: Do not fully tighten bolts until step 6.
NOTE: Be careful not to pinch the console
cable while attaching the right console mast.
ASSEMBLY STEP 4
A Open HARDWARE FOR STEP 4.
B Gently place CONSOLE (5) on top of
CONSOLE MASTS (2 & 4).
C Connect the CONSOLE CABLES (6) and tuck
them inside the right CONSOLE MAST (4). Do
not connect the HEART RATE CABLES (7)
until STEP 5.
D Connect the CONSOLE (5) to the right
CONSOLE MAST (4) using 2 BOLTS (E),
2 SPRING WASHERS (C) and 2 FLAT
WASHERS (D).
E Repeat STEP D on other side.
HARDWARE FOR STEP 4
PART TYPE QTY
E BUTTON HEAD BOLT 4
C SPRING WASHER 4
D FLAT WASHER 4
NOTE: Be careful not to pinch the console
cables while attaching the console.
AFG14_OM_3.3AT_Rev1_2.indd 12-13 7/31/14 4:41 PM