Afinia H480 3D Printer User’s Manual
7
Unpacking the Afinia H480 3D Printer
Remove the Installation Disc, Manual, Quick Start Guide, and Accessories Pack from the box.
Next, lift the Afinia H480 3D printer from the box. Remove the foam from both sides of the Printer
and set the Printer on its base with the back of the Printer facing you.
There are 2 packaging clips that protect the Printer during shipping
that need to be removed. Both clips should be saved in the event
that you need to ship the Printer in the future!
The first clip to be removed is used to hold the Extruder assembly in
place during shipping. Carefully peel the strapping tape down, and
then slide the clip down and off the Printer.
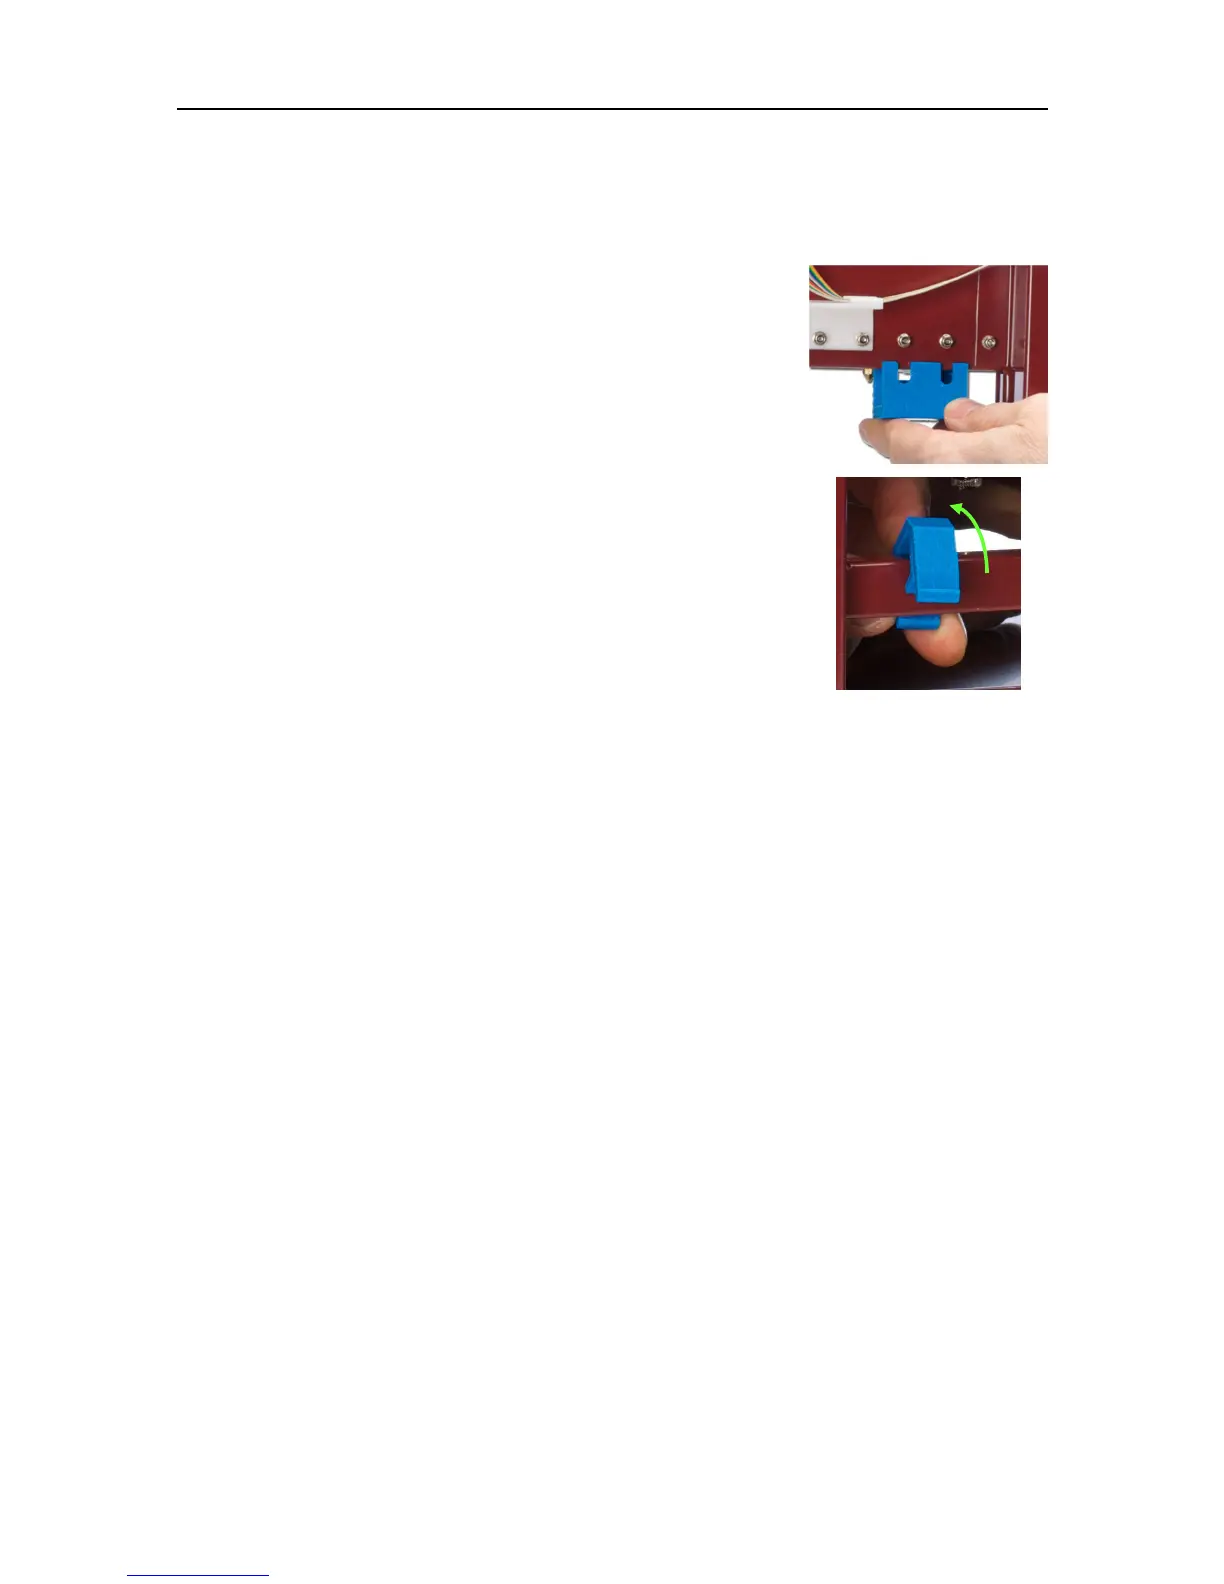
The second clip is used to help keep the Platform Arm secure during
shipping. To remove the clip, place your hand under the platform X-axis
arm and gently lift. Do not lift the arm by holding onto the platform!
Once the platform arm has been lifted a few inches, rotate the top of the
clip towards the front of the printer. Once in the correct position, the clip
will slip over the Z-axis arm.
Next, open and check the contents of the Accessory Pack:
• Reel of Filament (1, Natural/White)
• Power Supply
• Power Cable
• USB Cable
• FR-4 (Perf) Board
• Filament Guide Tube
• Filament Hanger
• Nozzle Wrench
• Hex Wrenches
• Spare screws & washers
• Gloves (1 pair)
• Putty Knife
• Exacto Knife and blades
• Snipping Pliers
• Tweezers
• Platform and Nozzle Cable
• Platform Calibration Probe
You will need the Power Supply and Cable, Hex Wrenches, Filament Spool, Filament Hanger,
Filament Tube, and USB Cable to complete the Afinia H480 3D Printer installation.
 Loading...