29
INSTALLATION
Check the appliance is electrically safe when you have nished.
Final Fitting
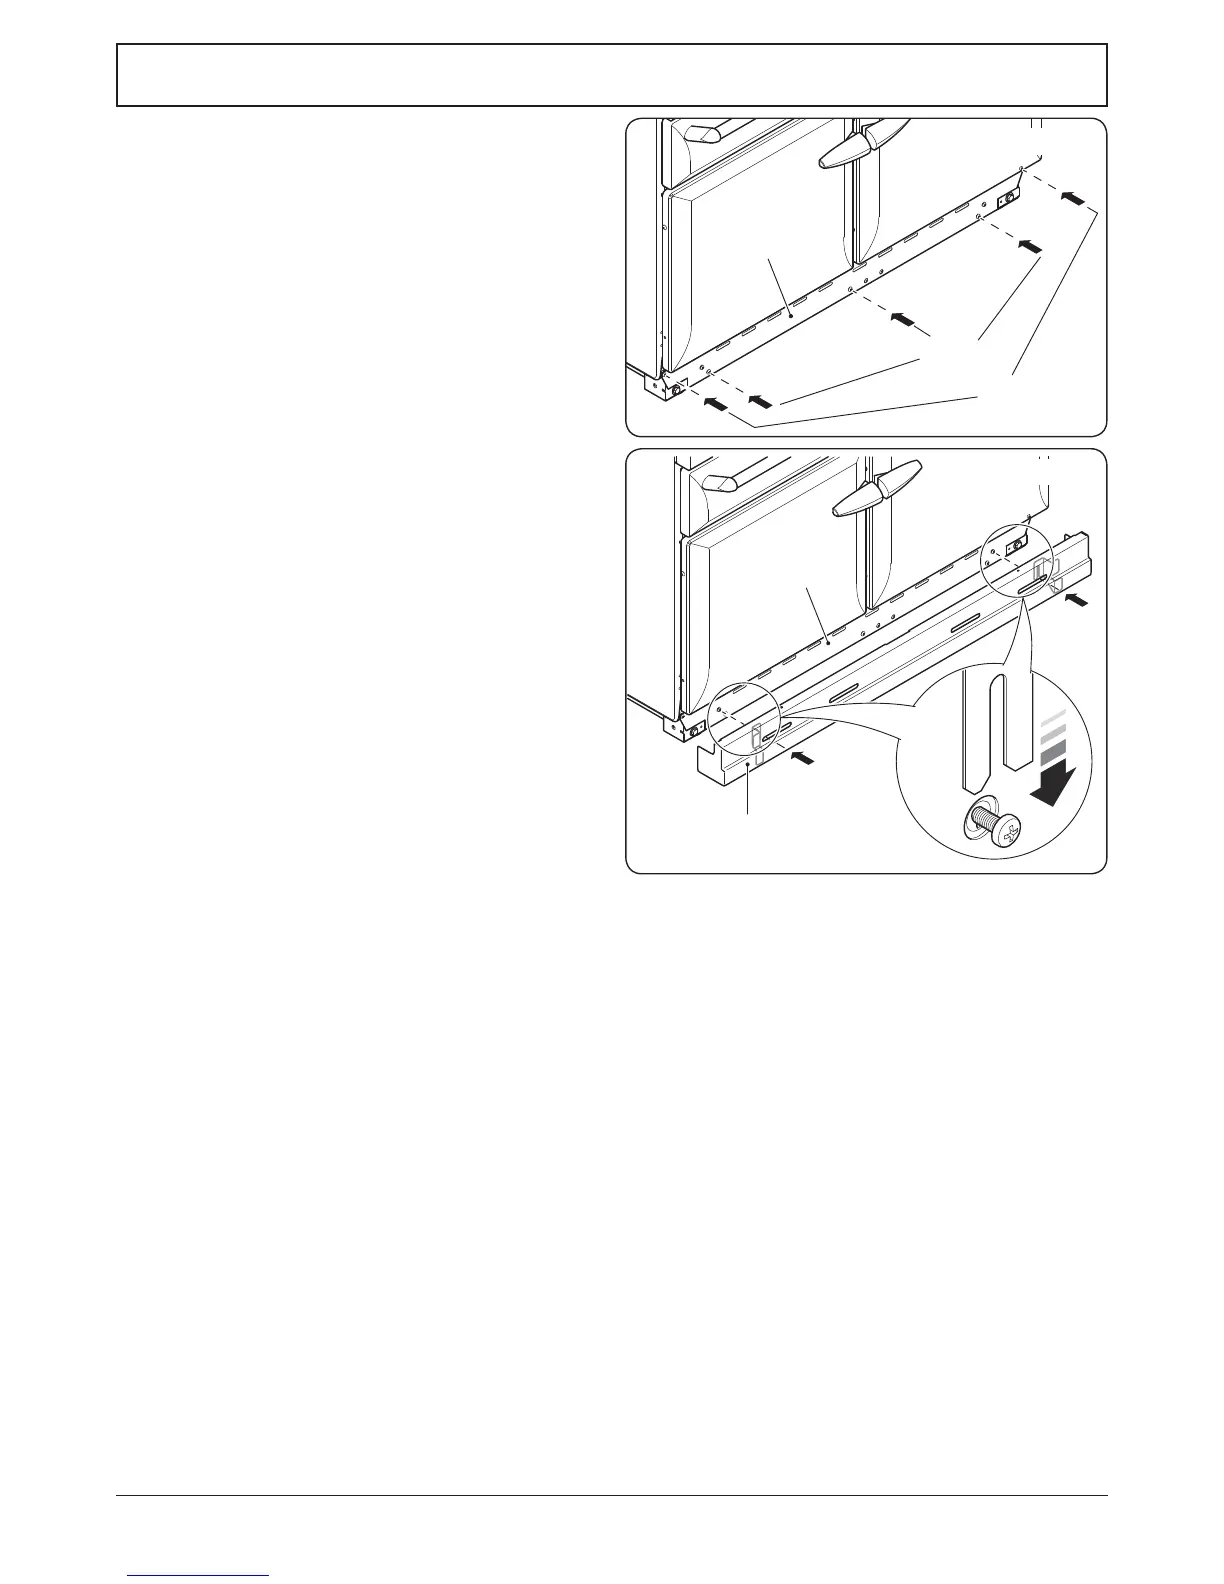
Fitting the 2-piece Plinth
Fit the inner plinth to the bottom front of the cooker using
the 5 screws provided (3x M5 screws in the lower edge, 2x
No.8 screws in the each end) (Fig.7-13).
Loosen the 2 screws in the front of the inner plinth.
Locate the 2 slotted brackets on the inside of the outer plinth
onto the 2 screws (Fig.7-14). Using a suitable screwdriver
through the slots in the outer plinth, tighten the 2 screws to
secure.
The height of the outer plinth can be adjusted by loosening
the 2 retaining screws and sliding it up or down to suit and
then retightening the screws.
Note: To aid the tting of the outer plinth we advise that you
open the doors when locating the 2 slotted brackets.
Fitting the Splashback
Position the splashback on the rear of the hotplate and secure
with the screws supplied.
Customer Care
Installer: Please complete your details in this Guide, inform
the user how to operate the cooker and hand oven the
instructions.
Thank you.