Choice of
sound level
Move square
shot to the left
(vertical mode)
Move square
shot to the right
(vertical mode)
Aim scanning left
Aim scanning right
Choice of
accuracy
On/Off
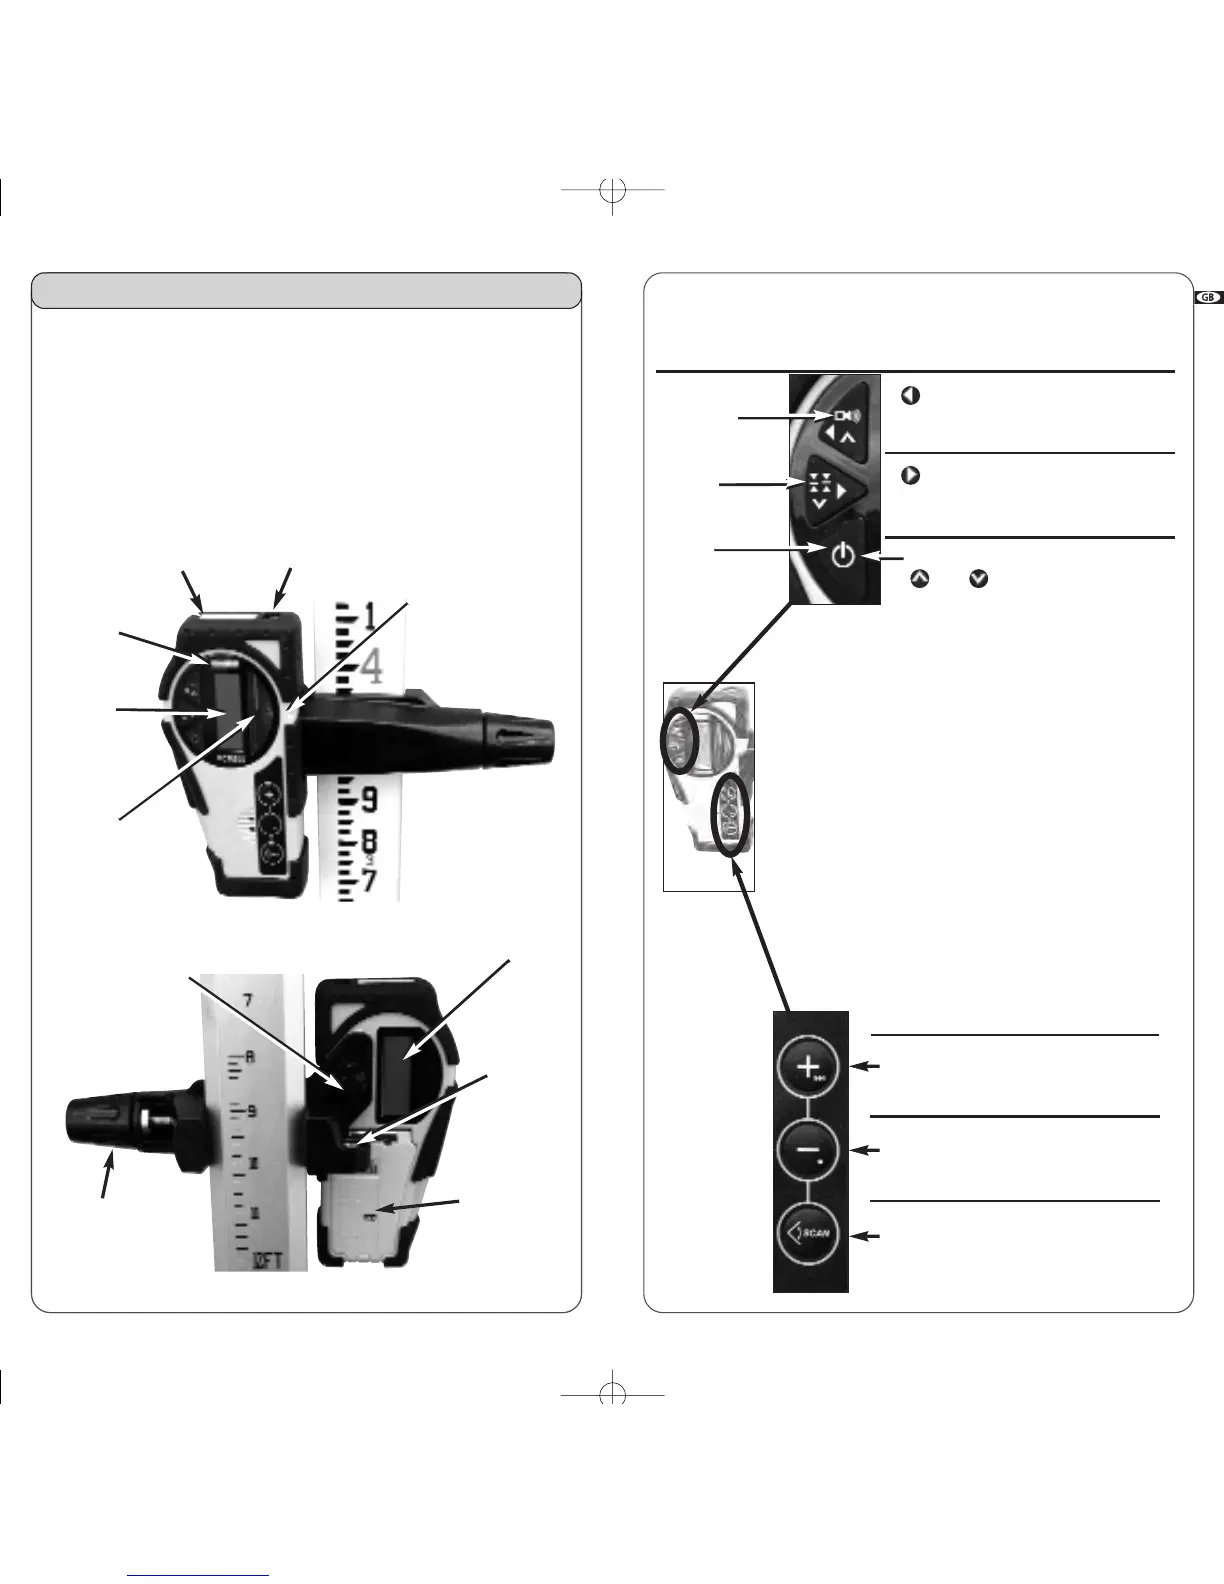
• Upper Keypad
Detector mode
(red keys)
Remote mode Scanning mode
• Lower Keypad
Increase rotation
speed/move non-
rotating point right
Decrease rotation
speed/move non-
rotating point left
Start/Stop
scanning mode
Calibration section of manual explains
function of secondary small symbols.
Increase
scanning angle
Decrease
scanning angle
Start rotation mode
Remote mode Scanning mode
6.1
Combination detector and
laser remote control
For grade rod or handheld applications. Also can use the magnet
mount to attach to metal studs for exterior curtain wall alignment or
to ceiling grids for acoustical ceiling leveling.
LCD
screen
(front)
On-grade
alignment notch
Detection
window
Magnet
Window for remote’s
infrared signal
Level vial
6. Accessories
LCD screen
(rear)
Bubble
vial to
plumb rod
9V battery
compartment
(follow polarity
indications inside)
Use a coin to unscrew
the battery cap
Turn to attach
clamp to
detector
Turn to tighten
or remove clamp
from rod
23
TROUBLESHOOTING
• Before using a detector, it is very important to set the A510S
in point mode. The receiver cannot detect the beam in
chalk line mode.
• If you cannot pick up the beam with the detector, check how
you are lined up with the laser. One of the head protection sup-
ports on the laser may be blocking the beam; move to the left
or right to receive the beam.
• The metal head protection can be removed from the laser by
pivoting the two security locks. This will not affect the perform-
ance or the water or dust resistance of the laser.
Change to remote mode
and are used
for calibration or to set
manual grade
22