3
1. General information 4
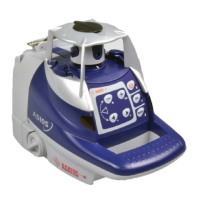
1.1. Description
1.2. Safety
1.3. Specifications
1.4. Laser overview
1.5. Keypad overview
2. How to use the laser 7
2.1 Setup
2.2 Automatic/Manual
2.3 HI Alert
2.4 Rotation speed
2.5 Laser chalk line
2.6 Scanning
2.7 Motorized mount
2.8 Squaring
2.9 Matching slope
3. Power 14
3.1 Installing alkaline batteries
3.2 Using rechargeable batteries
3.2 Later recharging
4. Checking and adjusting calibration 15
5. Care and handling 21
6. Accessories 22
6.1 RCR500 detector
6.2 Remote control
6.3 Tripods
6.4 Other accessories
7. Warranty 26
Table of contents
2
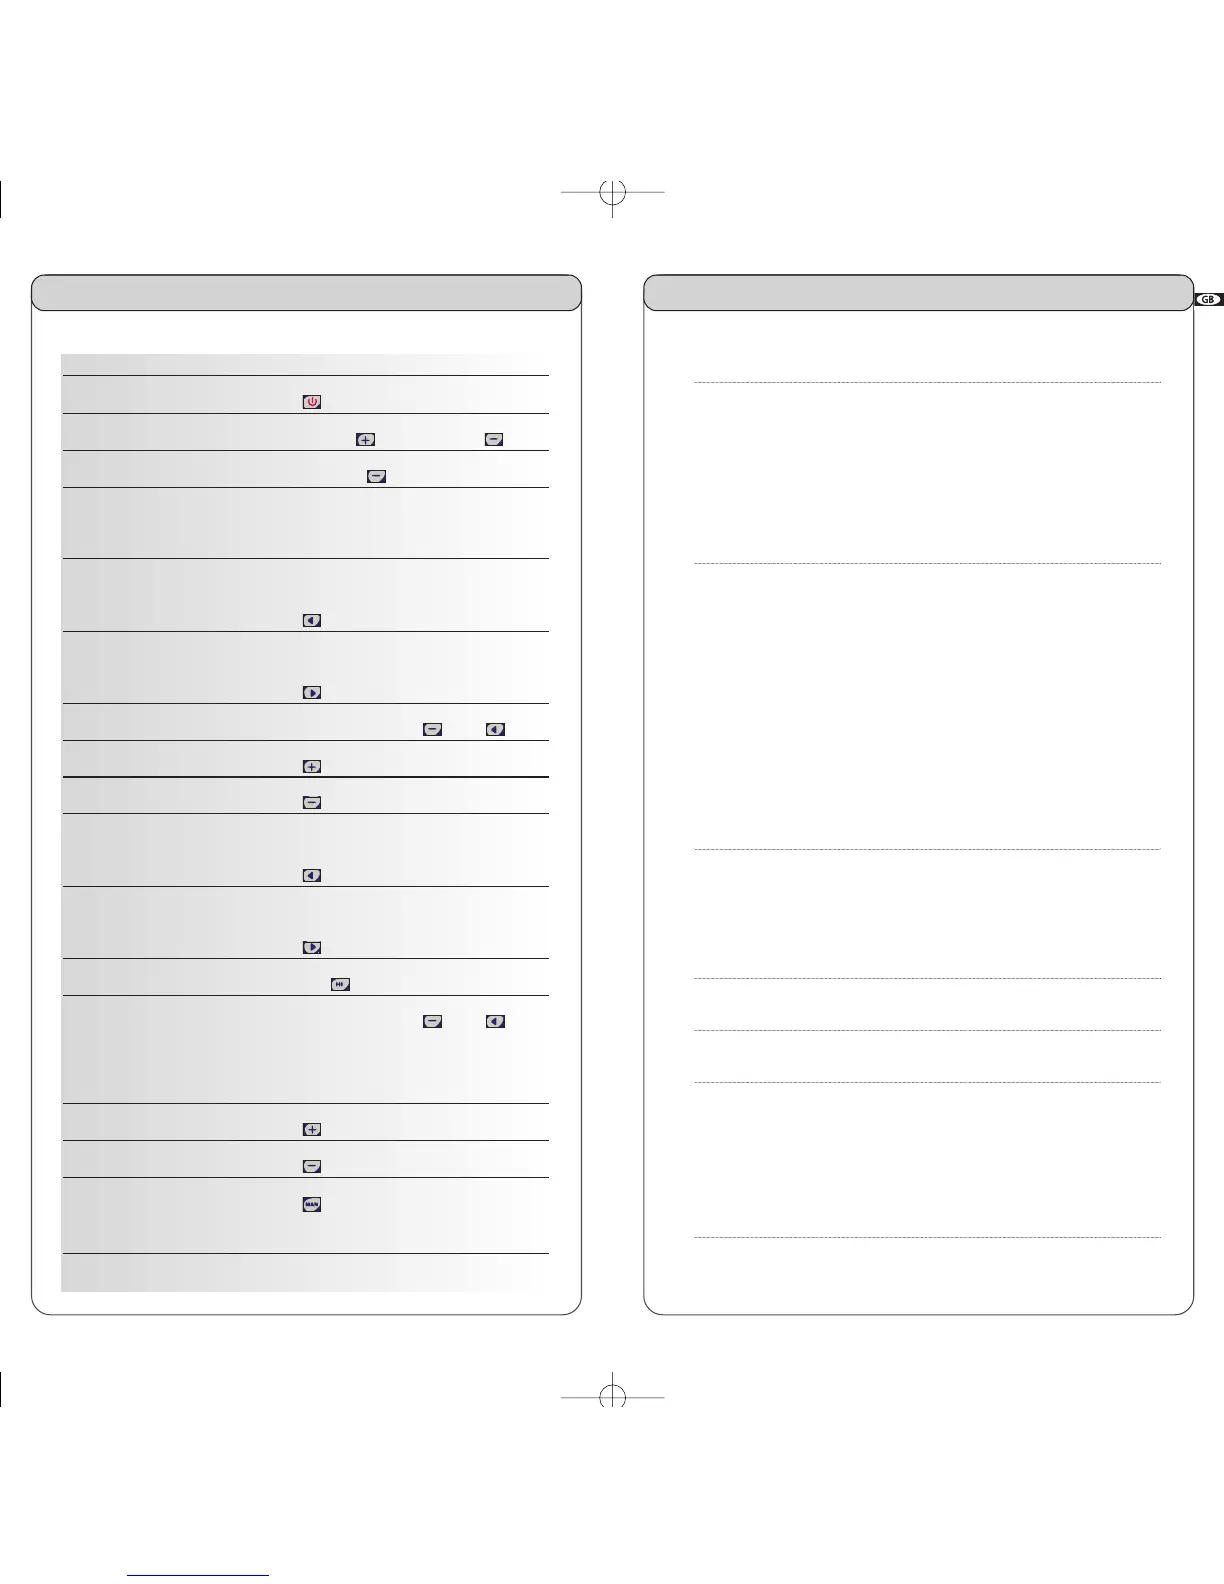
Functions using the laser keypad
On/Off Press
Rotation speed Increase with ; decrease with
Stop rotation Press and hold until it stops
Chalk line Flip collar on head up for chalk line,
down for point
Move stationary point
or chalk line left Press
Move stationary point
or chalk line right Press
Scanning Press simultaneously on and
Increase scan angle Press (in scan mode)
Decrease scan angle Press (in scan mode)
Move left
scan or vertical alignment Press *
Move right
scan or vertical alignment Press *
H.I. Alert Press H.I.
Motorized mount mode Press simultaneously on and
(scan keys) for several seconds; all 3
LEDS will blink and 4 beeps will sound
Raise laser on mount Press (in wall mount mode) on remote
Lower laser on mount Press (in wall mount mode) on remote
Manual mode Press Man
(slope on X axis) (bottom LED will blink)
* Functions not available in wall mount mode; exit to use these functions.
Quick start