7
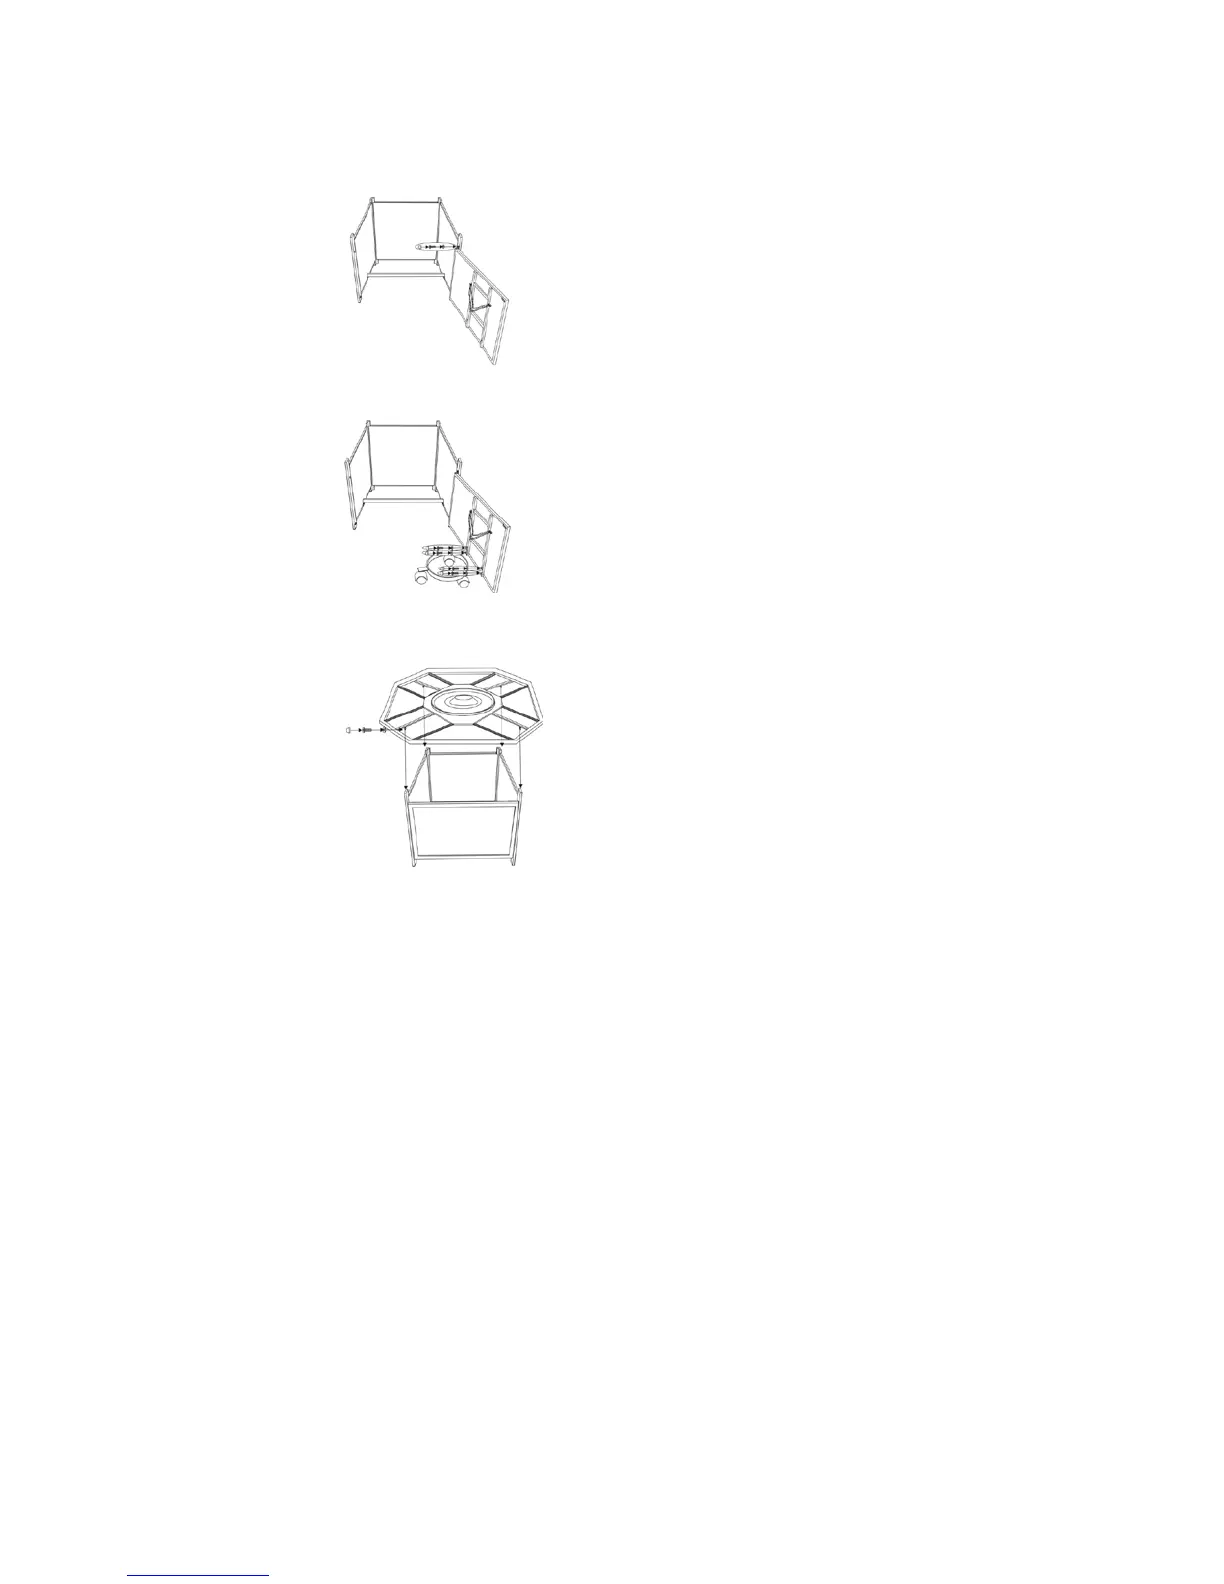
5. Put the door onto the "L" pre-assembled connector,guide the pin of "L" connector into the hole under the door
Then guide the pin of another "L" connector into the hole upside of the door,use a 1/4"x15 mm bolt and washer
to attach this "L" connector to the right side panle as shown in Fig 5. Do not over tighten.
Figure 5
6. Attach the LP support to door panel by using four 1/4"x15 mm bolts and washers as shown in Fig 6a. Do not
over tighten.
Figure 6
7. With the help of another person, carefully place the table top onto the table base. After making any necessary
adjustments to the alignment of the table top and the assembled base, use four 1/4"x40 mm bolts and washers
as shown in Fig.7.Guide the bolts through the holes under the table top,into the pre-drilled holes in the side panles.
Do not tighten completely.
Figure 2
Figure 7
 Loading...