20 21
aidacare.com.au
Remove Bed From Base Carton
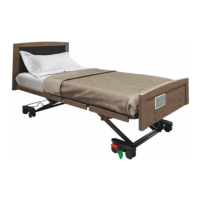
19. Unlock central locking brake at the foot end by pressing the green pedal
20. Roll the bed out of the flattened carton and position or move the bed as desired
21. Remove remaining dunnage and wrapping and other materials such
as protective foam and zip ties
Mount the Wall Buffer:
22. When the bed is in the desired position, attach the wall buffer at the head
end of the bed
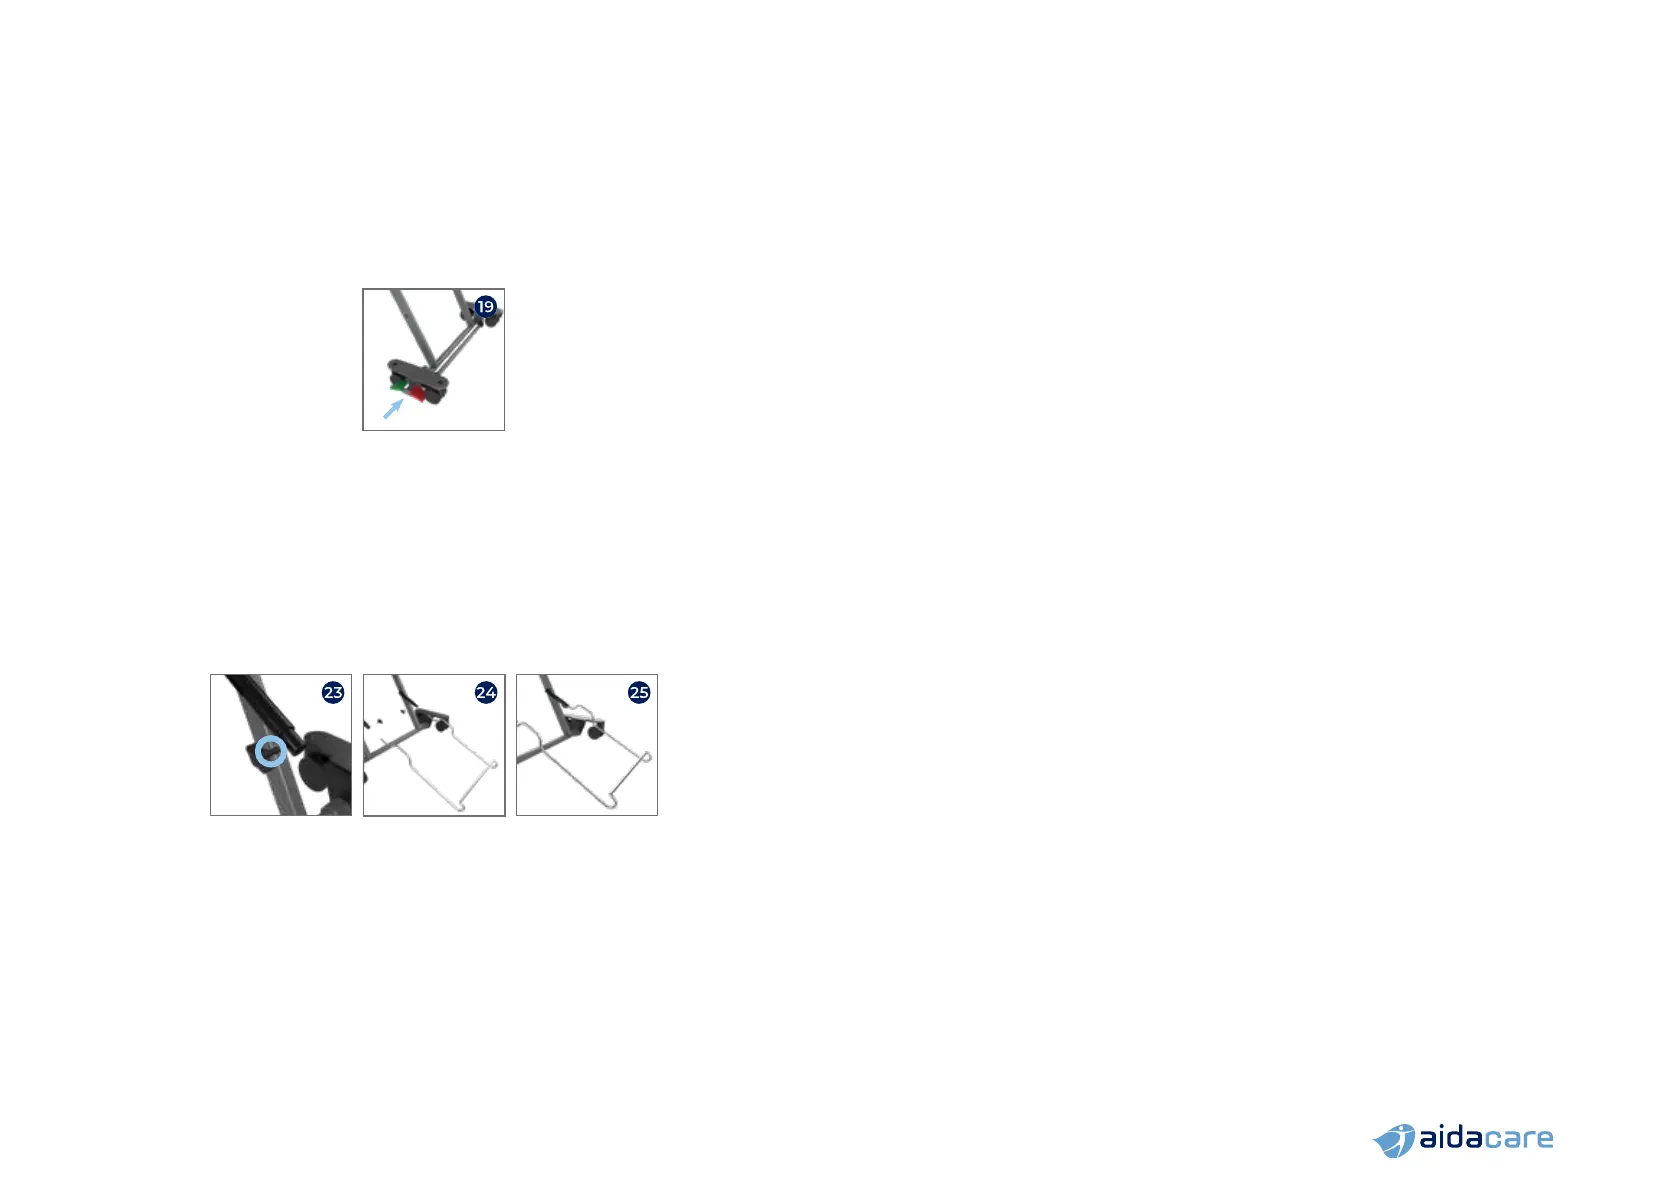
23. Locate the sprung mounting barrels on the head end bed legs, loosen
the thumb screws for insertion of wall buffer
24. Ensuring the hooked end of the wall buffer is pointing upwards, insert the
ends of the wall buffer into the sprung mounting barrels. Ensure fully inserted
25. Fasten thumb screws tightly to secure wall buffer
Position the bed:
You may position the bed as desired however it is recommended that if the
head end is positioned against a wall, the wall buffer should be in contact
with both the floor and wall or skirting board.
26. If necessary, gather and fasten excess ACP or power leads away from
encumbrance with moving parts
B ASSEMBLY OF FL250 BED
(without access to power source)
Unpack Bed, Mount To EasyMove Transport System:
1. Using appropriate equipment (such as forklift, walkie stacker, pallet jack,
hydraulic lift trolley etc) lower the bed carton to 600-700mm from the ground
2. Carefully remove strapping and external dunnage materials, remove the
carton lid and internal dunnage materials
3. Fold down carton base to expose either end of bed
4. Place an EasyMove trolley at either end of the bed. The narrower width base
castors of the EasyMove face in towards the bed
5. Lower the bed until the bed frame axle mount is level with the EasyMove
quick release axle
6. Attach bed to EasyMove Transport System (as per EasyMove instructions –
see page 34)
7. Remove lifting device
8. Remove remaining carton and dunnage materials
9. Locate all component packets as per carton contents above
10. Plug in handset to 1 of 2 handset port options
11. Mount mattress retainers
12. Mount adjustable mattress retainer (foot end)
13. Mount Head and Foot Board Holders
14. Hang hooked end of Wall buffer over EasyMove handle crossbar
15. Pivot the bed frame to vertical (as per EasyMove instructions – see page 34)
The bed is now ready to move to a power source.
When a power source is reached, pivot the bed to horizontal, plug in the
power lead, lower legs to floor and disconnect EasyMove Transport System
(as per EasyMove instructions – see page 34)
16. Mount the Wall Buffer
17. Position the bed
18. If necessary, gather and fasten excess ACP or Power Leads away from
encumbrance with moving parts
 Loading...