Technical Documentation - Datasheet MyChron 4 – Version 1.00
2
Key on a PC. This options avoid you to always have a Pc available for
data download.
Both MyChron 4 and the optional E-box can be internally and externally
powered. MyChron 4, can also be powered by a magnet.
Internally powered versions need one 9 V battery, while externally
powered versions needs an external 9-14,5 V power source (the kart
battery for instance).
Installation notes
• Most of steering wheels have existing holes in the 3 central arms
that will accommodate your MyChron 4 display unit;
• If the steering arms are solid, mark the point where the hole is to be
drilled and then indent a drill reference point with a large nail or hole
punch, to minimize drill wander;
• Do not over-tighten the locknut: over-tightening it may seriously
damage the display unit chassis;
• We suggest to use plastic washers, given as stock, to keep your
MyChron 4 separate from the steering wheel;
• Once the gauge has been correctly installed, please plug the 3
sensors in the connectors on the instrument’s back part.
Display description
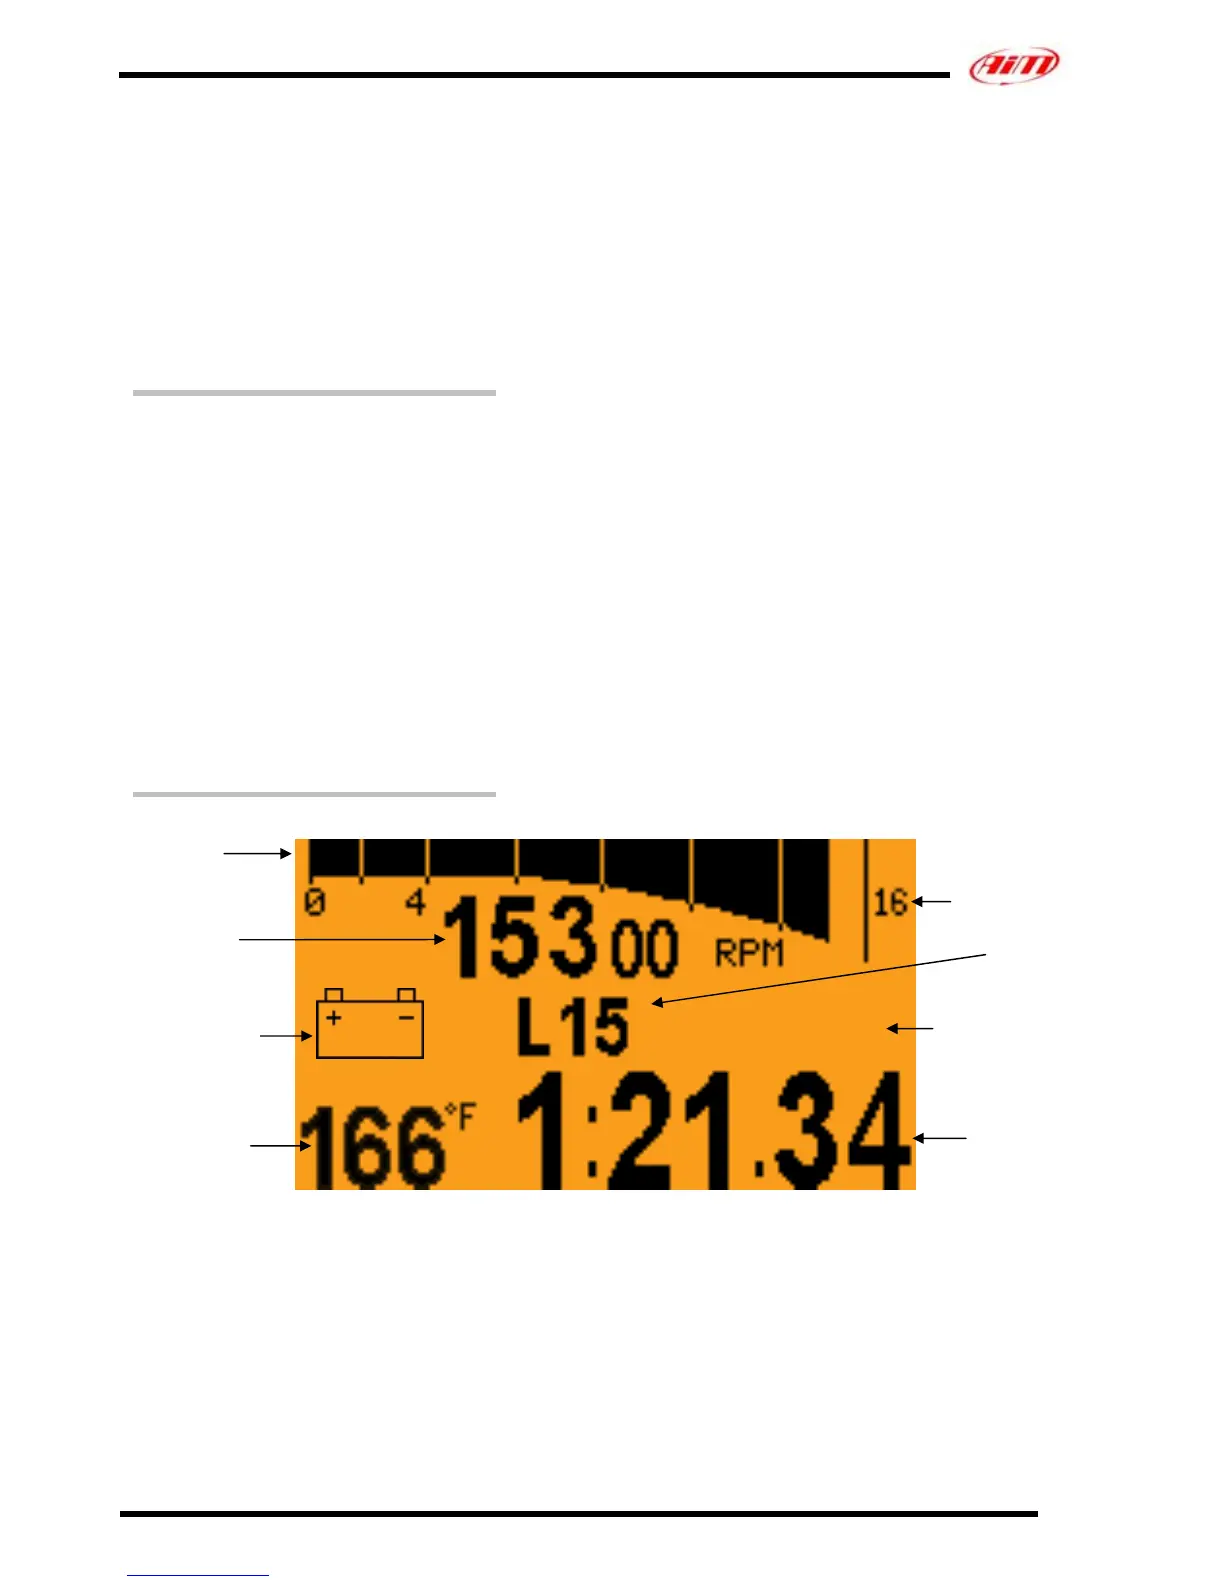
Figure 2: Display Description MyChron 4 on line.
RPM
Bar graph
Digital RPM
value
Low battery
warning
Nr. of last
ended Lap
Lap Nr
Best for best Lap
Time.
Forecast for
forecast Lap Time
BEST / FORE
1 Temperature
Settable Unit of
measure
Lap Time
 Loading...