Decimal
Room ID # Setting:
Use S# for standard
system stations 1-48.
Use A# for expanded
system stations 1-250.
Use B# for expanded
system stations 251-500.
For residential/tenant stations
251-500, the dip switch
assignment is wthe same as
1-250.
Residential/tenant stations
1-250 wire to Sub 1A and
Sub 1B of the GT-BCX while
residences 251-500 wire to Sub
2A and Sub 2B
(see page 4).
Note: 8 binary digits allows
for 255 unique numbers. Only
numbers 1-250 are used by the
GT system.
PROGRAMMING: ADDRESSING RESIDENCES VIA DIP SWITCH METHOD
Step 1: Set dip switches for all GT-1C7(-L), GT-1M3(-L) and GT-2C(-L) stations
using the chart example to the right.
(The full GT Dip Switch Setting Worksheet can be found on the CD included with the GT-BC.)
Step 2: Apply power to system.
Step 3: Install the GT software and USB cable driver on a computer running
Windows
®
XP, Windows Vista
®
, Windows
®
7, or Windows
®
8.
(Refer to page 6 for COM Port selection steps.)
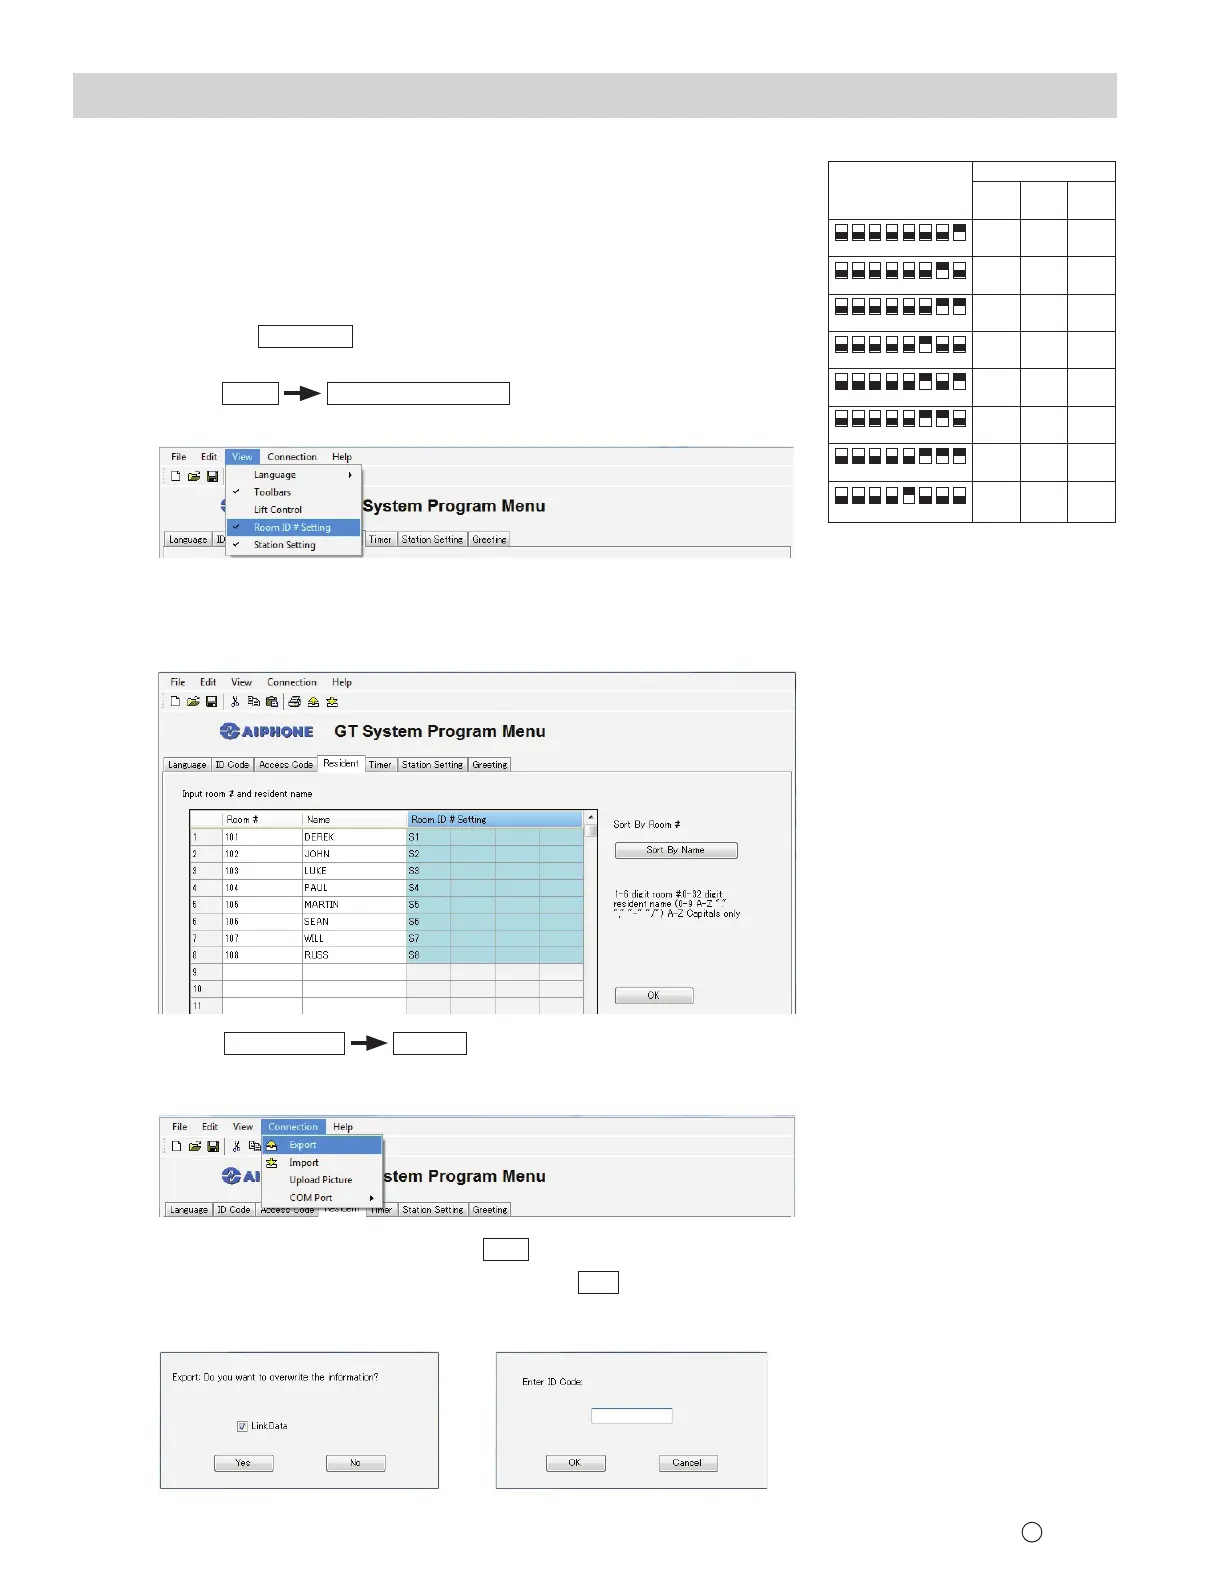
Step 4: Open the GT software, select [GT System Mode].
Step 5: Select the
Resident
tab.
Step 6: Enter a Room # and Name for each residence to be programmed.
Step 7:
Select
View
Room ID # Setting
from the menu bar (see Figure 1).
Figure 1
Figure 2
Binary
Figure 3
Dip Switch
152637
48
152637
48
152637
48
152637
48
152637
48
152637
48
152637
48
152637
48
ID #
S4
S8
S2
S6
S1 A1
A5
A3
A7
A2
A6
A4
A8
B251
B255
B253
B257
B252
B256
B254
B258
S5
S3
S7
Figure 4 Figure 5
Step 9: Select
Connection
Export
from the menu bar (see Figure 3).
(Export sends data to the entrance station. Import pulls data from the entrance station.)
Step 8: For each Binary Dip Switch setting made in Step 1, enter the appropriate
ID into the Room ID # Setting fi eld. Ensure that the correct correlation is
kept between residence name and actual unit (see Figure 2).
Step 10: Check the LinkData box and select
Yes
(see Figure 4).
Step 11: Enter ID code (initial setting is
*
1111) and click
OK
(see Figure 5).
Data will be transferred.
Std
Exp
(Sub 1)
Exp
(Sub 2)
8
FK2114 B 1216 SZ 59030
Issue Date: Dec. 2016
 Loading...