- Measure the roof thickness and
consult the table across to check
if adjustments to the hold down
bolt and duct length are
required.
- NOTE if the duct length needs
to be adjusted then cut the
excess from the un-notched end.
Failure to properly alter
the hold down bolt size
as required can lead to
the evaporater tray being
punctured during the
installation procedure
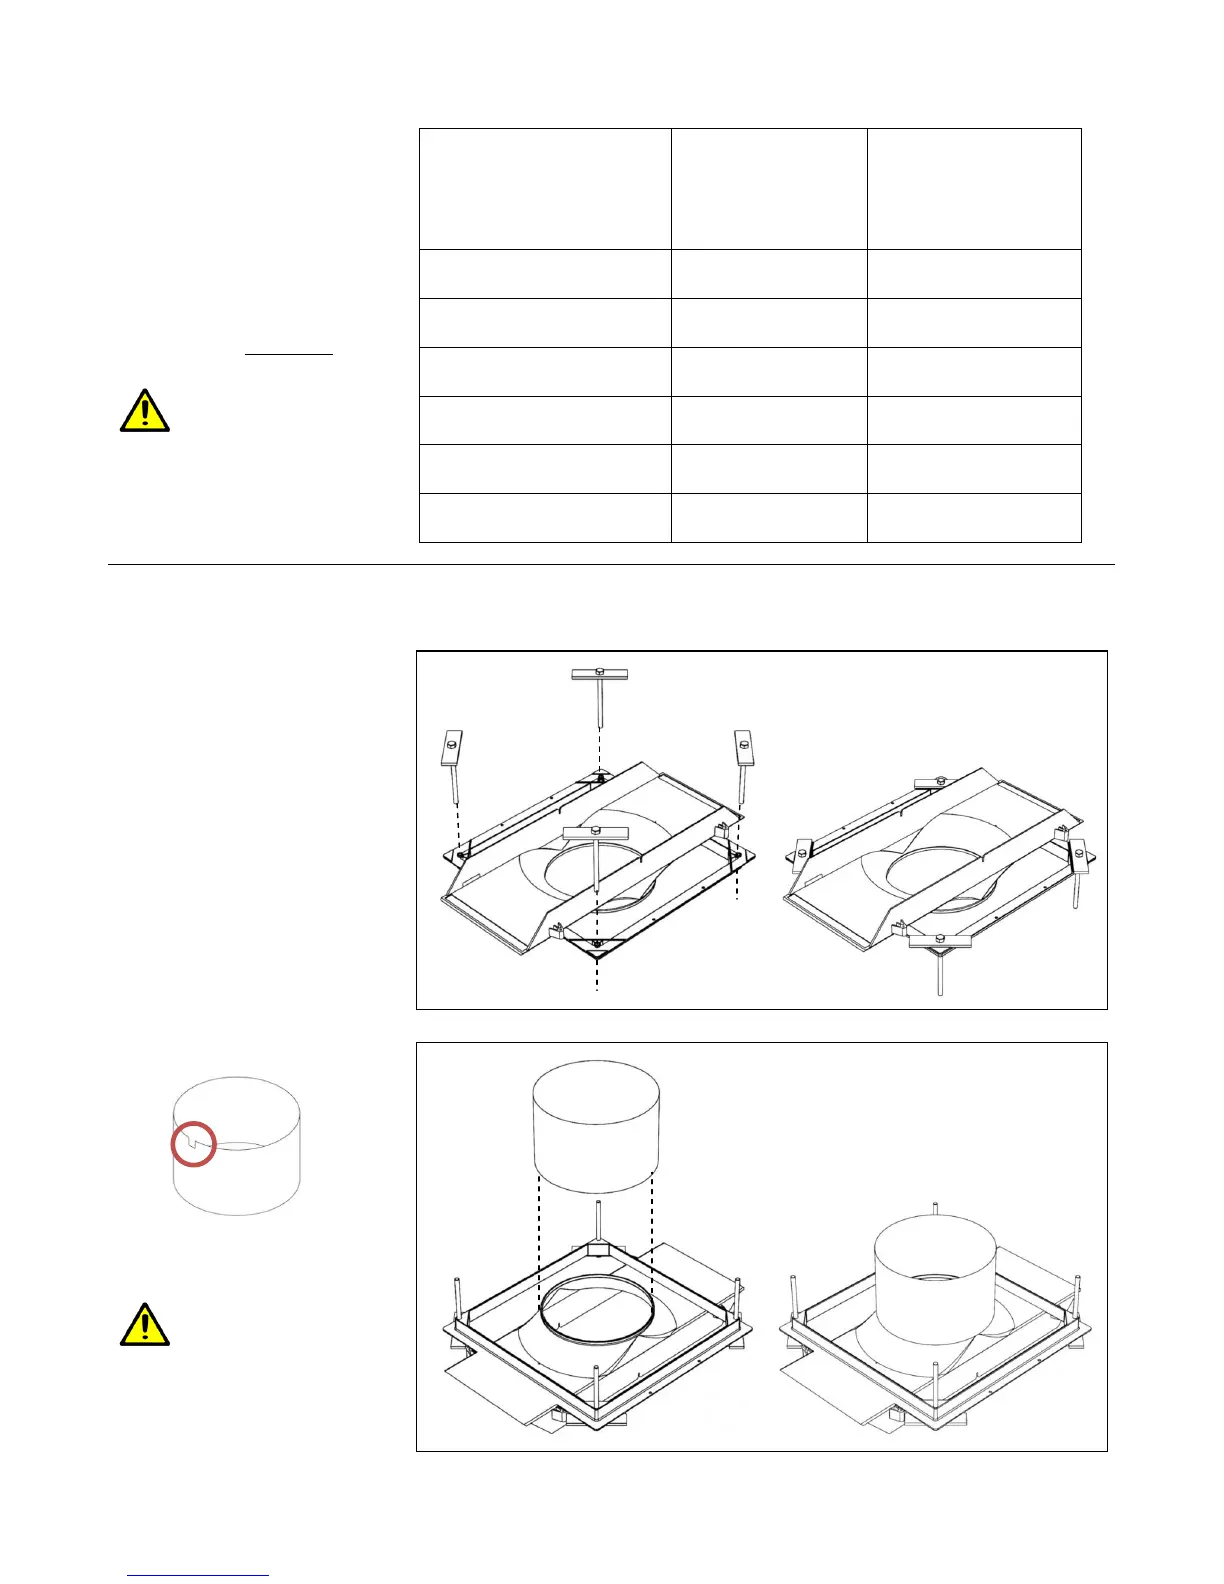
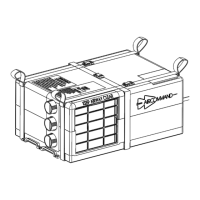
- Thread a hold down bar onto
the M8 bolt and push the bolt
almost all the way into the hole
in each corner of the brace
(Fig 10)
- Leave a 10mm gap between the
hold down bar and the recess in
the plastic brace. This will allow
for easier engagement with the
four corresponding threaded
holes in the unit.
- Turn the assembly over and add
the black plastic duct work to the
top of the assembly with the
notch upwards (Fig 11). The
notch is shown circled below.
- Align the notch with the inside
fans power cable.
When attaching the
duct to the unit take
care to ensure it forms
a tight, unbroken seal that
doesn’t allow cold air to escape.
Fig 10: Insert the four M8 bolts and hold down bars into the corners of the brace
Fig 11: Fit the black plastic duct onto the brace assembly ensuring a tight, sealed fit