8
Installation Procedures
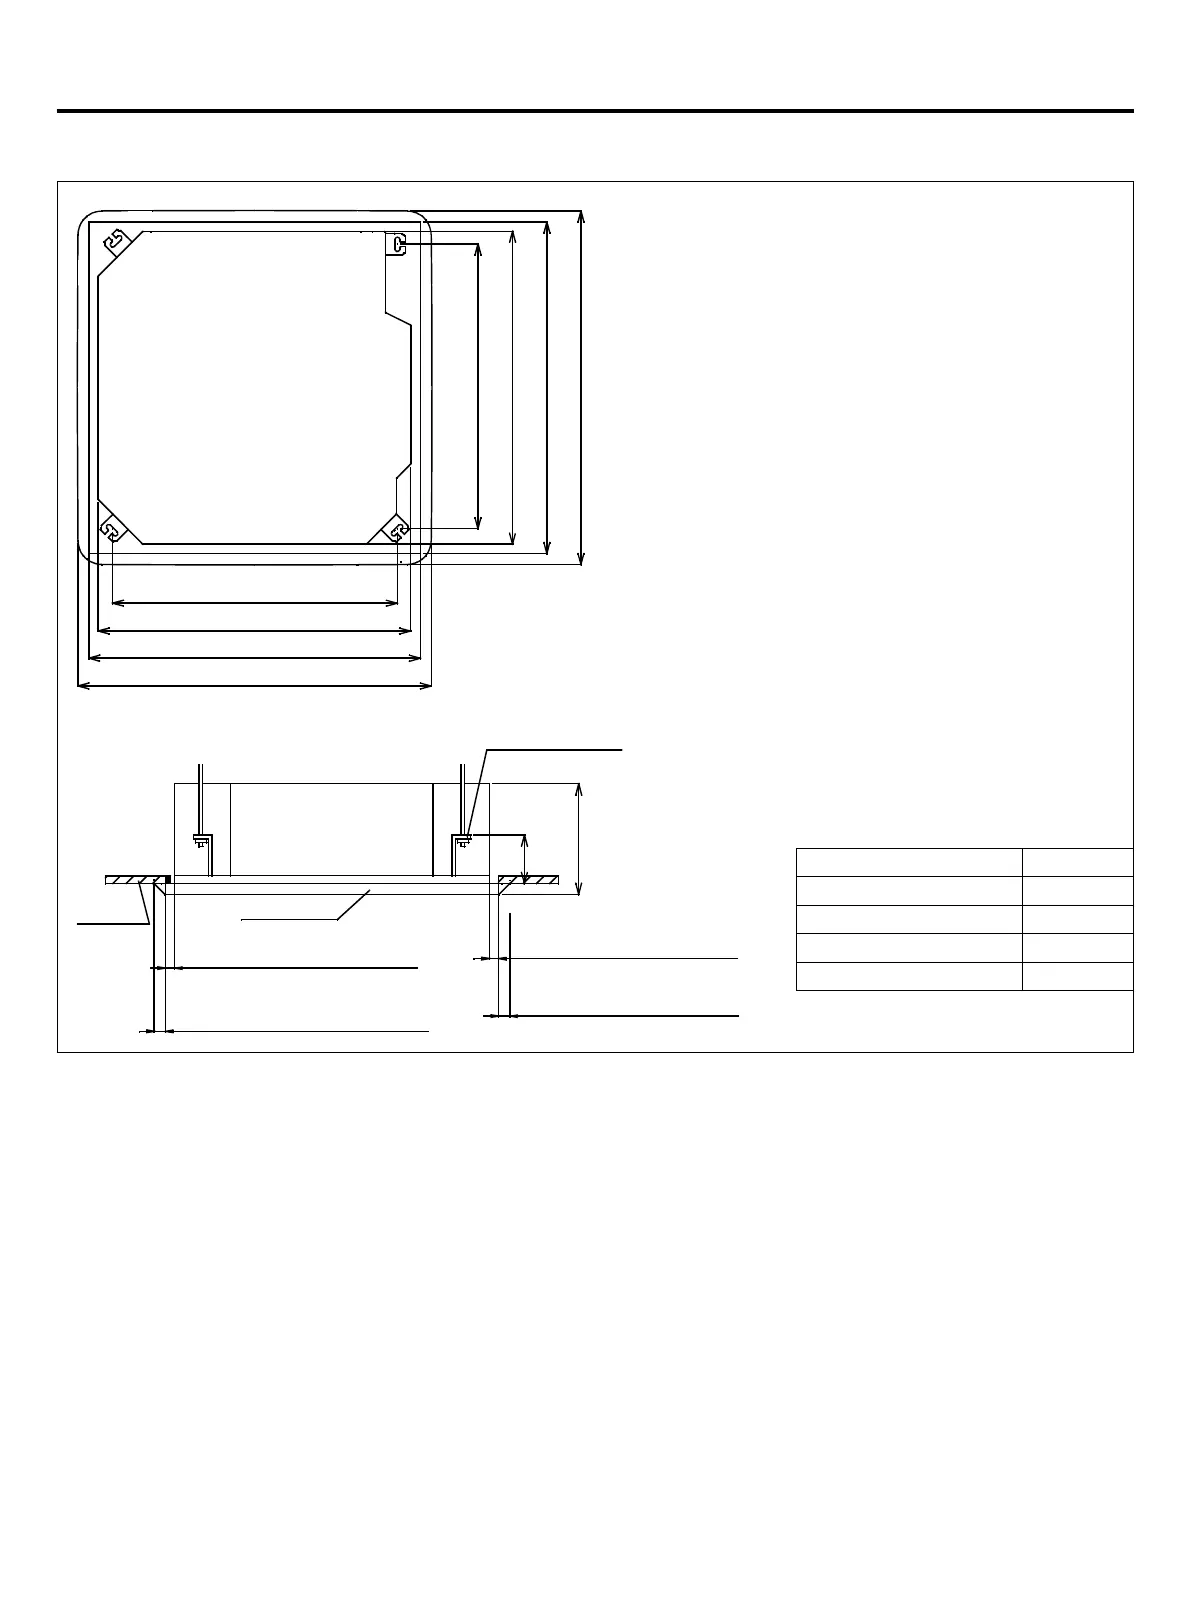
2. Location Relationship among Ceiling Hole, Unit and Hoisting Studs
Model H
CFV007~018 236
CFV024~028 257
CFV030~038 299
CFV048~CFV060 341
765(spacing of hanging screw)
765(spacing of hanging screw)
890(ceiling opening)
950(trim panel)
850(indoor unit)
850(indoor unit)
890(ceiling opening)
950(trim panel)
130
H
Hanger bracket
Ceiling
Trim panel
Distance between indoor unit
and ceiling≤20
Distance between indoor
unit and ceiling≤20
Overlap between ceiling and
trim panel≥30
Overlap between ceiling
and trim panel≥30
Note:
Before suspending the indoor unit, select the installation location according to the piping and wiring in the ceiling, and
determine the lead direction of the piping. Prepare all pipes (refrigerator and drainage) and wiring (connection line for
remote control and connection line of indoor units and outdoor units) connected to indoor units before suspending the
indoor unit so as to make the connections right after the installation.
• In the situation with the ceiling, before suspending the unit, set refrigerant pipe, drainpipe, connection line in the room,
lead wire of line control to the locations of piping and wiring.
• Conrm the size of the indoor unit and x it according to the requirements in the manual.
(1) Cut and withdraw the foundation of ceiling according to the size of indoor unit.
(2) After cutting an appropriate hole, reinforce the cutting area on the foundation of indoor unit, and append the rim to the
ceiling to secure its foundation. In order to prevent the ceiling from vibrating, it is vital to reinforce the ceiling foundation
and ensure the original levelness of the ceiling.
3. Ceiling Hole & Reinforcement
 Loading...