10
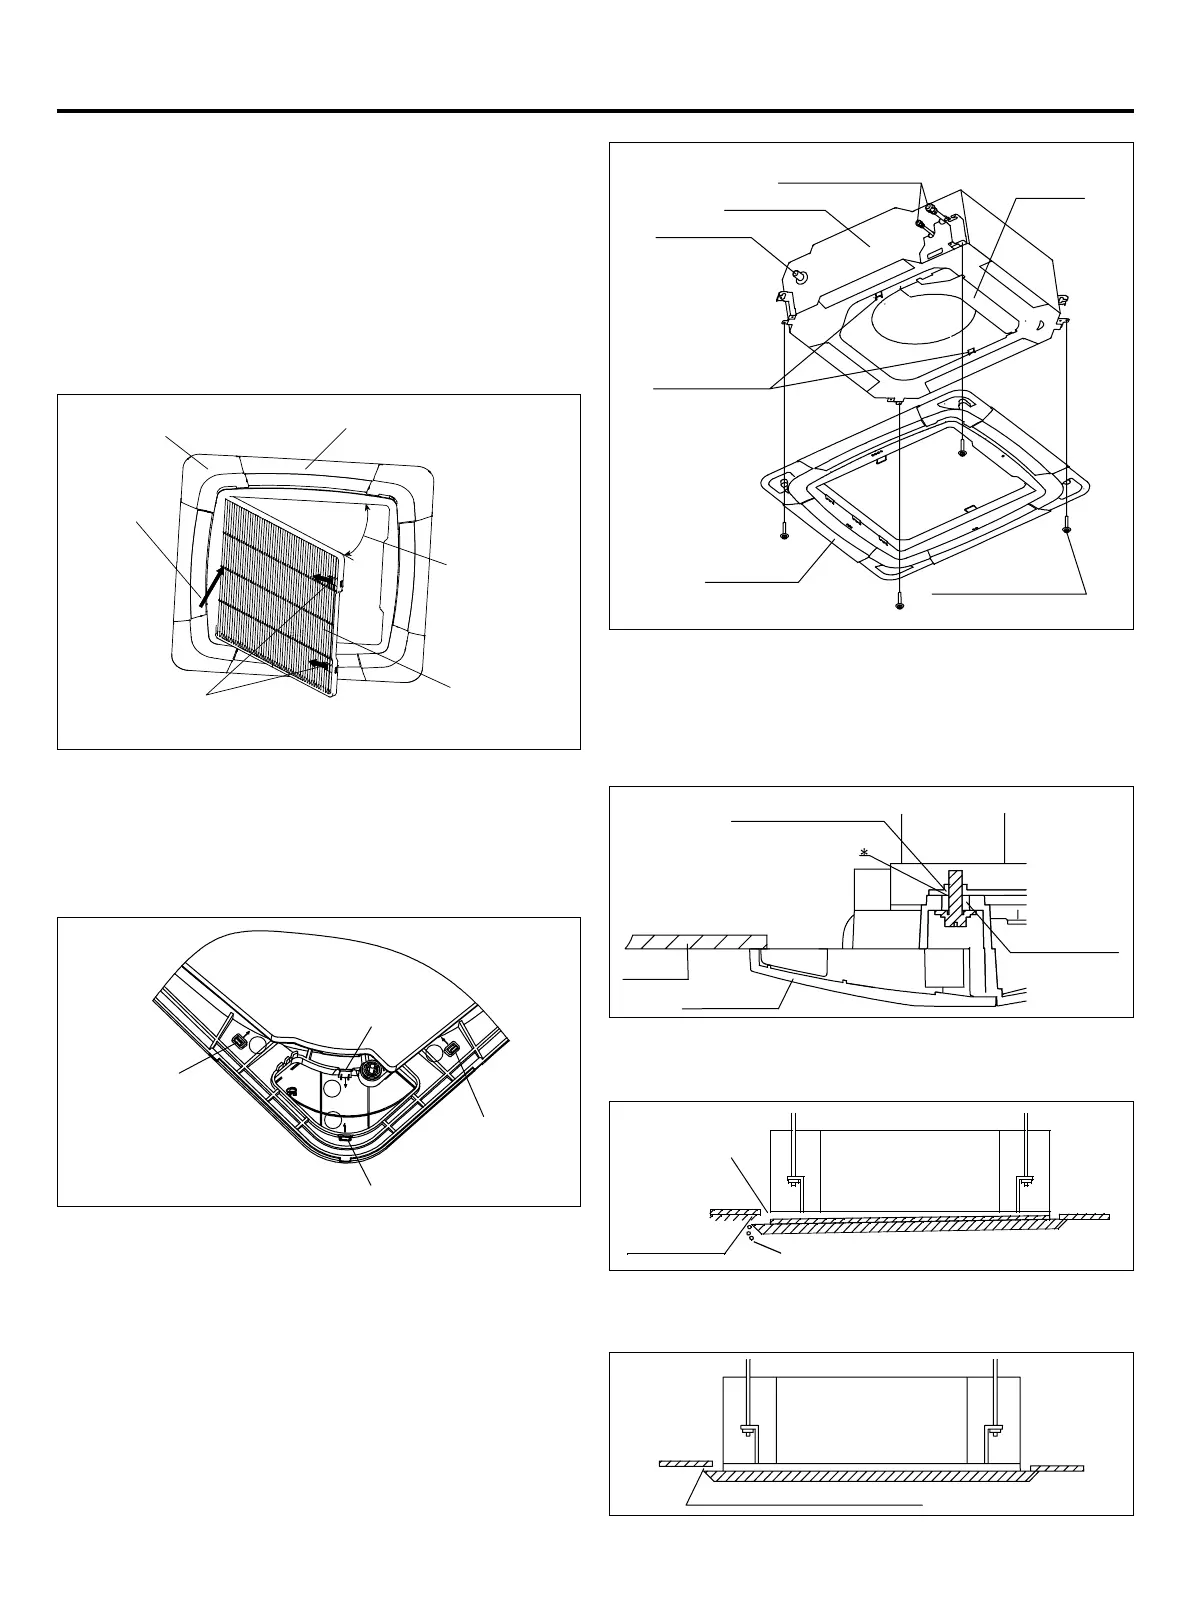
(3) Installing the panel
1) Please remove the four (4) angle trim panels. Removal
method: Flip the jack catches of the angle trim panel in the
order of
①②③④
, as shown in the following gure. The
ipping direction is indicated by the arrows. Then the angle
trim panel can be removed.
2) Pull out the two (2) U-shaped hooks on the indoor unit
from below.
3)Adjust the panel direction to make the angle side
engraved with"Pipe side" consistent with the refrigerant
pipe of the indoor unit, and make the angle side engraved
with "Drain side" consistent with the drain side of the indoor
unit. Then hang the 2 hooks in the inner side of the panel
on the 2 U-shaped hooks of the indoor unit.
4) Finally x the panel on the indoor unit with the bolts
(M5*25) and gaskets delivered with the unit.
Caution: Gaskets must be used for xing, or else the panel
would be easy to fall off.
5) When tightening the four (4) bolts, please make sure
there is no clearance between the panel xing seat on the
side of the indoor unit and the panel xing seat on the side
of the panel. That is to say: the bolts shall be fully tightened
(see * in the gure). If there is a clearance, air leakage or
water leakage is likely to occur.
Caution:
• Improper tightening of bolts would lead to the faults
shown in the following gure.
1
2
3
4
Jack catch
Jack catch
Jack catch
Jack catch
Drain pipe
Indoor unit
Refrigerant pipe
Housing
2 x U-shaped
hooks
Trim panel
4x Bolts (M5*25)
(including gaskets)
Panel xing seat
(Indoor unit side)
Panel
xing seat
(Panel side)
Trim panel
Ceiling
Air leakage
Ceiling
pollution
Water condensate, water dripping
Clearance is not allowed
Installation
(1) Conrming the position of unit hanger
Please conrm the installation position of the hanger
for indoor unit is about 130mm above the ceiling. For
details, please refer to the Instructions for Installation and
Maintenance of indoor unit.
(2) Removing the air-inlet grille
Open the air-inlet grille to make it at an angle of 45° to the
trim panel. As shown in the following gure, please remove
the air-inlet grille as per the operation requirements.
Angle trim cover
Panel
Step 3:
Gently
push the
air-inlet
grille in the
direction
of arrow.
Step 2:
Open the
air-inlet grille
to make it
at 45°to the
panel.
Air-inlet
grille
Step 1: Open the two
snaps in the direction of arrow.
• After tightening the bolts, if there is a clearance between
the ceiling and the trim panel, please readjust the height
of the indoor unit.
Installation Procedures
 Loading...