13
CAUTION
When performing the following steps, avoid any exposure to the service valve ports;
remember that the system is under pressure
g) Remove the valve caps from the three-way valves. Position both valves to “open” using an
hexagonal wrench (See Figure 16).
h) Replace valve caps of both three-way valves. Check for gas leakage with a leak detector
or soapy water.
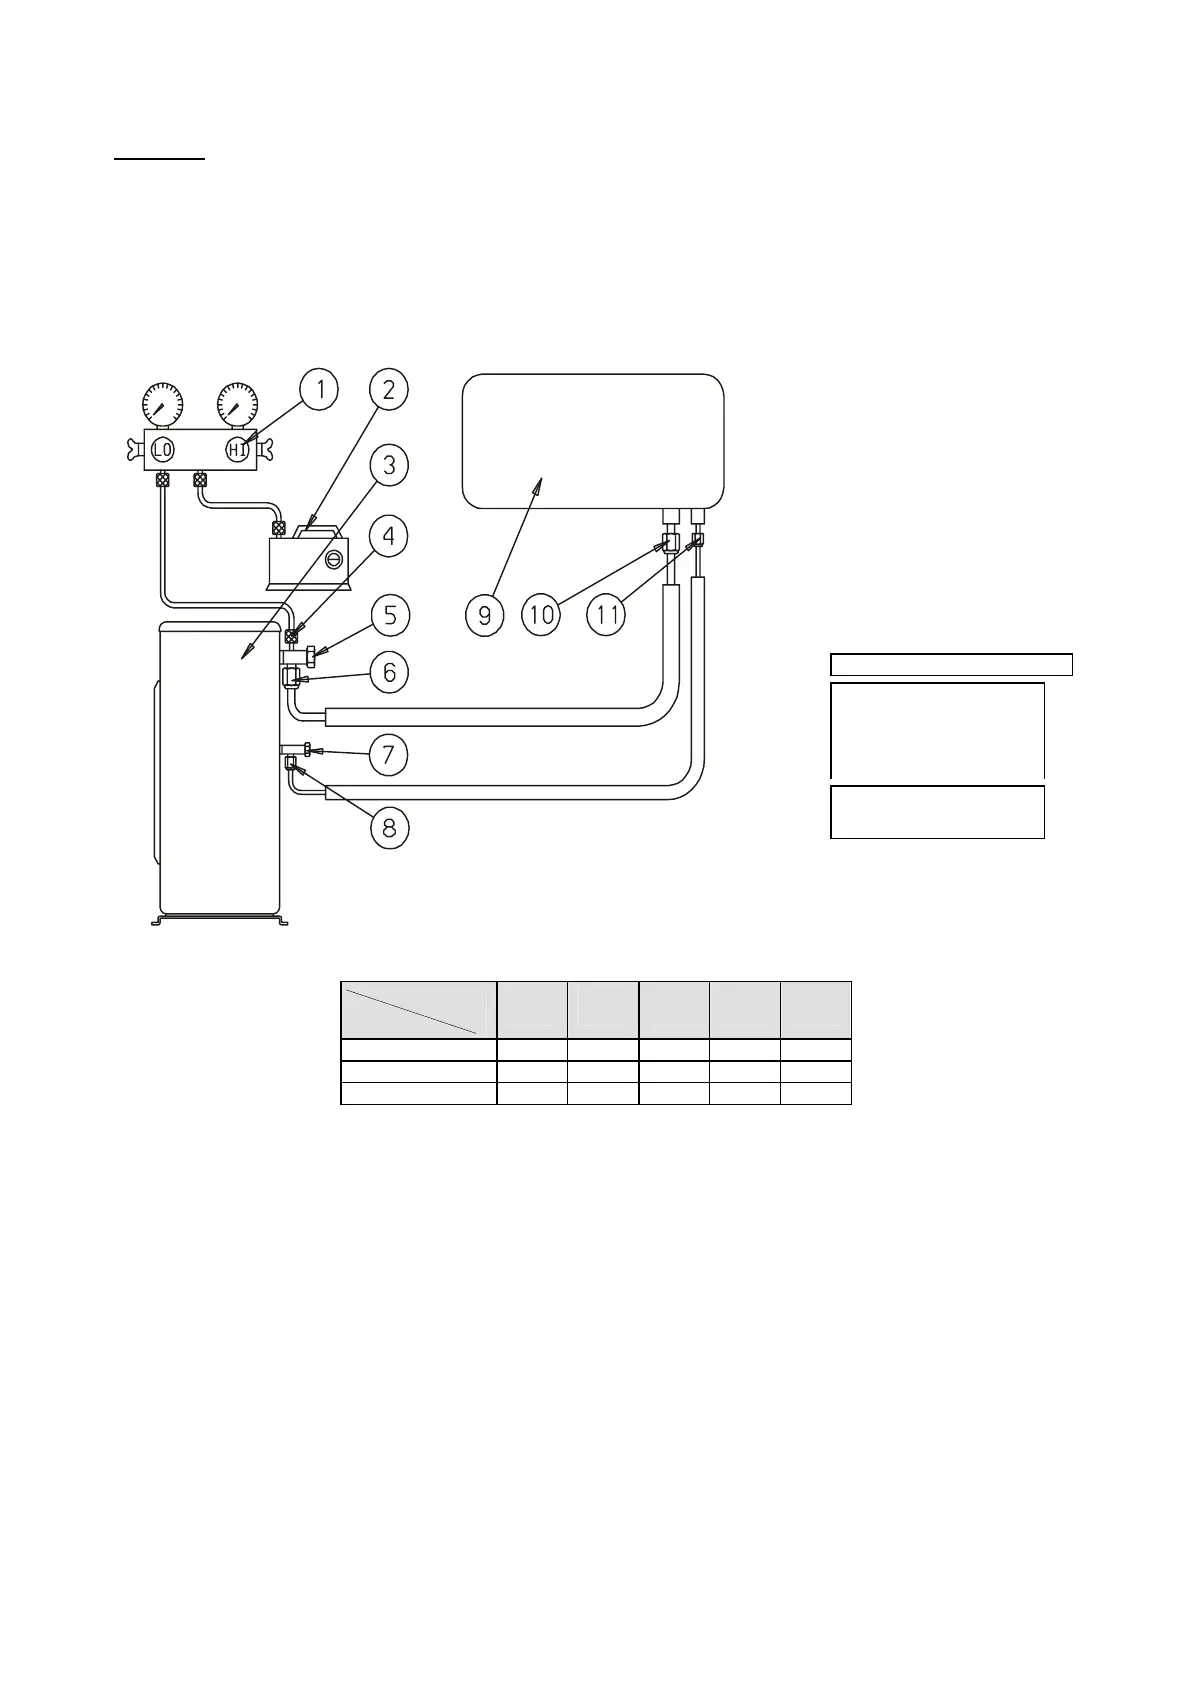
Figure 15. Refrigerant Tube Service Connection
1. Charging Set
2. Vacuum Pump
3. Outdoor Unit
4. Service Port
5. Valve Cap
6. 3-Way Suction Valve
7. Service Port Optional
8. 3-Way Liquid Valve
9. Indoor unit
10. Suction Flare
Connection
11. Liquid Flare
Connection
NOTE :
1. FOR ADDITIONAL
REFRIGERANT CHARGE,
FOR VARIOUS TUBING
LENGTHS, REFER TO
OUTDOOR UNIT
NAMEPLATE.
2. SERVICE PORT ON LIQUID
3-WAY VALVE IS NOT
SUPPLIED ON ALL UNITS.
Tube ( Inch)
TORQUE (N.m.)
1/4" 3/8" 1/2" 5/8" 3/4"
FLARE NUTS
11-13 40-45 60-65 70-75 80-85
VALVE CAP
13-20 13-20 18-25 18-25 40-50
SERVICE PORT CAP
11-13 11-13 11-13 11-13 11-13
Table No. 2: Tightening Torque Values
 Loading...