Do you have a question about the Aiwa AD-F 800C and is the answer not in the manual?
Record model and serial numbers for service inquiries.
Explains wire colours in the UK mains lead for proper connection.
Warning about opening the unit to reduce electric shock risk.
Explains the meaning of graphical symbols used on the appliance.
Warning to protect the appliance from rain or moisture.
AIWA Co., Ltd. attests compliance with regulations for radio interference.
Avoid direct sun, heat sources, and humid/dusty areas for optimal performance.
Avoid fans, sewing machines, magnets, and stacking for better sound.
Regular cleaning of heads is crucial for tape sound quality.
How to set the voltage selector for 120V, 220V, or 240V power sources.
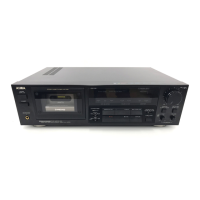
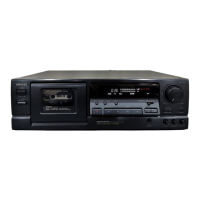
Identifies buttons, switches, and knobs on the front panel of the deck.
Identifies indicator lamps and meters on the front panel.
Identifies buttons for playback, recording, and transport functions.
Jacks for connecting the deck's playback sound to an amplifier.
Jacks for connecting sound sources for recording onto the deck.
Jacks for direct connection to CD/DAT players for recording without an amplifier.
Jack for connecting headphones to listen to the audio output.
Ensure TIMER switch is off before powering on, unless for timer functions.
Connect AC cord and use the POWER button to turn the deck on/off.
PAUSE indicator flashes for 4 seconds upon power-on, indicating standby.
Step-by-step guide to inserting a cassette tape correctly.
How to take up tape slack using a pencil to prevent damage.
Advises against using C-120 tapes due to their thinness and fragility.
Describes the mechanism that prevents button operation when the compartment is open.
Steps to insert cassette, set controls, and play.
Mechanism that stops the deck at tape end in any mode.
Automatically detects and sets tape type parameters for optimal performance.
Explains how to use fast forward, rewind, stop, and eject controls.
How to adjust listening volume using the headphone level control.
Explains the function of peak level meters for monitoring recording levels.
Adjusting recording levels using REC LEVEL control and peak meters.
Guidelines for optimal recording levels to minimize hiss and distortion.
Recommended level settings for Normal/CrO2 and Metal tapes.
Note on the symbol indicating the reference level for the Dolby NR system.
Explains calibration for bias and recording sensitivity for optimal sound.
Adjusting BIAS control using a signal and comparing SOURCE vs. TAPE.
Adjusting REC LEVEL for 0 dB readings on meters in SOURCE and TAPE modes.
Notes on recording signals for calibration and rewinding tape.
Step-by-step guide for recording after calibration.
Information on safety tabs, comparing SOURCE/TAPE sounds for optimal recording.
How to use the memory function for rewinding and playback/stop at desired points.
Illustrates using the memory function to repeat playback from a specific point.
Instructions for repeating playback of an entire tape side using Timer.
How to set memory points for repeating specific sections of tape.
How to review a portion of tape during playback or recording.
How to locate the start of a selection or skip unwanted parts of the tape.
How playback automatically resumes after tape rewinding.
How to create blank segments during recording for editing.
How to activate Rec-Mute during playback for tape editing.
When to use the MPX Filter for recording FM stereo broadcasts with Dolby NR.
Explains the use of Dolby B and C noise reduction systems for improved sound.
How to set the DOLBY NR switch for playback and marking recorded tapes.
Explains HX PRO as a servo system for improved high-frequency response and dynamic range.
Notes that HX PRO functions automatically during recording and is compatible with other decks.
Steps to set up unattended recording using a timer and cassette.
How to prepare for wake-up playback using a timer and cassette.
Reminder to leave the TIMER switch in OFF position unless using timer functions.
How to break off safety tabs to prevent accidental erasure.
How to cover openings with tape for re-using cassettes with broken tabs.
How to completely erase tape by setting REC LEVEL to 0 and recording.
Importance and method for cleaning heads, capstans, and pinch rollers.
Details type, track format, power supply, and consumption.
Covers frequency response, signal-to-noise, wow/flutter, and tape speed.
Details recording/erase systems, motor, and head types.
Statement confirming product compliance with EEC radio interference directives.
Caution for C model regarding polarized plug use with extension cords.
| Track System | 4-track, 2-channel stereo |
|---|---|
| Tape Speed | 4.76 cm/s |
| Tape Type | Normal, Chrome, Metal |
| Frequency Response | 20Hz to 19kHz (Metal tape) |
| Inputs | 1 x line |
| Outputs | 1 x line |