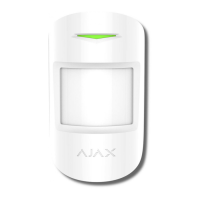
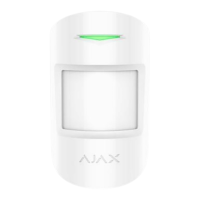
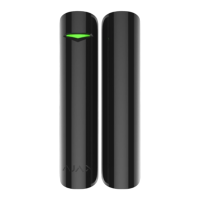
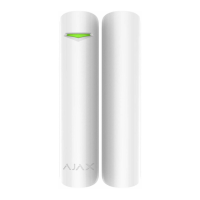
MotionProtect
1. FEATURES
Wireless sensor Ajax MotionProtect is designated for human motion detec-
tion. It functions as a part of Ajax security system.
2. SPECIFICATIONS
SPECIFICATION MEANING
Sensor type wireless
Uses indoors
Movement detection distance up to 12 m (39.4 ft)
Sensitivity 3 levels adjustable (low, medium, high)
Detection angle 88.5° horizontal / 80° vertical
Installation height suggested 2.4 m (7.9 ft)
Pet ignoring option
Weight up to 20 kg (44 lb),
size up to 50 cm (19.7 in)
Tamper protection available
Radio signal power 20 mW
Radio-frequency range 868 MHz (Europe); 915 MHz (USA)
Maximum distance between sensor
and central unit
2000 m (6552 ft) (open area)
Power supply CR123A battery
Power supply voltage 3V
Battery life up to 7 years
Operation temperatures range from 0°С (+32°F) to +50°С (+122°F)
Operation humidity up to 80%
Dimensions 110х65x50 mm (4.33x2.55x1.96 in)
3. COMPONENTS
4. SETTIING-UP PROCEDURES
4.1 Before installing the sensor, it is required to register it with the Ajax se-
curity system. In order to register the sensor, it is necessary to switch the
Ajax security system’s receiver to «Add Device» mode (the receiver’s man-
ual explains how to accomplish it) and to put the switch «2» (PICTURE 4) on
the sensor to the «ON» position. Sensor’s light must blink at the moment of
switching on. The registration request is transmitted at the moment the sen-
sor is switched on only! In case the registration was not successful, switch
off the sensor, wait for 5 seconds and switch it on again. If the sensor’s light
blinks constantly (each second during one minute), it means that the sensor
is not registered. The light blinks in the same way if the sensor is deleted
from the registration list. Non-registered sensor blinks also throughout 3
seconds during each activation.
4.2 Having registered the sensor successfully, select an appropriate location
to install it.
MotionProtect sensor, battery CR123A, installation set, manual
ATTENTION!
Make sure that in the installation location sensor has a stable radio con-
tact with the receiver! A maximum distance of 2000 m (6552 ft) between
the sensor and the receiver is mentioned as a comparison with other
devices. This distance was found as a result of open area tests. Connec-
tion quality and distance between the sensor and the receiver can vary
depending on installation location, walls, compartments, bridgings,
as well as the thickness and constructional material. Signal coming
through obstacles, loses power. For example, distance range between
the sensor and receiver, divided with two reinforced concrete bearing
walls, constitutes approximately 30 m (98.4 ft). Please note that moving
the sensor even 10 cm (4 in), it is possible to improve the signal recep-
tion considerably.
Before installation, make sure to check the signal strength in the place where
you intend to install the sensor! It is possible to launch a signal level test on
the receiver’s side. Test launching is described in the receiver’s manual.
ATTENTION!
Signal level test and detection zone test for sensors take some time to
start. A certain period of time is necessary for the receiver to send a test
request to the sensor, and for the sensor to send a test response.
5. INSTALLATION
5.1 The sensor must be installed in such a way that the intruder’s assumed
entrance was perpendicular to the sensor’s lens axis. Make sure to check if
the sensor is functioning at the point where it is going to be installed! (see
paragraph 5.7)
5.2 In order to install the sensor, move the plastic fastening clip Smart-
Bracket (PICTURE 1) alongside the frame and remove it.
5.3 Install the fastening clip SmartBracket on the wall with a help of the ex-
pansion bolts and self-tapping screws included in the set (PICTURE 2). The
height suggested for the sensor installation is 2.4 m (7.9 ft).
Sensor installation height other than the height suggested 2.4 m (7.9 ft) re-
duces sensor detection distance and can diminish the area protected.
PICTURE 1.
MotionProtect sensor and its SmartBracket
SmartBracket is to be moved
down and removed
5.4 Put the sensor on the SmartBracket. Once the sensor is fixed on the
SmartBracket, its light must blink. It means that the tamper on the sensor is
shut. In case the sensor does not blink, the tamper status must be checked
at the receiver configuration software!
PICTURE 2.
MotionProtect sensor and its
SmartBracket
RECEIVER SENSOR'S LIGHT EMITTING DIODE DESCRIPTION
3 indication bars
lights almost permanently, with short
breaks each 1.5 seconds
excellent signal
2 indication bars blinks 5 times per second medium signal
1 indication bar blinks twice per second low signal
0 bars short flashes each 1.5 seconds no signal