EasyManua.ls Logo

AJAX DoorProtect Plus - User Manual

AJAX DoorProtect Plus
19 pages
Print Icon
To Next Page IconTo Next Page
Loading...
DoorProtect Plus User Manual
Updated July 30, 2020
DoorProtect Plus is a wireless opening, shock, and tilt detector, that operates
within the Ajax security system, connecting via the protected radio
protocol. Is used inside premises. The communication range is up to 1,200 m line
of sight. DoorProtect Plus can operate up to 5 years from a pre-installed battery
and capable to detect more than one million openings.
The user can configure the detector via the for iOS, macOS, Windows, or
Android. The app notifies the user of all events through push notifications, SMS,
and calls (if activated).
DoorProtect Plus does not support connecting via the or
integration modules.
Jeweller
Ajax app
Ajax uartBridge Ajax ocBridge Plus

Other manuals for AJAX DoorProtect Plus

Question and Answer IconNeed help?

Do you have a question about the AJAX DoorProtect Plus and is the answer not in the manual?

Summary

Functional Elements

Operating Principle

Connecting

Before starting connection

Steps required before connecting the detector to the hub.

How to connect the detector to the hub

Step-by-step guide for pairing the detector with the Ajax hub.

Performance testing

Jeweller Signal Strength Test

Test to evaluate the quality of the radio signal between the detector and the hub.

Detection Area Test

Test to confirm the detector's detection zone and sensitivity.

Attenuation Test

Test to measure signal degradation due to obstacles.

Installation

Detector Testing

Procedure to verify the detector and magnet operation after installation.

Connecting a Third-Party Wired Detector

Guide on connecting external wired detectors to the DoorProtect Plus.

Maintenance

Tech specs

Complete Set

Warranty

Overview

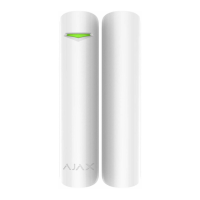
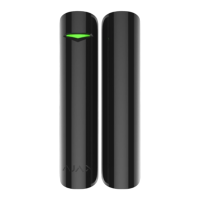
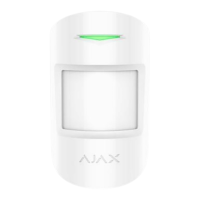
The DoorProtect Plus is a wireless opening, shock, and tilt detector designed for use within the Ajax security system. It communicates via the protected Jeweller radio protocol and is intended for indoor premises. The device can detect more than one million openings and operates for up to 5 years on a pre-installed battery. Users can configure the detector through the Ajax app, available for iOS, macOS, Windows, or Android, receiving notifications for all events via push notifications, SMS, and calls.

Important Note: DoorProtect Plus does not support connection via the Ajax uartBridge or Ajax ocBridge Plus integration modules.

Functional Elements:

The device consists of the DoorProtect Plus unit, a big magnet, a small magnet, an LED indicator, a SmartBracket attachment panel (with a perforated part that triggers the tamper button if the detector is torn off), an external detector connection socket, a QR code, a device switch, and a tamper button.

Operating Principle:

DoorProtect Plus comprises two main parts: the detector and a constant magnet. The detector incorporates a sealed contact reed relay, a built-in accelerometer, and a socket for a third-party wired detector.

To detect openings, the detector is attached to the door frame, and the magnet is attached to the moving part of the door. When the sealed contact reed relay is within the magnetic field, the circuit closes, indicating the door is closed. Opening the door moves the magnet away, opening the circuit, and the detector recognizes the opening. The kit includes two magnets: a small one for a 1 cm detection distance and a big one for up to 2 cm. The detector can be positioned horizontally. If opening detection is not required, only the detector part can be used (without magnets), and the primary detector can be disabled in the settings.

The built-in accelerometer detects shocks and vertical deviations of more than 5° from the initial position. This allows DoorProtect Plus to be installed on windows, including dormer windows, and the system can be armed even when they are slightly open (provided the primary detector is disabled in the settings).

Upon triggering, DoorProtect Plus immediately transmits an alarm signal to the hub, activating sirens and notifying the user and security company.

Connecting the Detector:

Before connecting, users must install the Ajax app, create an account, add the hub, and create at least one room. The hub should be switched on with an active internet connection (Ethernet cable and/or GSM network), disarmed, and not updating. Only users with administrator rights can add devices.

To connect, select "Add Device" in the Ajax app, name the device, scan or type the QR code (found on the detector body and packaging), and select the location room. After tapping "Add," a countdown begins. Then, switch on the device. For successful detection and pairing, the detector must be within the hub's wireless network coverage. The connection request is transmitted briefly when the device is switched on. If pairing fails (LED blinks once per second), switch the device off for 5 seconds and retry. Once connected, the detector appears in the app's device list, with status updates depending on the hub's ping interval (default 36 seconds).

States:

The app displays various states for the DoorProtect Plus, including:

  • Temperature: Measured on the processor, changes gradually.
  • Jeweller Signal Strength: Signal strength between the hub and detector.
  • Connection: Connection status between the hub and detector.
  • Battery Charge: Battery level, displayed in 25% increments.
  • Lid: Tamper mode status, reacting to detachment or damage.
  • Delay when entering, s: Entry delay time (alarm activation delay) to disarm the system.
  • Delay when leaving, s: Exit delay time (alarm activation delay) to arm the system.
  • Routed Through ReX: Status of using a radio signal range extender.
  • Primary Detector: Indicates if the opening sensor is active.
  • Secondary Detector: Status of the external detector connected to DoorProtect Plus.
  • Always Active: Indicates if the detector is always armed.
  • Shock Sensor: Indicates if the shock sensor is active.
  • Tilt Sensor: Indicates if the tilt sensor is active.
  • Firmware: Detector firmware version.
  • Device ID: Device identifier.

Settings:

Settings allow customization of various parameters:

  • First field: Detector name.
  • Room: Virtual room assignment.
  • Delay when entering, s: Configures entry delay.
  • Delay when leaving, s: Configures exit delay.
  • Delays in Night mode: Enables delay when using Night mode.
  • Arm in Night mode: If active, the detector switches to armed state during Night mode. Note that all active sensors of the detector become armed; individual sensor arming in Night mode is not possible.
  • Primary Detector: If active, the primary detector reacts to opening/closing.
  • External contact enabled: If active, the detector registers external detector alarms.
  • Shock sensor: If active, detects alarms after more than one impact.
  • Sensitivity: Sensitivity level of the shock sensor.
  • Ignore simple impact: If active, the detector ignores single hits.
  • Tilt sensor: If active, the sensor detects tilt.
  • Tilt: Sets the normal angle of the sensor; an alarm triggers if tilted beyond this limit.
  • Tilt alarm delay: Seconds from tilt to alarm.
  • Always active: When turned on, the detector is always armed.
  • External Contact Type: Selects the type of external wired detector.
  • Time before alarm, sec (for roller shutter motion detector only): Time in seconds during which a given number of impulses should be counted after the first impulse.
  • Impulses before alarm (for roller shutter motion detector only): Number of impulses required to raise an alarm.
  • Alert with a siren if opening detected: Activates HomeSiren and StreetSiren on opening detection.
  • Alert with a siren if an external contact is open: Activates HomeSiren and StreetSiren during an external detector alarm.
  • Alert with a siren if shock is detected: Activates HomeSiren and StreetSiren during a shock alarm.
  • Alert with a siren if tilt is detected: Activates HomeSiren and StreetSiren during a tilt alarm.
  • Jeweller Signal Strength Test: Switches to signal strength test mode.
  • Detection Zone Test: Switches to detection area test mode.
  • Attenuation test: Switches to signal fade test mode (available with firmware version 3.50 and later).
  • User Guide: Opens the detector's user guide.
  • Unpair Device: Disconnects the detector from the hub and deletes its settings.

Indication:

The LED indicator provides visual feedback:

  • Switching on: Lights up green for about one second.
  • Detector connection to the hub: Lights up continuously for a few seconds.
  • Alarm / tamper activation: Lights up green for about one second (alarm sent once in 5 seconds).
  • Battery needs replacing: During an alarm, it slowly lights up green and slowly goes out. Battery replacement details are in the Battery Replacement manual.

Performance Testing:

The Ajax security system allows testing the functionality of connected devices. Tests do not start immediately but within 36 seconds by default, depending on the "Jeweller" ping interval set in the hub settings. Available tests include:

  • Jeweller Signal Strength Test
  • Detection Area Test
  • Attenuation Test

Installing the Detector:

The installation location depends on the detector's distance from the hub and any obstacles (walls, floors, large objects) hindering radio signal transmission.

Important Warnings:

  • The device is developed only for indoor use.
  • Always check the Jeweller signal level at the installation location. If the signal is low (one bar), stable operation cannot be guaranteed. Measures should be taken to improve signal quality, such as moving the detector by at least 20 cm. If signal strength remains low or unstable, use a ReX radio signal range extender.

Do not install the detector:

  1. Outside the premises (outdoors).
  2. Near metal objects or mirrors that cause signal attenuation or screening.
  3. In areas with fast air circulation (air fans, open windows or doors).
  4. Inside premises with temperatures and humidity outside permissible limits.
  5. Closer than 1 m to the hub.

Attach the magnet to the right of the detector. The detector can be placed either inside or outside the door case (window frame).

  • For perpendicular installations (inside the case/frame), use the small magnet; the distance between the magnet and detector should not exceed 1 cm.
  • For installations where parts are in the same plane, use the big magnet; its actuation threshold is 2 cm.

Detector Testing:

After defining the location, fix the detector and magnet with double-sided adhesive tape and test its operation using the Detection Zone test. In test mode, the DoorProtect Plus LED lights continuously, switching off for a second when triggered. Check correct operation by opening/closing the door several times.

Connecting a Third-Party Wired Detector:

A wired detector with an NC (normally closed) contact type can be connected to DoorProtect Plus using the built-in terminal clamp. It is recommended to install the wired detector no more than 1 meter from DoorProtect Plus, as longer wire lengths increase damage risk and reduce communication quality. To route the wire, break out the plug from the detector body. Notifications are received if the connected wired detector is triggered. To ensure an alarm is raised when a roller shutter is opened, connect a wired roller shutter motion detector with an NC contact. This function is available for devices with firmware version 5.53.1.0 and higher.

Installation Steps:

  1. Fix the SmartBracket attachment panel using bundled screws. If using other tools, ensure they do not damage or deform the panel.
    • Warning: Double-sided adhesive tape is for temporary attachment only. It can dry out, causing falling, false triggering, and malfunction.
  2. Place the detector on the attachment panel. When fixed in SmartBracket, the LED blinks, signaling the tamper is closed. If the LED does not blink, check the tamper status in the Ajax app and the panel's fixing tightness.
    • Note: If someone detaches the detector or takes it off the attachment panel, the security system notifies you.
  3. Place the magnet on the attachment panel.

Maintenance:

Regularly check the detector's operational capability. Clean the detector body from dust, spider webs, and other contaminants with a soft, dry napkin suitable for tech equipment. Do not use alcohol, acetone, gasoline, or other active solvents to clean the detector.

Battery life depends on quality, triggering frequency, and the hub's ping interval. For example, if a door opens 10 times a day with a 60-second ping interval, DoorProtect Plus can operate for 7 years on the pre-installed battery. A 12-second ping interval reduces battery life to 2 years. When the battery is low, the system notifies the user, and the LED indicator smoothly lights up and goes off if a glass break is detected or the tamper is triggered.

Technical Specifications:

  • Detector actuation threshold: 1 cm (small magnet), 2 cm (big magnet).
  • Tilt sensor activation threshold: 5° or more (customizable).
  • Shock sensitivity: 3 levels.
  • Ignore first shock option: Yes.
  • Tamper protection: Yes.
  • Frequency band: 868.0–868.6 MHz or 868.7–869.2 MHz (depending on region of sale).
  • Compatibility: Operates only with Hub, Hub Plus, Hub 2, and ReX.
  • Maximum RF output power: Up to 20 mW.
  • Modulation of the radio signal: GFSK.
  • Radio signal range: Up to 1,200 m (without obstacles).
  • Socket for connecting wire detectors: Yes, NC.
  • Power supply: 1 battery CR123A, 3 V.
  • Battery life: Up to 5 years.
  • Installation method: Indoors.
  • Operating temperature range: From -10°C to +40°C.
  • Operating humidity: Up to 75%.
  • Dimensions: Ø 20 x 90 mm.
  • Weight: 29 g.
  • Certification: Security Grade 2, Environmental Class II in conformity with EN 50131-1, EN 50131-2-6, CLC/TS-50131-2-8, EN 50131-5-3.

Complete Set:

  1. DoorProtect Plus
  2. SmartBracket mounting panel
  3. Battery CR123A (pre-installed)
  4. Big magnet
  5. Small magnet
  6. Outside-mounted terminal clamp
  7. Installation kit
  8. Quick Start Guide

Warranty:

The warranty for "AJAX SYSTEMS MANUFACTURING" LIMITED LIABILITY COMPANY products is valid for 2 years after purchase and does not apply to the pre-installed battery. If the device malfunctions, users should first contact support; technical issues can often be resolved remotely. The full text of the warranty and a User Agreement are available. Technical support can be reached at support@ajax.systems.

AJAX DoorProtect Plus Specifications

General IconGeneral
BrandAJAX
ModelDoorProtect Plus
CategorySecurity Sensors
LanguageEnglish

Related product manuals