9
Installation (Cont.)
After Sales Support
1300 886 649 | info@tempo.org
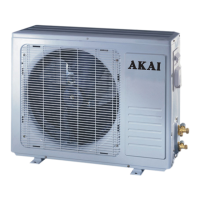
Note: The installed air
conditioner will not be
tightly affixed to the wall
unless it is installed as
pictured. The outflow
tube must be at the bot-
tom and its highest point
not higher than the water
basin.
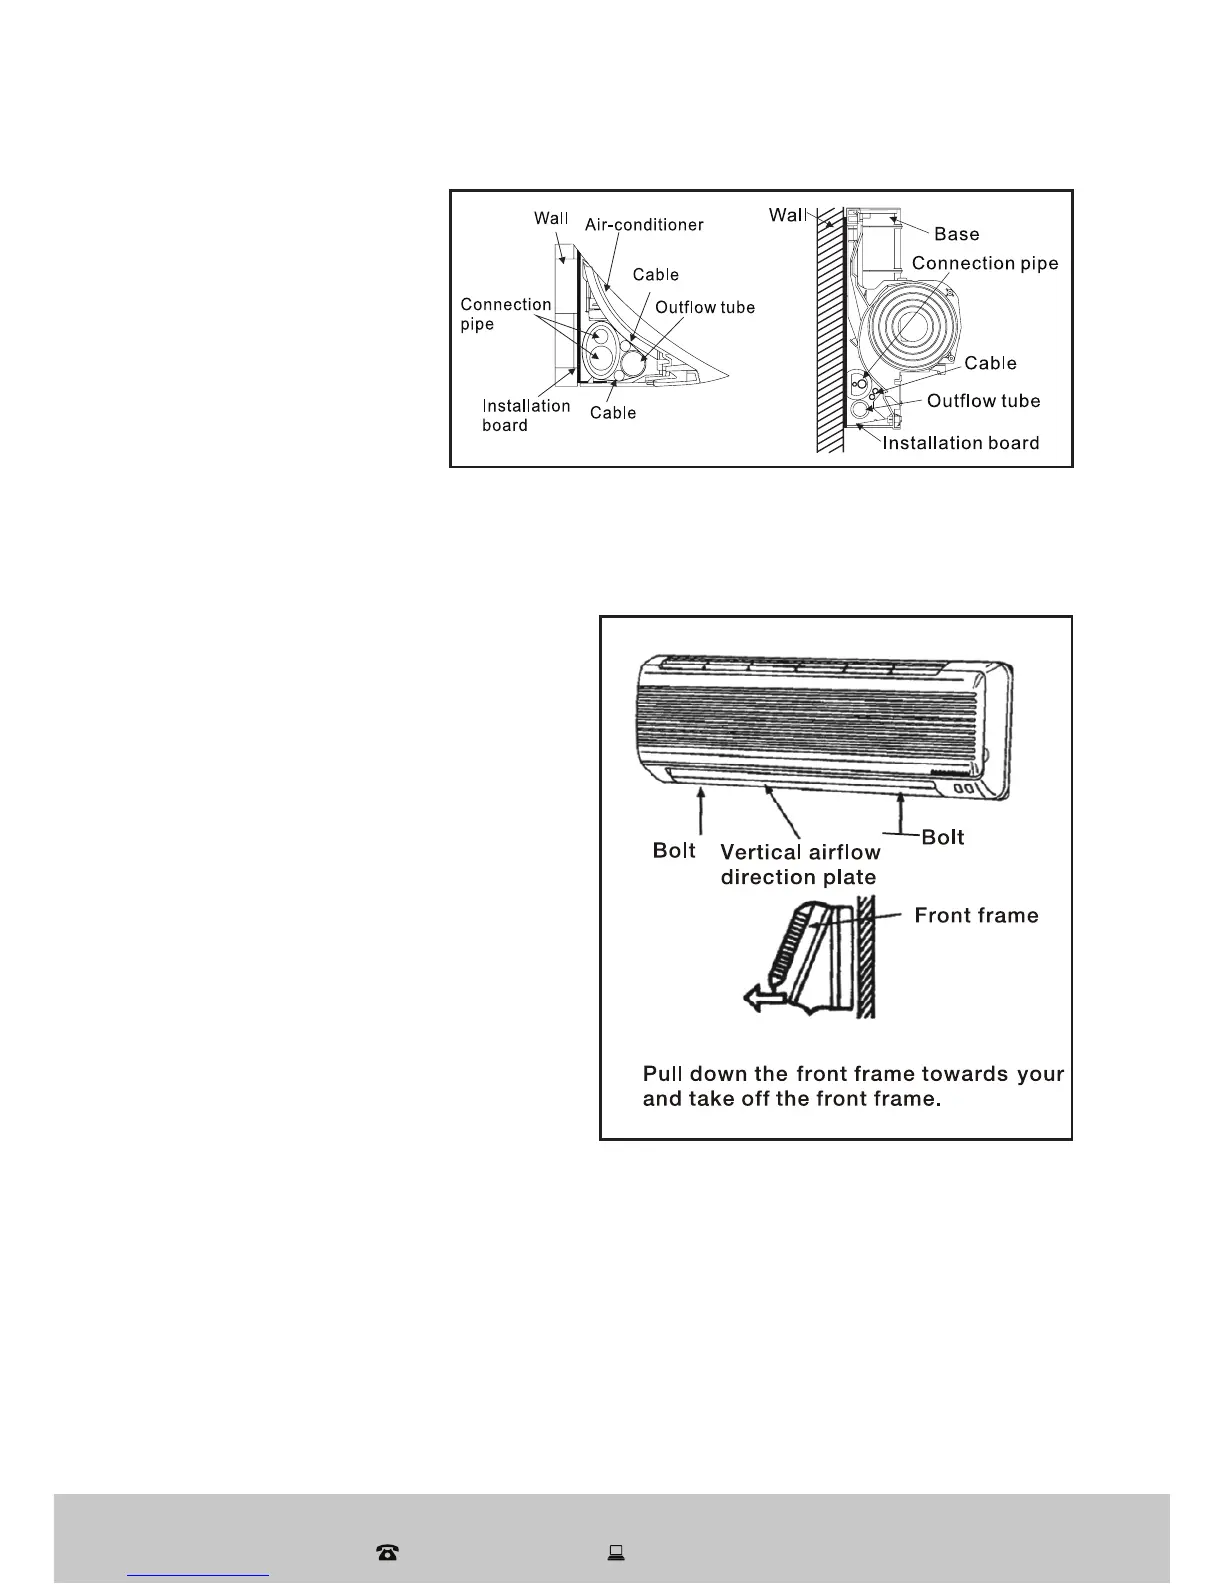
Checking the Water Discharge
• For maintenance, take off the front frame according to the following steps:
• Turn the perpendicular airflow
direction handle from [ I ] to
horizontal direction.
• As shown in the picture on the
right, take off the two covers from
the front frame and then unfasten
the two fixture screws.
• Pull the front frame towards
yourself and take it off.
• To put the front frame back, turn
the perpendicular airflow direction
handle from [ I ] to horizontal, then
proceed according to the fourth
and third steps above.
• You should check whether the
front frame is firmly inside the
fixture groove on the top.
• To check the water discharge, put a cup of water into the groove and check
whether the water flows through the water discharge hole.
 Loading...