RECORDING USING
MICROPHONES
*
Please read operating
precautions
carefully before
attempting
operation.
*
Connect
power
cord and load a tape.
STEREO
RECORDING
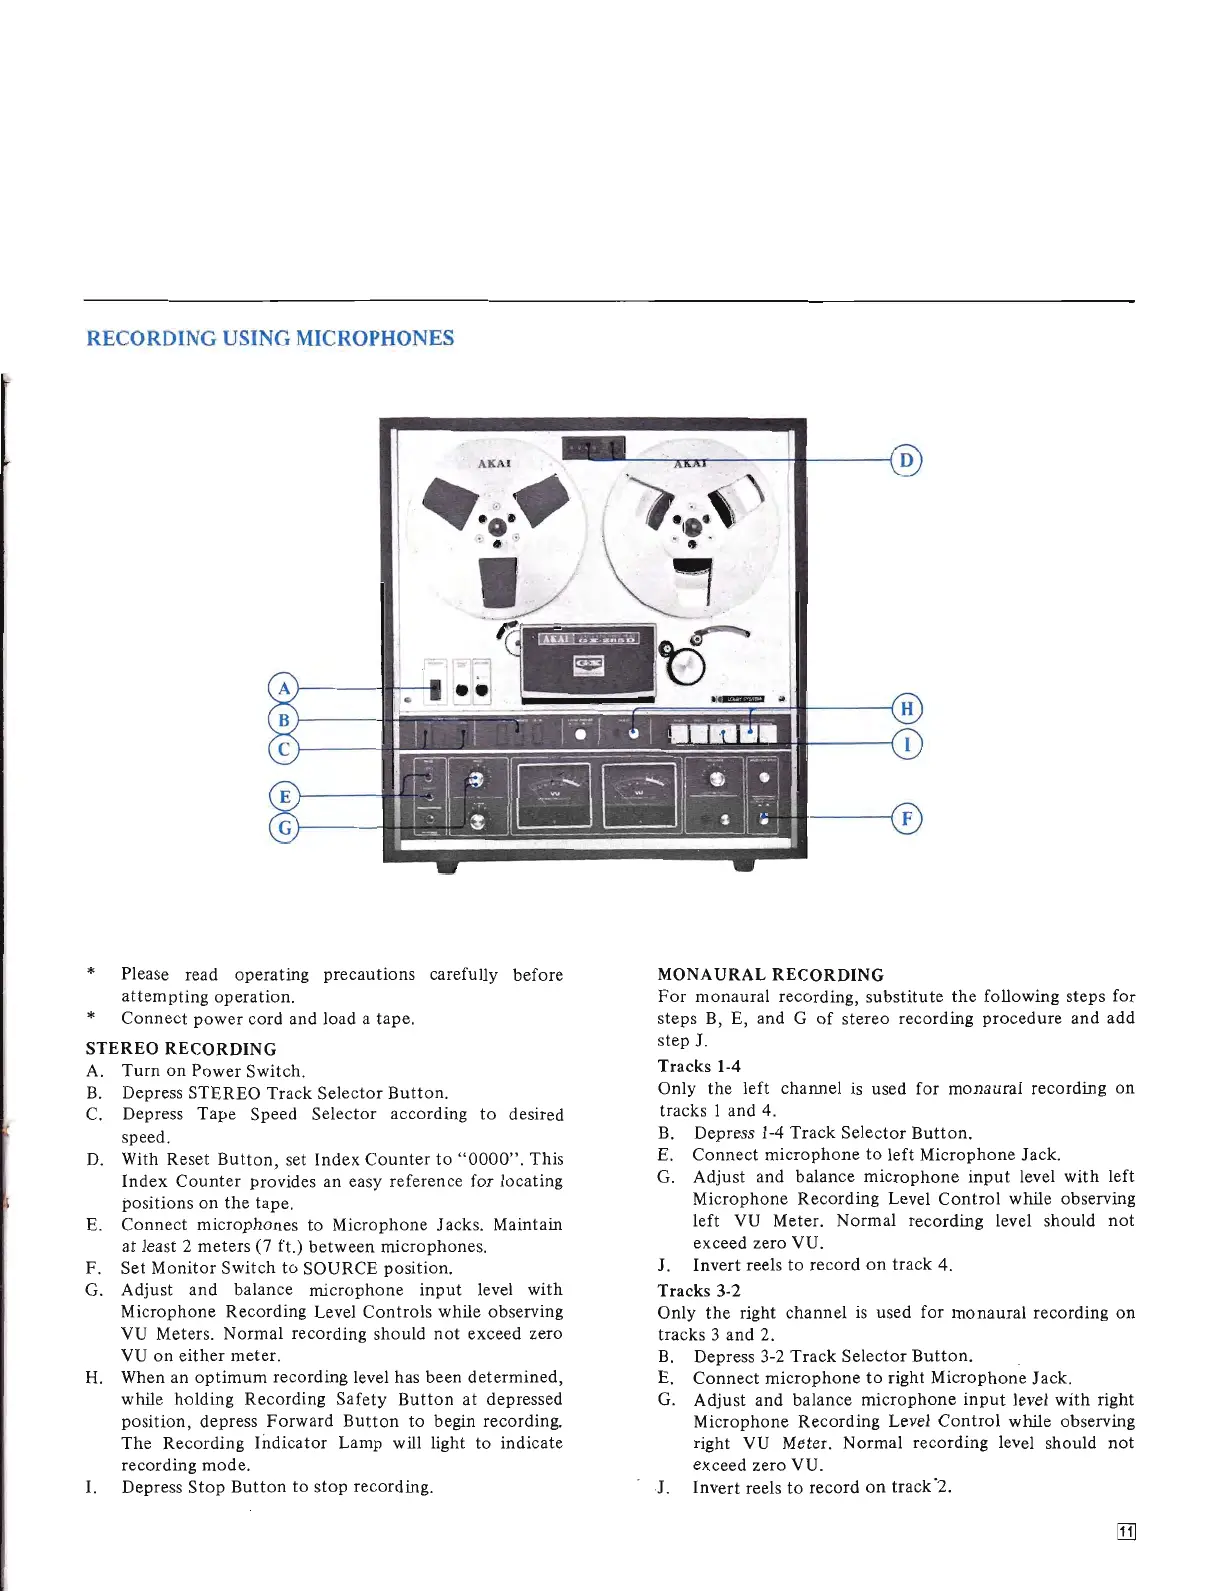
A.
Turn
on
Power Switch.
B. Depress
STEREO
Track
Selector
Button.
C.
Depress
Tape
Speed Selector according
to
desired
speed.
D. With Reset
Button
, set Index
Counter
to
"0000".
This
Index
Counter
provides an easy reference for locating
positions on
the
tape.
E.
Connect
microphones
to Microphone Jacks. Maintain
at least 2 meters (7 ft.)
between
microphones.
F. Set
Monitor
Switch
to
SOURCE position.
G. Adjust
and
balance
microphone
input
level
with
Microphone Recording Level
Con
troIs while observing
VU
Meters. Normal recording should
not
exceed zero
VU
on
either
meter.
H.
When an
optimum
recording level has been
determined,
while holding Recording
Safety
Button
at depressed
position, depress
Forward
Button
to
begin recording.
The
Recording
Indicator
Lamp will light to indicate
recording mode.
1.
Depress
Stop
Button
to
stop
recording.
MONAURAL
RECORDING
For
monaural recording,
substitute
the
following steps for
steps B, E, and G
of
stereo
recording
procedure
and add
step J.
Tracks
1-4
Only the left channel is used for
monaural
recording
on
tracks 1 and 4.
B. Depress
1-4
Track
Selector
Button.
E.
Connect
microphone
to
left Microphone Jack.
G.
Adjust and balance
microphone
input
level
with
left
Microphone Recording Level
Control
while observing
left
VU
Meter. Normal recording level should
not
exceed zero VU.
J. Invert reels
to
record
on
track 4.
Tracks 3-2
Only
the
right channel
is
used for
monaural
recording
on
tracks 3
and
2.
B.
Depress 3-2
Track
Selector
Button.
E.
Connect
microphone
to
right Microphone Jack.
G.
Adjust and balance
microphone
input
level
with
right
Microphone Recording Level
Control
while observing
right VU Meter. Normal recording level should
not
exceed zero VU.
1.
Invert reels
to
record
on
track
-2.

 Loading...