33
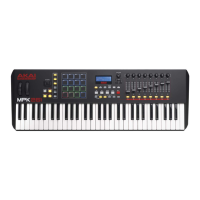
21. DAW Control: You can configure these buttons to send HID (Human Interface Device)
messages to your DAW (digital audio workstation—your music software). To learn how to
do this, please see the Edit Mode: Assignable Switches and DAW Control section.
Tip: You can save time by configuring these controls to send your most-often-used
commands to your software (e.g., copy, paste, save, zoom, etc.).
22. Preset: Press this button to enter Preset Mode where you can select and load different
Presets (or Programs).
23. Edit: Press this button to enter Edit Mode where you can edit the functions of the
keyboard, pads, knobs, buttons, and faders as well as each Preset's default settings.
24. Global: Press this button to enter Global Mode where you can set your global (system-
wide) preferences and execute MIDI reset commands.
25. Program Change: Press this button to enter Program Change Mode where you can send
a Program Change or Program With Bank Change message to a hardware or software
module.
26. Preview: Press and hold this button, and then press or move another control on the
keyboard to see the value that control will send without actually sending the value. This
helps you avoid sending erroneous controller messages due to the physical position of
the controller. (This is useful when switching between control banks where, for example,
the physical position of a fader may not correspond to the last value sent by the
controller.)
27. Loop: Press and hold this button to activate the Loop or Repeat feature in your software.
This button is considered a transport control, so it can be set to send the same
messages as the other transport control buttons: MMC (MIDI Machine Control),
MMC/MIDI SysEx, MIDI Start/Stop, or pre-assigned MIDI CC values.
Important: Your software must be able to loop or repeat in order to use this feature.
Also, make sure that you are using the MPK261 Preset named after your particular
software. If your software does not have a corresponding MPK261 Preset, configure the
Loop button in Edit Mode so it communicates properly with your software.
28. Transport Control Buttons: These five buttons are dedicated buttons for sending
conventional transport control commands: Rewind, Fast-Forward, Stop, Play, and
Record. These can be set to send MMC (MIDI Machine Control), MMC/MIDI SysEx, MIDI
Start/Stop, or pre-assigned MIDI CC values.

 Loading...