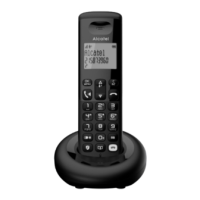
E260 S VOICE /
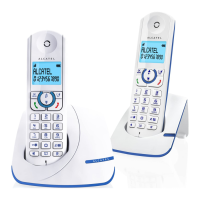
E260 S VOICE DUO /
E260 S VOICE TRIO
EN
| User Guide
Fig. 1.
Table. 1.
ENGLISH
BEFORE 1st USE
Connecting your phone:
• Connect plugs in corresponding sockets in the
base station.
Plug the telephone line into telephone socket and
insert power plug in an electrical outlet.
• Insert batteries in the handset and place it on its
base to start charging.
Before you start to use your telephone, charge batteries
continuously for 15 hours.
Use only plug adapter and rechargeable batteries
supplied with your phone.
After rst time power up (base unit is connected
to AC mains), welcome mode message will appear
on the screen (Fig.1) .
Select the country where you are using the phone
and conrm.
To select a dierent language, see Table 1.
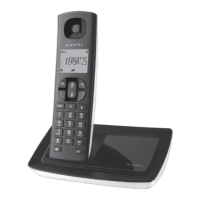
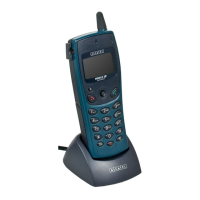
HANDSET / BASE STATION KEYS
1. MENU/OK key
2. Back/Correction/Intercom key
3. Navigation key/Call log access*/
Volume level increase
4. Navigation key/Volume level decrease
5. Talk key/Handsfree
6. Hang-up/Exit key
7. Direct access key to answering machine menu
8. Phonebook key
9. Call Block key*
10. Recall (Flash) key
- To access to operator services*
11. Redial list access
(in standby mode : press and hold)
12. Paging key
- To locate handset (short press) /
to start registration procedure. See General
Settings chapter.
*Subject to subscription and availability of the service
from the xed line operator.
DISPLAY ICONS
Battery level indicator
(full , mid , empty ).
Indicates that phone is on line or held.
Icon blinks when receiving an incoming call.
Indicates you have a new voice mail message*.
Answering machine is on;
blinking in case of new message
Indicates you have new missed calls*.
Displays when the alarm clock is activated.
Displays when handsfree is activated.
Displays when ringer volume is turned o.
Indicates that the handset is registered and
within range of the base station.
Icon blinks when the handset is out of range or
is searching for a base.
GENERAL SETTINGS
This phone can be customized according to your
preferences, to access the dierent possibilities press:
.
• To customize handset (Alarm, Ring setup,
... Language, ... Date & Time): or select HS
SETTINGS / .
• To change Pin code, Flash time: or select BS
SETTINGS / .
For example, to change language or ashtime:
• / or select HS SETTINGS / / or
select LANGUAGE / / or select your
desired language / .
• / or select BS SETTINGS / /
or select FLASH TIME / / or select
SHORT / MEDIUM or LONG / .
To register a handset (if needed):
On main base, press and hold for 10s the paging key
(number ).
On the handset to be registered: press / / /
select REGISTRATION / press / enter PIN code
(default 0000) / press , handset is paired in few
seconds.
USING THE PHONE
Receive and end a call
• /
Make a call
• either before or after dialing your number.
• From redial list: Press / or / .
• From call log list*: Press / or / .
• From direct memories: press and hold on or
or in idle mode.
• From phonebook: / or / .
• During a call, to activate/desactivate handsfree:
.
To make an internal call
• If only 2 registered handsets: .
• If more than 2 registered handsets: / or
select the handset number / .
• To ring all handsets to intercom: / or
select CALL ALL / .
To make a three-party conference call
(with one external, two internals):
During call:
• Press / / select INTERCOM / / or
select the handset number / .
• Press on the called handset to answer.
• Press and hold for 2 seconds on the calling
handset to establish conference call.
PHONEBOOK AND DIRECT MEMORIES
SETTINGS
To register in phonebook (50 entries)
/ select PHONEBOOK / / / select ADD /
/ enter name of contact / / enter number of
contact / / or to select melody / / to save
as CONTACT.
To register the direct memories in keys 1, 2, & 3
/ or select HS SETTINGS / / or
select DIRECT MEM / / or select one key
(Key 1, Key 2, Key 3) / / enter the number / .
Notes:
- Phonebook is shared with duo, trio handsets.
ANSWERING MACHINE SETTING BY
HANDSET
Set the answer mode
/ or to select ANS.MACHINE / / or
to select TAM SETTINGS / / to select ANSWER
MODE / / or to select ANSWER ONLY or
ANS & REC / .
Record a personalised outgoing message
/ or select ANS. MACHINE / / or
select TAM SETTINGS / / or select OGM
SETTINGS / / or to select ANSWER ONLY
or ANS & REC / / or select RECORD MESS
/ to start recording / to end recording.
Change the default outgoing message language
(if needed)
/ or to select ANS.MACHINE / / or
to select TAM SETTING / / or to select TAM
LANGUAGE / / or to select your preferred
language / .
Set answer delay
/ or to select ANS.MACHINE / / or
to select TAM SETTING / to select ANSWER
DELAY / / or to select 2-10 RINGS / .
If you have subscribed to a voice mail service from
your Operator, make sure to set shorter delay on your
phone, so that your phone can answer and record a
message.
ANSWERING MACHINE USE BY
HANDSET
You can control the Answering Machine by short cuts
on the keypad instead of going through the menu.
Turn the answering machine on or o
/ or to select TAM ON/OFF / / or
to select ON or OFF / .
Playback/Delete messages/Others
/ MSG PLAYBACK / / to start playback in
handsfree mode. While you are listening to a message,
press to stop / to go forward / to go
backward / to delete message.
Answering machine menu can also be reached by:
/ or to select ANS. MACHINE / .
Remote access to answering machine
Dial your home phone number. While the answering
machine is playing the outgoing message, press
and enter remote access code (default 0000).
1/2