AUS
WDV12 Assembly/Operation
AFTER SALES SUPPORT
15
1300 855 831
support@scheppach.com.au
MODEL: WDV12 PRODUCT CODE: 703406 10/2020
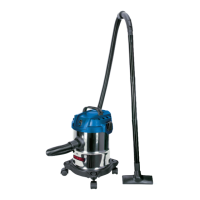
Fitting the suction hose (Fig. 7)
Connect the suction hose (11) to the corresponding connector on the wet and dry
vacuum cleaner, depending on the application required.
Vacuuming:
Connect the suction hose (11) to the suction hose connector (4).
Blowing:
Connect the suction hose (11) to the blow connector (10).
Mounting the suction tube, hose and nozzles (Fig. 8)
1 Push the 3 parts of the suction tube (17) together.
2 Connect the 3-part suction tube (17) with the suction hose (11).
3 Mount the oor nozzle (15) or the crevice nozzle (16) onto 3-part suction tube
(17).
VIII. Operation
m Warning! Switch o the appliance if liquid or foam is emitted with the ex-
haust air when wet vacuum cleaning.
On/O switch (Fig. 1.1)
Press the On/O switch (2) to switch on.
Press the On/O switch (2) again to switch o.
Dry vacuuming (Fig. 1.3)
Use the paper bag (13) and the cloth lter (14) for dry vacuuming. Always ensure that
the lters are correctly mounted.
Use the oor nozzle (15) for surface cleaning applications. The crevice nozzle (16) is
used for hard to reach areas.
The paper bag (13) is full, when the suction function is noticeably reduced. For emp-
tying instructions, read the "Maintenance and cleaning" chapter.