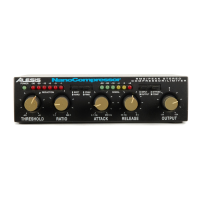
Description of Controls
Output
The [OUTPUT] knob controls the level of the NanoCompressor’s output. The Output
control is useful for making up gain which was reduced by the compression circuit
or matching the input level of a mixer or recorder. If the REDUCTION meter shows
that the input signal is being attenuated by -6dB, then the Output control generally
should be set around +6dB. The [OUTPUT] knob is labeled with tick marks every 6
dB (±6, 12, 18, 24dB). This control is disabled if the [BYPASS] button is pressed.
Hard/Soft
The [HARD/SOFT] switch is used to switch between Hard and Soft knee compression
styles. When the NanoCompressor is set for Hard knee, the compression ratio applies
only to signals above the threshold level. If the NanoCompressor is set for Soft knee,
the compression ratio gradually increases from 1:1 to the currently selected ratio
over a range of approximately 5 dB, so that the transition from uncompressed to
compressed is more gradual. The difference between Hard Knee and Soft Knee is
more obvious at high compression ratios. Once the input signal crosses the
Threshold, the unit will compress the signal at the full ratio level.
Soft knee compression is useful when performing high-ratio compression or limiting
on a signal. When the compression gradually fades in, it doesn’t sound as obtrusive
as when it suddenly starts limiting the signal. If you’re looking for a “brick wall”
limiter, the switch should be set for Hard knee to stop any transients from slipping
through without affecting lower level signals. Lower Ratio levels may require a hard
knee setting so that the compression slope isn’t too narrow and you loose some of the
compressive “punch”.
Peak/RMS
This switch selects either the Peak or RMS compression style, which affects the
detection of the signal input. When set for Peak, the compressor is looking for peaks
in the input level. For example, if your tape recorder overloads every time the kick
drum hits, you can use Peak limiting to keep the kick from peaking above the rest of
the music.
RMS compression works by detecting a signal’s average level, much like our ears
adjust to loud or soft sounds. In RMS mode, your source can have more of a
dynamic, transparent sound (because short peaks don’t clamp down the overall
level) but still be prevented from getting too loud.
When the NanoCompressor is set for RMS compression, the Attack and Release controls will
be program dependent, and therefore disabled.
Generally, if you’re trying to raise the apparent volume of the track for radio or
mixdown, use RMS compression. If you’re trying to stop peaks from distorting your
tape recorder or amplifier, use Peak mode.
✪