Do you have a question about the Alesis SR18 and is the answer not in the manual?
| Polyphony | 32 voices |
|---|---|
| Effects | Reverb, EQ, Compression |
| MIDI | In/Out |
| Display | Backlit LCD |
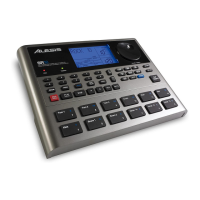
| Pads | 12 velocity-sensitive pads |
| Kits | 100 User Kits, 100 Preset Kits |
| Songs | 100 User |
| Outputs | 2 x 1/4" (L/R), 1 x 1/4" (Headphones) |
| Inputs | 1 x 1/4" (aux in) |
| Power | 9V DC |
Lists the items included in the SR18 package, such as the unit, power adapter, and manuals.
Illustrates how to connect the SR18 to external audio equipment and power sources.
Explains the difference between Patterns and Songs, their structure, and purpose.
Describes Preset and User patterns, and how to switch between them.
Details the four sub-patterns within each pattern: Main (A/B) and Fill (A/B).
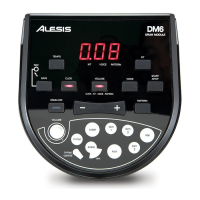
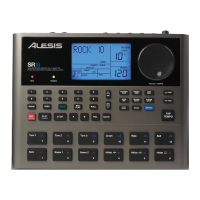
The screen showing system parameters, settings, and pattern information.
Buttons to select sound categories for the pads.
Enables playing rapid drum hit sequences by holding a pad.
Sets or changes the tempo by tapping or using control dials.
Indicators for tempo synchronization and recording status.
Explains the A/B main patterns and associated fill patterns for musical variation.
Tools for deleting unwanted data or silencing instrument layers.
Controls for incrementing, decrementing, and scrolling through menus and settings.
Buttons to switch between Pattern/Song and Preset/User modes.
Accesses menus for System, Record, Drum Set, and Effects configuration.
Buttons for playback, recording, and stopping sequences.
Steps to choose and start playback of individual patterns.
Methods for setting the tempo via tapping or controls.
How to halt pattern playback.
How to begin playing a sequence of patterns.
Transitioning between A/B patterns within a sequence.
Choosing new patterns while a sequence is playing.
How to play fills that transition between A/B patterns.
Methods for playing fills that do not change the current pattern.
Activating the mode for pad-triggered pattern playback.
Playing patterns by tapping pads with looping capability.
Customizing which pattern is triggered by each pad.
Steps to select Pattern Mode, User Patterns, and an empty pattern slot.
Adjusting Quantization and Swing for desired rhythmic feel.
Initiating the recording process using the REC and PLAY buttons.
Playing pads to record patterns with multiple sound layers.
Using the ERASE function to remove mistakes during recording.
Steps to stop recording, play the pattern, and record more.
Instructions for muting or unmuting drum, percussion, and bass tracks.
Accessing and navigating the options for drum sets and sounds.
Choosing drum kits and hearing their sounds.
Changing sounds assigned to pads and adjusting their properties.
Choosing specific bass sound sets to complement drum sets.
Storing user-created drum sets to memory.
How to leave the drum set management interface.