3Installation
Studytheinstructionscarefullyandpayspecialattentiontothewarnings!
AlwayschecktheAgitatorbeforeoperation-seechapter3.3Pre-usecheck.
TheAgitatorisforpermanentfastening.
Makesurethatthemotorcorrespondtotheenvironment.
Guidelines Guidelines
Guidelines
for for
for
installing installing
installing
Flat Flat
Flat
Shaped Shaped
Shaped
W W
W
elding elding
elding
Flange Flange
Flange
(FSWF), (FSWF),
(FSWF),
ALB ALB
ALB
Agitator: Agitator:
Agitator:
(for (for
(for
mounting mounting
mounting
flange flange
flange
with with
with
nose) nose)
nose)
CAUTION CAUTION
CAUTION
AlfaLavalrecommendthatallotherweldingtasksonthetankarefinishedbeforeinstallingweldingflangeintank.
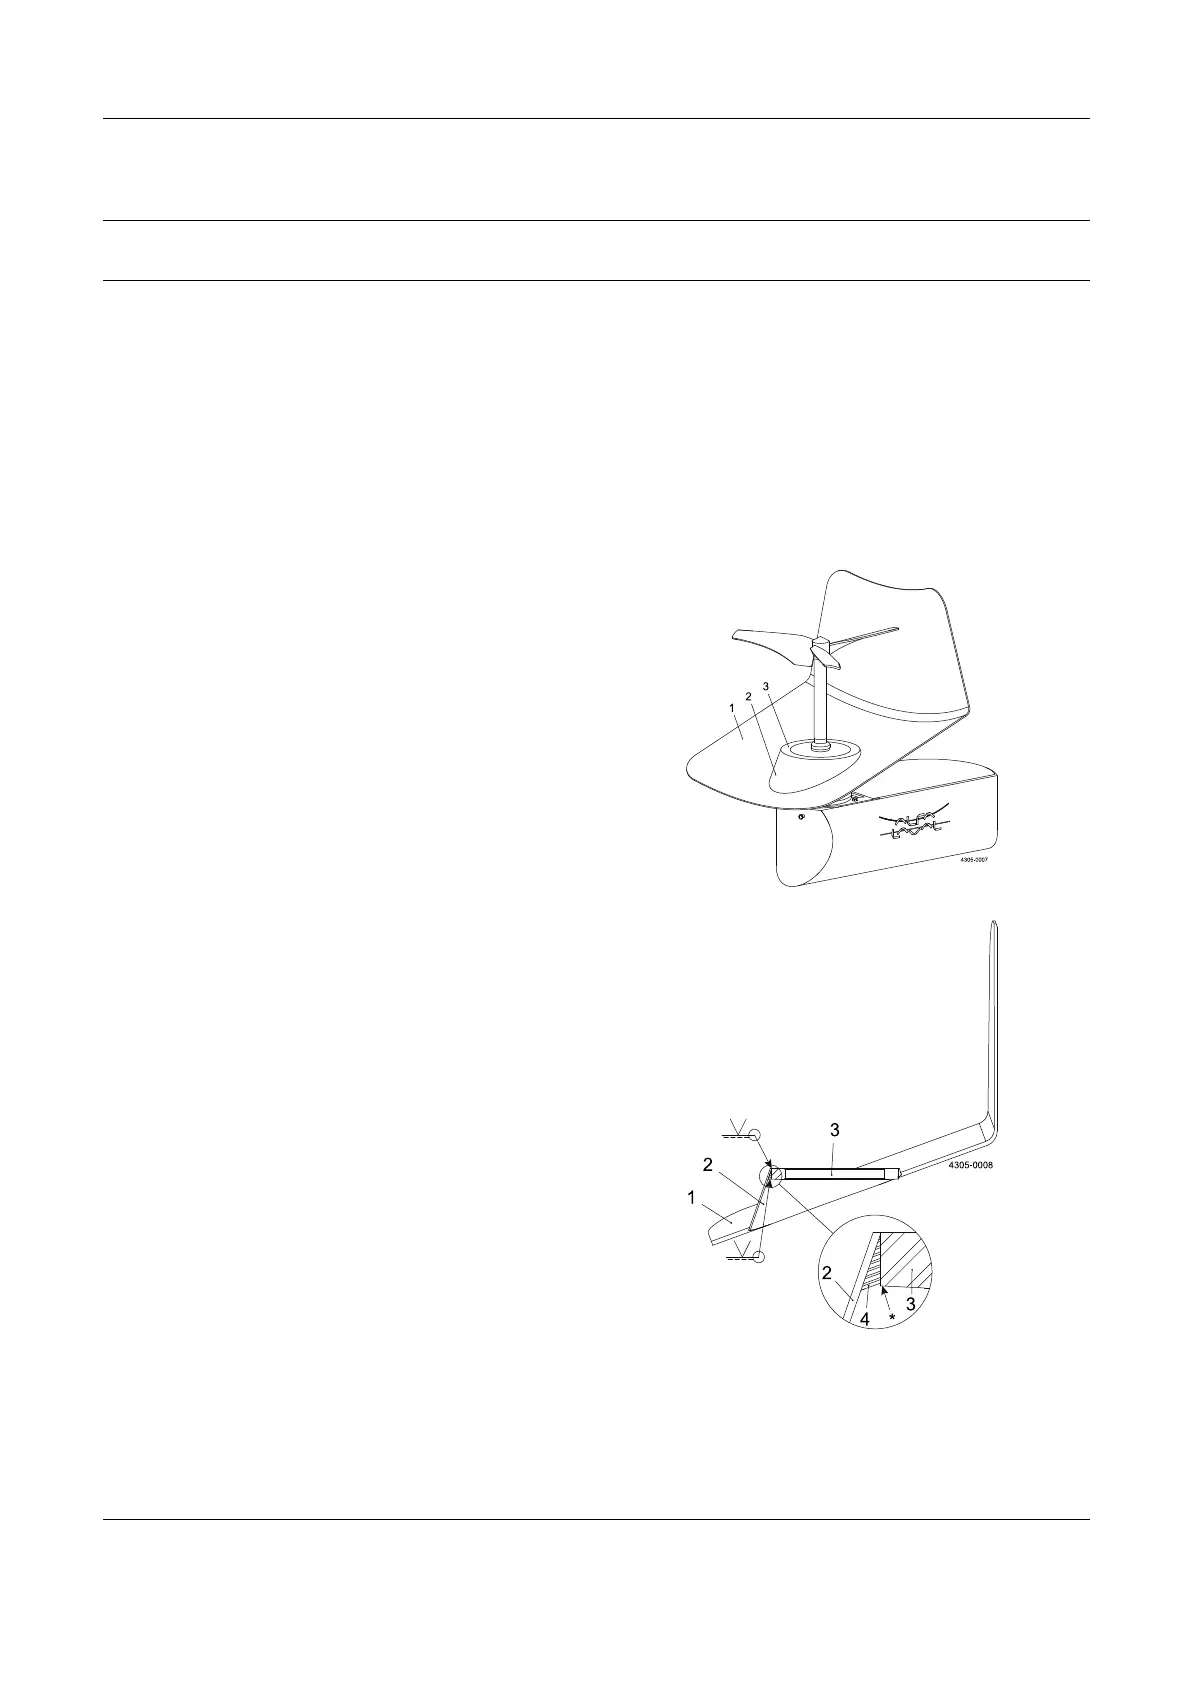
ALBAgitatormustbeinstalledinthetankasshowninchapter6.3MountingangleforbottommountedAgitatortypeALB
whichcanbeachievedasshownontheillustrationbelow.
IncaseofinstallationofWeldingFlangeparalleltotankbottomsurface(shaftperpendiculartotankbottomsurface)itisalways
recommendedtouseabead/cone.Thisistoensurethattankbottomstresses/forcesarenottransmitteddirectlytothe
WeldingFlangeincreasingtheriskofleakages.
1.Tankbottom
2.Coneforweldingflange
3.Weldingflange
1.Tankbottom
2.Coneforweldingflange
3.Weldingflange
4.Weldings
CAUTION CAUTION
CAUTION
Ensurethatnoweldingsareappliedtotheoutsidesurfaceoftheweldingflange*astheAgitatorsmountingflangehasthesame
sizeastheweldingflange.Ifweldingsbymistakeareappliedtothesurfaceoftheweldingflangeitmustberemovedbygrinding,
orthelike,toensureacorrectfitandinstallationofthemountingflange.
15
 Loading...