3Installation
Studytheinstructionscarefullyandpayspecialattentiontothewarnings!
AlwayschecktheAgitatorbeforeoperation-seechapter3.3Pre-usecheck.
TheAgitatorisforpermanentfastening.
Makesurethatthemotorcorrespondtotheenvironment.
W W
W
elding elding
elding
pr pr
pr
ocedur ocedur
ocedur
e e
e
FSWF FSWF
FSWF
, ,
,
ALB ALB
ALB
Agitator: Agitator:
Agitator:
(for (for
(for
mounting mounting
mounting
flange flange
flange
with with
with
nose) nose)
nose)
NOTE NOTE
NOTE
AlfaLavalrecommendaweldingtoolwith,ifpossible,buildincoolingbyflowingwater,tobemadeandfixedtotheFSWFto
ensureshapeandformoftheFSWFduringweldingandinstallation.
IngeneralAlfaLavalrecommendtoweldtheweldingflangeontoabendedrimofthetankbottomplate–thisistosecure
adequateflexibilityathighloads,e.g.whenthetankisfilled.Ifabendedrimisimpossibletoobtainduetoahighplate
thickness,AlfaLavalrecommendtoweldtheweldingflangeontoaconeshapedplatesection.
Ifnotfollowingtheaboverecommendationstherewillbeariskthattheflangecandeform,especiallyathightankfillings,which
cancausealeakagebetweentheweldingflangeandtheAgitatormountingflange.
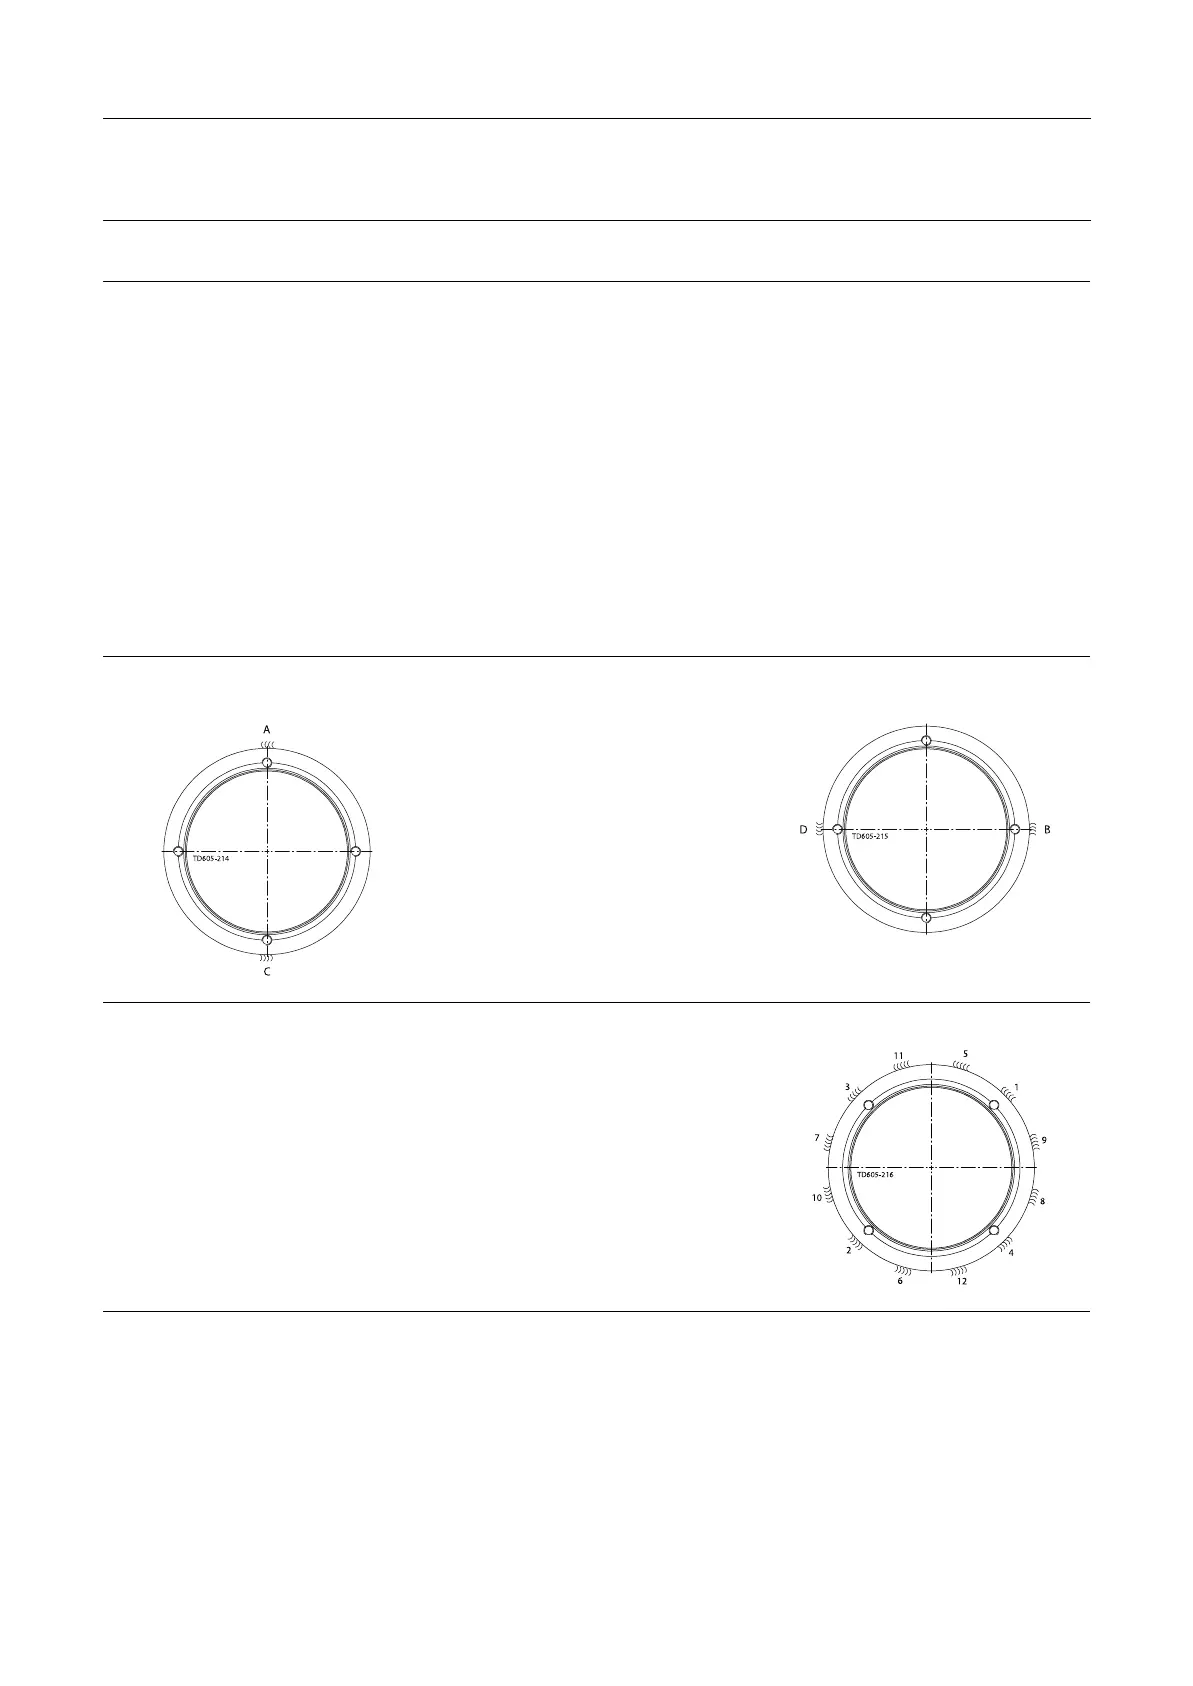
Step Step
Step
1 1
1
Positiontheflangecorrectly.
Always Always
Always
allowflangetocooltoambienttemperatureaftereachsectionhasbeenwelded.
Step Step
Step
2 2
2
Spotweldfromoutside.
Adjustalignment!
Step Step
Step
3 3
3
Spotweldfrominside
18
 Loading...