1
www.observint.com
ALI-IPV3030RV_CQ
5/16/14
What’s in the box
Your camera includes this document and the items shown below.
Gang box
adapter plate
(camera side
shown
CD-ROM
manuals and
software
Security
L-wrench
Surface
mount drill
template
Weatherproof
LAN coupling
Mounting
hardware
packet
Video test
cable
Step 1. Install the camera
The camera includes hardware to install it directly to a mounting surface, or onto a single- or double-gang
electrical box using the gang box adapter plate shown above. Camera drop cables can be routed through
the conduit port on the side of the lower dome, through the mounting surface or into an electrical box, if
used. To install the camera:
1. Remove the dome assembly by loosening the three captive dome screws using the security
L-wrench provided.
2. Install a MicroSD card in the SD card slot, if needed.
3. To mount the camera, do one of the following:
To mount the camera directly onto a mounting surface
1. Determine the best fasteners
for securing the camera
to mounting surface. The
mounting hardware provided is
suitable for most surfaces.
2. Using the Drill Template
provided, mark the location of
the mounting screw holes. If
the drop cable will be routed
through the mounting surface,
mark the location of the hole for
the camera drop cables.
3. Drill holes for the mounting
fasteners, and for the drop cable
where needed.
4. Continue the installation with
Connect camera drop cables
to peripherals, LAN and
power below.
Mounting
screw hole
Wall insert
Lower
dome
assembly
Mounting
screws
Drop
cables
To mount the camera onto an electrical box
1. Install a single- or double-gang electrical box at the location where the camera will be installed.
2. Secure the at side of the gang box adapter plate to the open side of the box using appropriate
screws.
3. Continue the installation with Connect camera drop cables to peripherals, LAN and power
below.
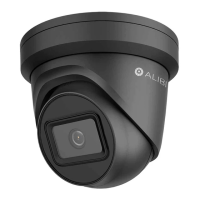
ALI-IPV3030RV IP Dome Camera
Quick Installation Guide
This document guides you through the basic steps to install and congure the ALI-IPV3030RV cameras. The
ALI-IPV3030RV camera features:
• 3MP high resolution sensor
• 2.8 - 12 mm vari-focal lens
• HD real-time video with H.264 compression
• IR LEDs with illumination up to 65 feet
• 3D-DNR noise reduction, Wide Dynamic Range (WDR), Backlight compensation
• Dual power capable - Power over Ethernet (PoE) or 12 Vdc
• Weatherproof - IP66 rated and Vandalproof - IK10 rated
• Internal micro-SD card storage up to 64GB (card not provided)
• Audio I/O, Alarm I/O
• Available Wall Mount Bracket (ALI-IPV31WB)
• Available Junction Box (ALI-IPV31JB) for Wall Mount Bracket (ALI-IPV31WB)
For more information about the software features of this camera, please refer to the ALI-IP Camera
Software User Manual.
Lower
dome
assembly
Dome
assembly
IR array
Lens
Conduit
port
Lower
dome
assembly
Product label
Holes for
mounting
screws (3)
D
rop cable for
power and LAN
D
rop cable for
peripherals
Reset
button
Lens
IR LED
array
D
rop
cables
V
ideo test
monitor
cable
connector
C
amera gimbal
tilt pivot point
MicroSD
card slot
W
ide (W) /Tele (t)
zoom control
N
ear (N) / Far (F)
focus control
D
ome
tether
D
ome
screw
holes (3)
M
ounting
screw
holes (3)
Camera with dome cover removed