1
www.observint.com
ALI-TS2015R_CQ
170706
What you need
To install the camera, you will need:
• 12 Vdc power source. See Specications for requirements
• Tools and additional fasteners (may be required) for mounting the camera
• Phillips #2 screwdriver
• Video and power extension cable
• HD-TVI video setup monitor (optional)
Installation
Before installation:
• Make sure that the device is in good condition and all the assembly parts are included.
• Check the specication of the products for the installation environment.
• Make sure that the wall or the ceiling is strong enough to withstand 3 times the weight of the camera.
• To avoid re or shock hazard, use only UL listed power supplies. Verify that the power supply will
provide the rated voltage and wattage for the camera. See the Specications section.
During installation:
• Camera Lens: Handle the camera carefully to prevent scratching or soiling the lens. If the lens or IR
array shield becomes soiled, clean it only with approved products. See the
Cleaning section.
• Power supply: Camera drop cable: The camera drop cable includes two connectors:
— Video BNC connector: For transmission of the video signal across a coax (75 Ω) extension
cable to a 5 MP HD-TVI compatible recorder.
— Power connector: When applying power, observe the power polarity. See the picture to the
left for the connector polarity conguration.
1. Using the drill template provided with your camera, mark the location of the screws that anchor the
base plate to the mounting surface. If you are routing the drop cable through base, also mark the
position of the hole for the drop cable.
2. Drill holes for the screws that anchor the base to the ceiling. The mounting hardware provided is
appropriate for most surfaces. However, depending on the surface materials, more appropriate
fasteners may be required.
3. Drill a 3/4” hole for the drop cable, if necessary. The drop cable can be routed through the mounting
surface, or through a cable channel in the mounting plate.
4. Route camera video and power extension cables between camera location and the monitoring
device (monitor, DVR, etc.).
5. Remove the mounting plate from the camera assembly
u
Loosen the clip plate captive screw with the security L-wrench provided.
u
v
Clip plate
Enclosure
v Slide the clip plate out as shown in the photo above.
Separate the mounting base from the enclosure.
6. Anchor the mounting base to the ceiling with appropriate fasteners. If the camera drop cable will be
routed through a cable channel, make sure it is in place before securing the mounting plate to the
surface.
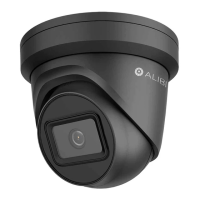
ALI-TS2015R 5MP HD-TVI 135 ft IR
Varifocal Outdoor Turret Camera
Quick Installation Guide
The ALIBI ALI-TS2015R indoor/outdoor HD-TVI turret cameras include a high sensitivity sensor with the
ability to send HD video across standard coaxial cable. This camera features:
• 5 MP Megapixel High Performance CMOS
• 135 ft Smart Full Frame IR
• Motorized 2.8 ~ 12 mm VF lens
• OSD menu (up-the-coax OSD control), DNR, Smart IR, True Day/Night
• IP67 Weather rated housing
• Compatible with a 5 MP HD-TVI recorder (HD-TVI DVR)
Mounting
base
Enclosure
Cable
guide (2)
Clip plate
Orientation
mark (UP)
Lens
Turret
Photosensor
ALI-TS2015R camera
Power
Connector
HD-TVI video
BNC connector
Camera drop cable connectors
What’s in the box
• Camera assembly
• Mounting hardware
• Drill template
• Security L-wrench for clip plate
• This instruction guide