Alienware Area-51 m5750 Technical Reference
57
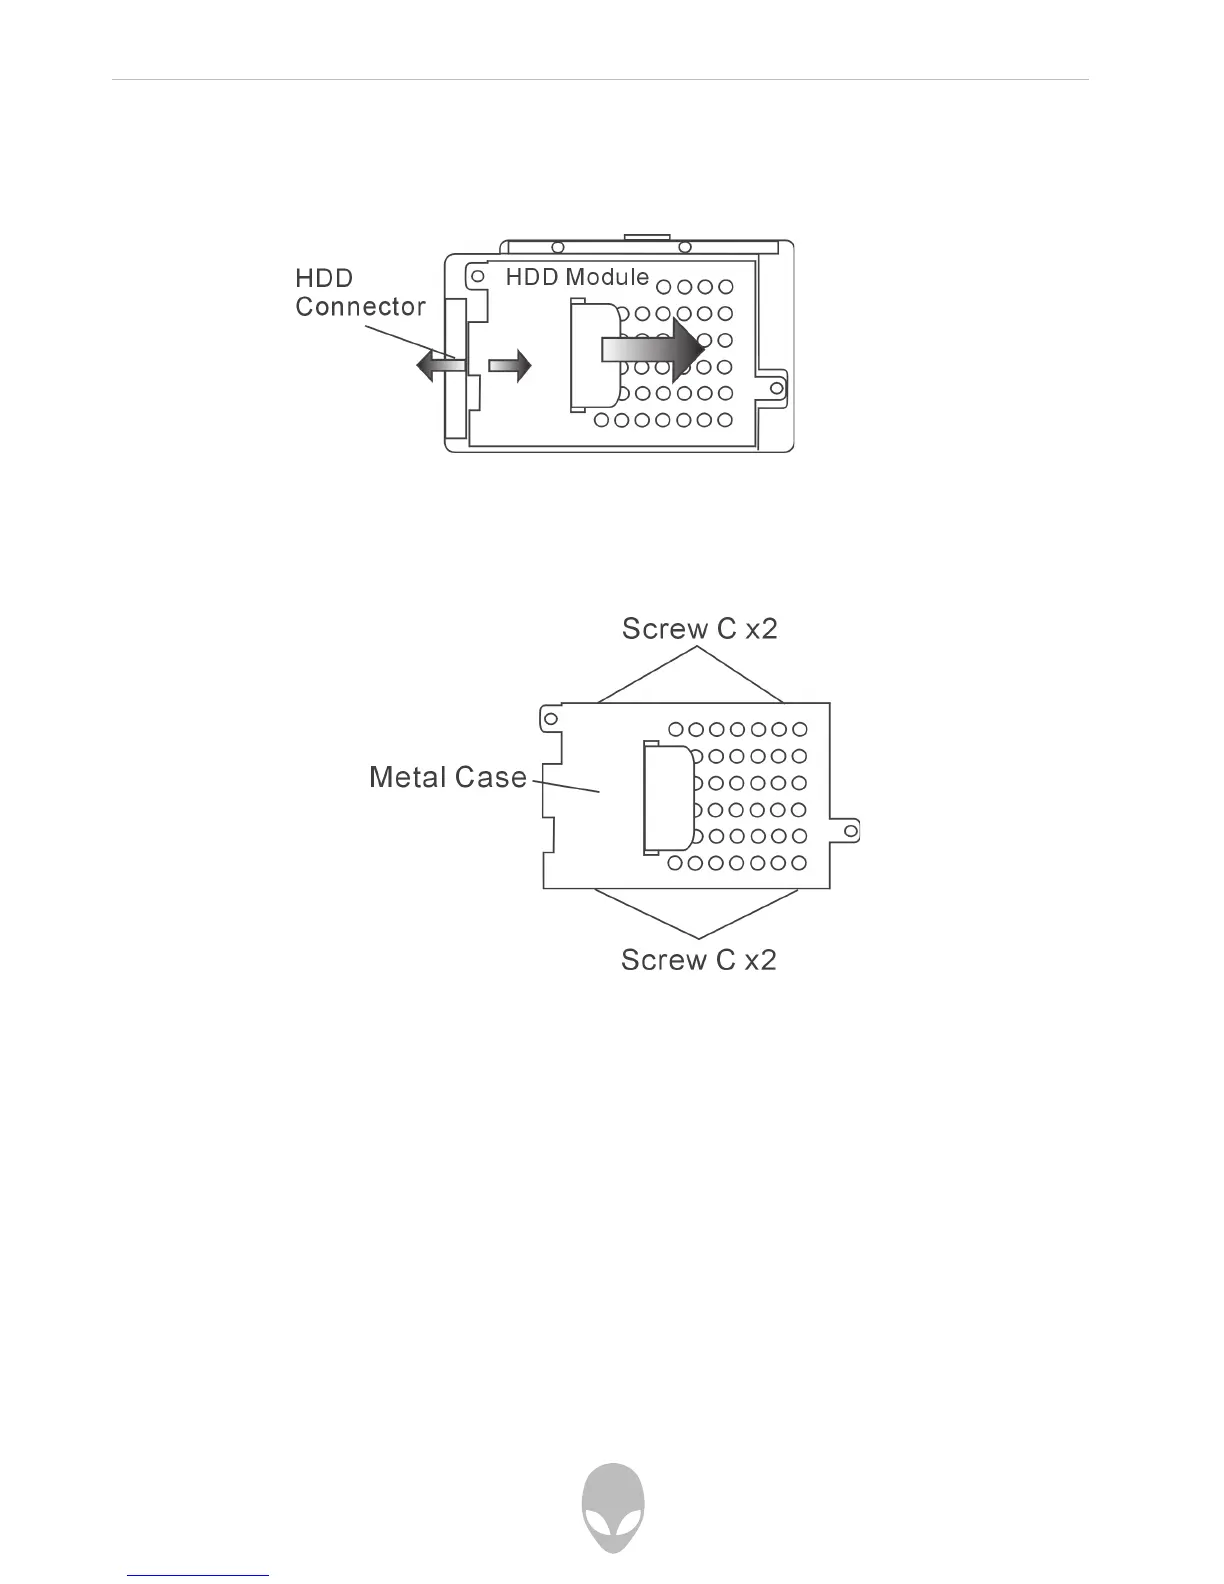
6. Push the HDD module to the right and separate it from the connector. Lift the
module away from the bay.
7. Locate and remove 4 Screw C’s from the HDD module. Remove the metal case.
8. Re-attach the metal cover to the new hard drive and tighten 4 Screw C’s.
9. Re-attach the HDD module to the HDD connector. And re-attach 1 Screw B.
10. Put the HDD Cover back and re-attach 2 Screw A’s.
Congratulations! You have now completed the hard drive upgrade. When you boot up your
notebook, you may need to create a primary HDD partition and reformat the new drive,
re-install O/S, drivers, and all the necessary applications.