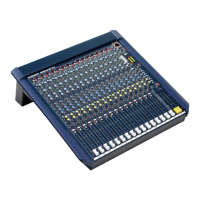
Do you have a question about the ALLEN & HEATH MixWizard WZ3 16:2 and is the answer not in the manual?
Type | Analog Mixer |
---|---|
Channels | 16 |
Phantom Power | Yes |
Power Supply | Internal |
Buses | 4 |
Lists the conditions for warranty coverage, including proper installation and authorized repairs.
Operate console with covers fitted; only qualified personnel should remove covers for internal settings. Connect to specified mains power unit.
Protect from moisture, ensure adequate ventilation, avoid heat, and maintain proper grounding for safety.
Refer servicing to qualified personnel. Install correctly and avoid direct amplifier connections.
Avoid heavy objects, scratching, rough handling, and vibration to protect controls and cosmetics.
Protect from dirt, dust, heat, vibration; avoid smoke, spills, and moisture.
Use soft brush and dry cloth for cleaning. Protect controls during transit; use adequate packing.
Avoid operating at excessively high volumes to prevent hearing damage.
Introduces the MixWizard series, its compact design, high standards, and sonic performance.
Details features like EQ, aux sends, effects processor, and different input counts for models.
Specifies the number of inputs for WZ³16:2 and WZ³12:2 models.
Mentions available accessories like backup power supply and LED lamp.
Illustrates controls for mono input channels, including GAIN, HPF, EQ, AUX sends, PAN, MUTE, PFL.
Shows controls for stereo inputs (ST1-ST4) and stereo returns (ST5/FX, ST6).
Displays controls for Aux masters (1-6), ST5/FX, ST6, and main L, R, M outputs with faders and meters.
Describes the WZ³16:2 and WZ³12:2 models and mentions other series models.
Explains the console's professional live sound mixing design, build quality, and chassis.
Details features like EQ, aux sends, effects processor, mono output, and backup supply input.
Details how to set up the console for free-standing operation with side trims.
Explains the process of removing side trims and rotating the connector pod for rack mounting.
Provides crucial warnings about not removing the connector pod and ensuring ventilation.
Instructions on reading safety warnings, checking mains supply, and connecting the IEC plug.
Explains the dual reasons for grounding: safety from shock and audio performance improvement.
Recommends turning off amplifiers before the console and vice-versa for clean power-up.
Details how to connect an optional backup power supply for redundancy.
Illustrates balanced and unbalanced connections for XLR and TRS plugs for input/output.
Shows how to wire insert cables (tip/ring/sleeve) and headphone connections.
Depicts Y-adapters for splitting signals and common cable types like instrument and mic cables.
Recommends using high-quality XLR and 1/4" TRS cables for optimal performance.
Explains how ground loops cause hum and suggests solutions like checking ground paths.
Advises keeping audio cables away from power units and crossing them at right angles.
Details how balanced connections reject noise equally on both wires for clearer signals.
Explains how the PAD (LINE) switch selects MIC XLR or LINE TRS input.
Describes the stereo inputs (ST1-ST6) on the WZ³12:2 and ST1-ST2 on the WZ³16:2.
Details the single 3-pole TRS jack for insert signals, including tip/ring/sleeve functions.
Explains the impedance balanced TRS jack direct output and its pre/post-fade options.
Describes the balanced XLR outputs and the M output's mono sum or AUX6 source options.
Explains the configurable AB output for monitor sends or additional mixes.
Details the impedance balanced TRS aux send outputs and their use for monitors or effects.
Describes the MIDI input for effects control and the footswitch input for muting effects returns.
Explains the +48V switch for powering microphones and warnings about unbalanced sources.
Describes how the PAD switch selects the TRS LINE input or acts as a pad for the MIC XLR input.
Details how to adjust input sensitivity for optimal signal levels using PFL and meters.
Explains the function of the high pass filter to attenuate frequencies below 80Hz.
Describes the 4-band semi-parametric EQ, its controls, and frequency adjustments.
Explains the rotary controls for mixing channel signal to aux outputs and default settings.
Details how the PRE switch affects pre-fade channel signal to auxes and its factory default setting.
Describes how the PAN control positions the channel signal between L and R in the stereo mix.
Explains how the MUTE switch silences the channel signal and its indicator light.
Details how to use PFL to listen to the pre-fade channel signal without affecting main outputs.
Explains the function of the PEAK (red) and SIGNAL (green) indicators for signal presence and clipping.
Describes the fader's function for controlling channel level and setting channel levels.
Explains how stereo channels can be used separately, mixed, or split for different routing options.
Describes the unbalanced TRS inputs ST1 and ST3, their GAIN control, and ON switch.
Details the recessed switch for routing ST1/ST3 to the LR mix or the channel.
Describes the balanced TRS inputs ST2 and ST4, their GAIN control, and ON switch.
Explains the 4-band fixed frequency EQ for stereo channels.
Describes how stereo signals feed aux sends in mono or can be configured for stereo via jumpers.
Explains how the BAL control adjusts L vs R signal levels for stereo imaging.
Mute, Pre-Fader Listen, Peak, and Signal indicators for stereo channels.
Explains how the processor works as single or dual effects engines fed from AUX5/AUX6.
Describes how aux sends are used to feed the effects processor and potentially monitors.
Details how to use SEL and BANK buttons to scroll through and select effects presets.
Explains how to disable the internal processor to use external effects.
Describes the LEV control for the stereo effects return level to the main LR mix.
Explains the MUTE switch for the effects return and the MODE switch for single/dual operation.
Instructions on how to restore factory default effects presets.
Explains the master level controls for each aux send and their effect on outputs.
Details the 100mm faders for adjusting the main L-R mix level and operating recommendations.
Describes the M fader's source selection for mono PA, mono fill, or AUX6 master feeds.
Discusses using the M output for mono fill speakers or theatre sound systems.
Explains the increasingly popular application for driving sub bass speakers with their own mix.
Details the AB output's function as a separately controlled mix or monitor send.
Explains how to select monitor sources for headphones and the function of channel PFL overrides.
Advises using closed ear headphones and warns about hearing damage from high volumes.
Describes the stereo return channel for playback devices or additional effects returns.
Explains how signal levels between stages affect performance and prevent distortion or noise.
Details how to use console meters for optimal gain settings, averaging around '0' and watching peak indicators.
Guides on setting channel gain using PFL, starting with faders down to prevent loud volumes.
Explains console output levels and advice for connecting to sensitive equipment to avoid degrading performance.
Defines terms like normal operating level, headroom, signal-to-noise ratio, and dynamic range.
Details output levels, headroom, meters, sensitivity, frequency response, THD+n, and crosstalk.
Lists noise figures (Mic EIN, residual output noise) and EQ parameters (HPF, Mono EQ, Stereo EQ).
Covers power supply details, consumption, fuse rating, and dimensions for different mounting options.
Lists XLR and TRS connections for mono channels, including sensitivity and phantom power.
Details TRS connections for stereo channels and returns, including impedance and sensitivity.
Lists XLR and TRS connections for L, R, M, Aux, Direct, and AB outputs with levels.
Provides part numbers for console models and optional kits like Sys-Link II.
Illustrates the signal path from mic/line inputs through EQ, fader, and aux sends.
Shows the signal flow for stereo returns and the internal effects processor.
Depicts the aux send outputs and the monitor section signal routing.
Illustrates the main L-R, M, A-B outputs and their signal sources.
Shows the signal path for mic/line and dual stereo inputs on the WZ312:2.
Depicts the signal flow for stereo returns and the internal effects processor.
Illustrates the aux send outputs and the monitor section signal routing.
Shows the main L-R, M, A-B outputs and their signal sources.
Guides on how to remove the base to access internal assemblies and jumper links.
Explains how to set option jumpers for desired configurations and check settings.
Instructions on how to correctly reposition and secure the base after configuration.
Emphasizes carefully setting jumpers and recommends documenting changes for reference.
Details jumper settings for mono channel aux pre/post EQ and insert options.
Explains jumper settings for direct output source (pre-fade vs. post-fade).
Describes jumper settings for mono channel aux pre/post fader configurations.
Details jumper settings for stereo channel aux pre/post fader and mono/stereo aux source.
Explains how to configure the effects return (ST1/ST5) aux source for mono or stereo.
Details jumper settings for AB source to be pre or post LR faders.
Explains the optional balanced driver ICs for aux master outputs and their installation.
Details the Sys-Link II option for linking consoles and its limitations.
A template page designed for users to copy and record their console settings for the WZ312:2.
A template page designed for users to copy and record their console settings for the WZ316:2.