ControlLogix L7 Controller 3
Rockwell Automation Publication 1756-PC018C-EN-P - July 2016
Prevent Electrostatic Discharge
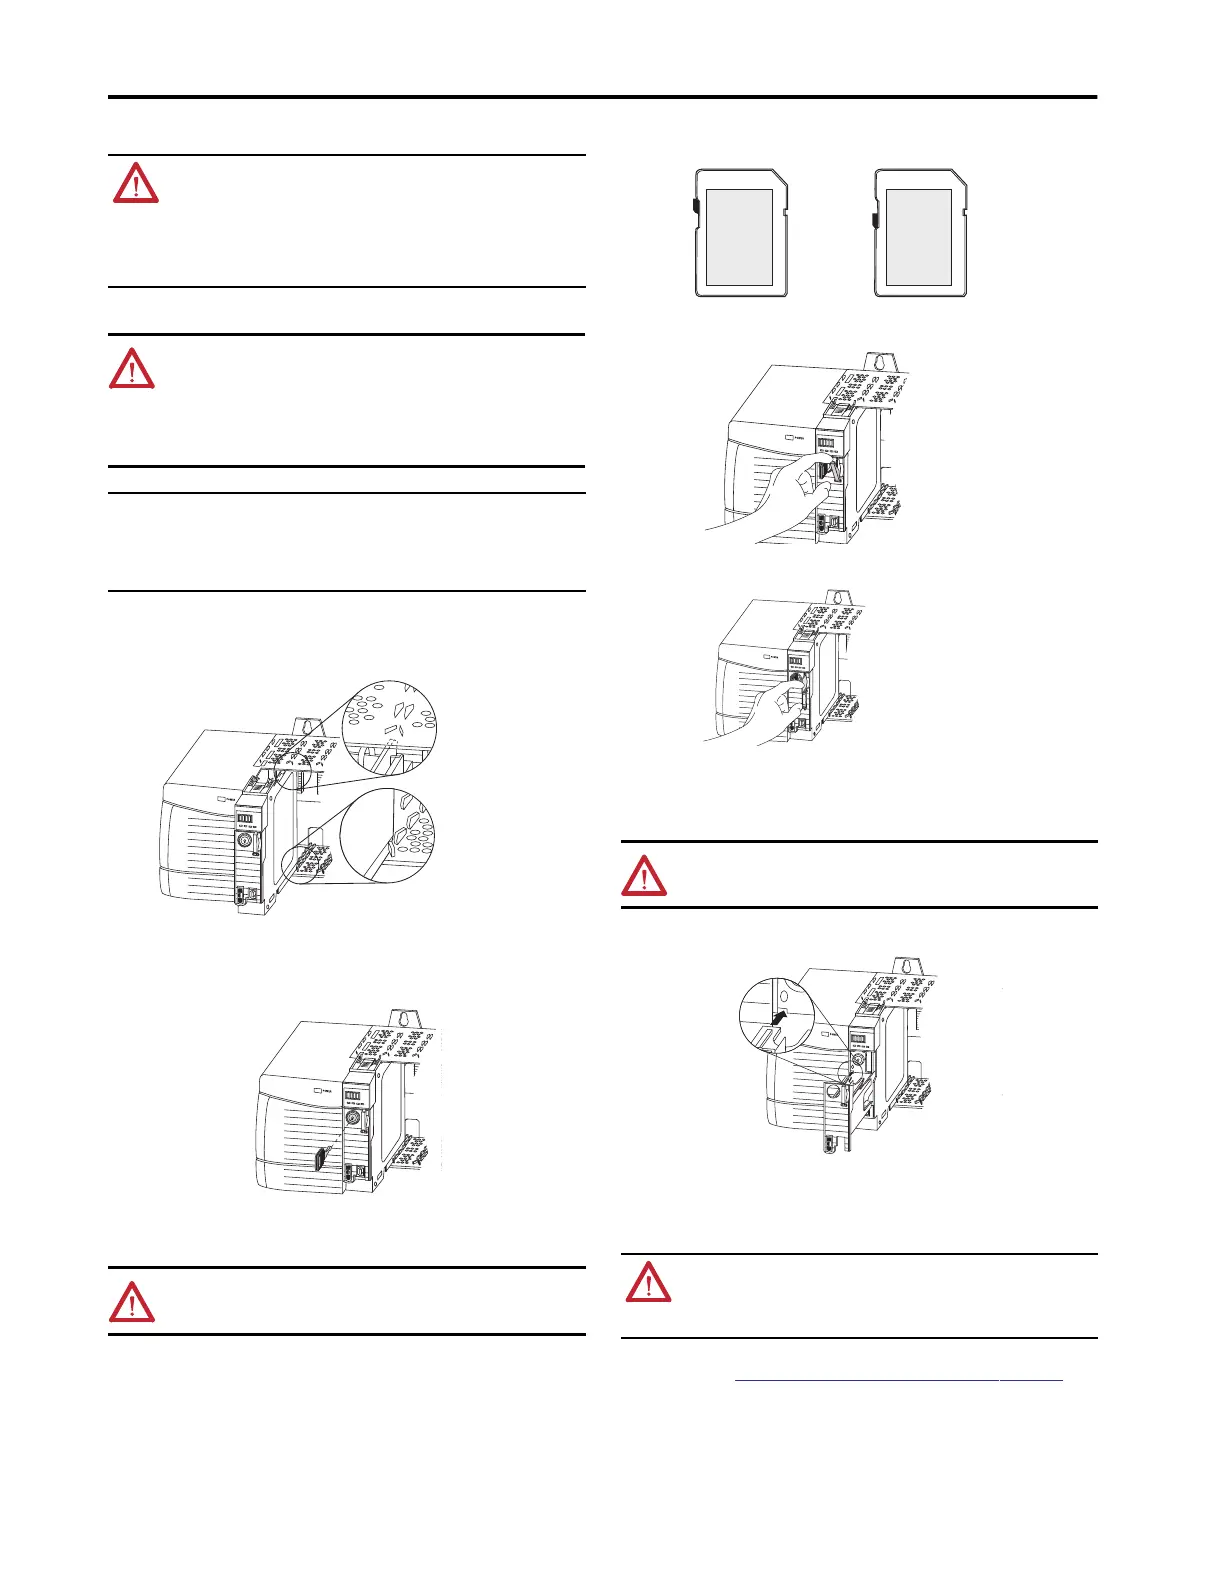
Insert the Controller into the Chassis
To insert the controller into the chassis, complete these steps.
1. Align the circuit board with the top and bottom guides in the chassis.
2. Slide the module into the chassis until it snaps into place.
3. Verify that the controller is flush with the power supply or other installed modules.
Insert the Key
After the controller is installed, insert the key.
Install the SD Card
Complete these steps to install the SD card in the 1756-L7x controllers.
1. Verify that the SD card is locked or unlocked according to your preference.
2. Open the door for the SD card.
3. Insert the SD card into the SD card slot.
4. Gently press the card until it clicks into place.
5. Close the SD card door.
Install the ESM
To install an ESM in the 1756-L7x controller, complete these steps.
1. Align the tongue-and-groove slots of the ESM and controller.
2. Slide the ESM back until it snaps into place.
The ESM begins charging after installation. Charging status is indicated by one of these status messages:
• ESM Charging
• CHRG
After you install the ESM, it can take up to 15 seconds for the charging status messages to display.
Rockwell Automation Support
For technical support, visit http://www.rockwellautomation.com/support/overview.page.
WARNING: If your application requires an ESM to deplete its residual stored energy to 40 μJoule
or less before you transport it into or out of the application, use only the 1756-(SP)ESMNSE(XT)
module. In this case, complete these steps before you remove the ESM.
1. Turn off power to the chassis. After you turn off power to the chassis, the controller’s OK status
indicator transitions from Green to Solid Red to OFF.
2. Wait at least 20 minutes for the residual stored energy to decrease to 40 μJoule or less before
you remove the ESM.
There is no visual indication of when the 20 minutes has expired. You must track that time period.
ATTENTION: This equipment is sensitive to electrostatic discharge, which can cause internal
damage and affect normal operation. Follow these guidelines when you handle this equipment:
• Touch a grounded object to discharge potential static.
• Wear an approved grounding wriststrap.
• Do not touch connectors or pins on component boards.
• Do not touch circuit components inside the equipment.
• Use a static-safe workstation, if available.
• Store the equipment in appropriate static-safe packaging when not in use.
IMPORTANT The ESM begins charging when one of these actions occurs:
• The controller and ESM are installed into a powered chassis.
• Power is applied to the chassis that contains a controller with the ESM installed.
• An ESM is installed into a powered controller.
After power is applied, the ESM charges for up to 2 minutes as indicated by CHRG or ESM Charging
on the status display.
WARNING: When you insert or remove the Secure Digital (SD) memory card while power is on, an
electric arc can occur. This could cause an explosion in hazardous location installations.
Be sure that power is removed or the area is nonhazardous before proceeding.
Log
ix 55xx
R
UN
FORC
E
SD
OK
Top Circuit Board Aligned
Bottom Circuit
Board Aligned
31997-M
Log
ix 55
xx
RU
N
FO
RC
E
SD
O
K
ATTENTION: To avoid potential damage to the product when inserting the ESM, align it in the track
and slide forward with minimal force until the ESM snaps into place.
ATTENTION: Allow the ESM to finish charging before removing power from the controller. Failure
to do so can result in the loss of the application program. A type 1, code 40 major fault is logged
on powerup.
To verify that the ESM is fully charged, check the status display to confirm that messages CHRG or
ESM charging are no longer indicated.
Unlocked
Locked
32005-M
Log
ix 55
xx
RUN
FORCE
SD
OK
Log
ix 55
xx
RU
N
FOR
CE
SD
O
K
Log
ix 55
xx
R
UN
F
O
RC
E
S
D
O
K
 Loading...