EasyManua.ls Logo

Allen-Bradley 1769-L19ER-BB1B User Manual

Allen-Bradley 1769-L19ER-BB1B
327 pages
To Next Page IconTo Next Page
Page #1 background imageLoading...
Page #1 background image
CompactLogix 5370 Controllers
Catalog Numbers 1769-L16ER-BB1B, 1769-L18ER-BB1B, 1769-L18ERM-BB1B, 1769-L19ER-BB1B, 1769-L24ER-QB1B, 1769-L24ER-
QBFC1B, 1769-L27ERM-QBFC1B, 1769-L30ER, 1769-L30ER-NSE, 1769-L30ERM, 1769-L33ER, 1769-L33ERM, 1769-L36ERM
User Manual
Для уменьшения размера файла удалены фотографии обложки и пустые страницы между разделами

Table of Contents

Question and Answer IconNeed help?

Do you have a question about the Allen-Bradley 1769-L19ER-BB1B and is the answer not in the manual?
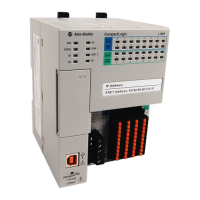
Allen-Bradley 1769-L19ER-BB1B Specifications

General IconGeneral
Product TypeCompactLogix Controller
Input Voltage24V DC
Memory512 KB
Ethernet Port Speed10/100 Mbps
Ethernet Ports2
Operating Temperature0°C to 60°C (32°F to 140°F)
Backplane Current @ 5V DC2 A
Power Supply24V DC
CertificationsCE, UL, cUL

Summary

Chapter 1 Install the CompactLogix 5370 L1 Controller

Connect Power to the Controller (Series B)

Guides on connecting external 24V DC power to the Series B controller.

Chapter 2 Install the CompactLogix 5370 L2 Controller

Install the Controller

Steps to physically install the controller onto the mounting base.

Chapter 3 Install the CompactLogix 5370 L3 Controller

Install the Secure Digital Card

Instructions for installing or reinstalling the SD card into the controller.

Connect Power to the Control System

Guides on connecting power to the control system using the I/O power supply.

Connect to the Controller via a USB Cable

Steps for establishing a connection using a USB cable for programming.

Connect the Controller to an EtherNet/IP Network

Instructions for connecting the controller to an EtherNet/IP network.

Chapter 4 Complete Software Tasks for CompactLogix 5370 Controller Installation

Set the IP Address of a Controller

Procedures for setting the controller's IP address during initial setup.

Use the BOOTP Server to Set the IP Address of the Controller

Method to assign an IP address using a BOOTP server.

Use the DHCP Server to Set the IP Address of the Controller

Method to assign an IP address using a DHCP server.

Use RSLinx Software to Set the IP Address of the Controller

Using RSLinx software to configure the controller's IP address.

Use the Studio 5000 Environment to Set the IP Address of the Controller

Using Logix Designer application to set the controller's IP address.

Use the SD Card to Set the IP Address of the Controller

Method to set the controller's IP address using an SD card.

Change the IP Address of a Controller

Procedures for modifying an existing controller IP address.

Change the Network IP Address with RSLinx Classic Software

Updating IP address using RSLinx Classic software.

Change the Network IP Address with Logix Designer Application

Updating IP address using Logix Designer application.

Load the Controller Firmware

Process for downloading and installing controller firmware.

Use the ControlFLASH Software to Load Firmware

Instructions for loading firmware using ControlFLASH software.

Use AutoFlash to Load Firmware

Using AutoFlash utility for loading controller firmware.

Use the Secure Digital Card to Load Firmware

Loading firmware onto the controller using an SD card.

Select the Operating Mode of the Controller

How to select and set the controller's operating mode via the mode switch.

Chapter 6 Communicate over Networks

EtherNet/IP Network Communication

Explains EtherNet/IP network protocols and capabilities.

DeviceNet Network Communication

Explains DeviceNet network communication using scanners.

Chapter 7 Use I/O Modules with CompactLogix 5370 L1 Controllers

Connect Field Power to I/O Devices Connected to a CompactLogix 5730 L1 Control System

Steps to connect field power to I/O devices for the L1 controller.

Set the Number of Local Expansion Modules

Specifies the count of local expansion modules in the project.

Use the Event Task

Configuring Event tasks triggered by input point state changes.

Chapter 8 Use I/O Modules with CompactLogix 5370 L2 Controllers

Wiring the Embedded I/O Modules

Procedures for wiring embedded I/O modules.

Local Expansion Modules - Optional

How to use Compact I/O modules as local expansion modules.

Distributed I/O Modules over an EtherNet/IP Network

How to include and configure distributed I/O over EtherNet/IP.

Distributed I/O Modules over a DeviceNet Network

How to include and configure distributed I/O over DeviceNet.

Estimate Requested Packet Interval

Defines the frequency for data transmission between controller and I/O modules.

Chapter 9 Use I/O Modules with CompactLogix 5370 L3 Controllers

Select I/O Modules

Options for selecting I/O modules for the control system.

Local Expansion Modules

How to use Compact I/O modules as local expansion modules.

Configure Distributed I/O Modules on an EtherNet/IP Network

Steps to configure distributed I/O modules on EtherNet/IP.

Configure Distributed I/O Modules on a DeviceNet Network

Steps to configure distributed I/O modules on DeviceNet.

Chapter 10 Develop Applications

Tasks

Explains how to schedule and prioritize program execution using tasks.

Monitoring Controller Status

Using GSV/SSV instructions to monitor controller status and data.

Monitoring I/O Connections

How the controller handles communication timeouts and produces warnings.

Chapter 11 Develop Integrated Motion over an EtherNet/IP Network Application

Time Synchronization

Importance of CIP Sync for accurate real-time synchronization.

Configure Integrated Motion on the EtherNet/IP Network

Steps to enable time synchronization and add drives for Integrated Motion.

Enable Time Synchronization

Procedures for enabling time synchronization in the controller.

Add a Drive

Steps to add a drive to the I/O configuration for motion control.

Chapter 12 Use a Secure Digital Card

Store or Load a Project with the Secure Digital Card

Tasks for storing and loading projects using an SD card.

Appendix C Connect Power to the Series A L1 CompactLogix 5370 Controllers

CompactLogix 5370 L1, Series A, Controller Power Connection

Explains how to connect power to the Series A L1 controller.

CompactLogix 5370 L1, Series A, Controller Field Power to I/O Devices Connection

How to connect field power to I/O devices for the Series A L1 controller.

Related product manuals