Do you have a question about the Allen + Roth L-GZ815PST-C and is the answer not in the manual?
Key safety guidelines for product assembly and use, including electrical storm and falling risks.
Critical warning about fabric flammability and the need to keep away from flames.
Unfold the long and short crossbeams and secure them using elastic buckling.
Insert the unfolded crossbeams into poles and secure them with knobs.
Attach netting pipes to crossbeams and poles using knobs.
Insert the hook into the top connector, then add the middle beams.
Insert the other ends of the middle beams into pegs on the crossbeams.
Insert the top oblique beams into the top oblique beam down tubes.
Insert the top oblique beams into the main top connector.
Attach the top oblique beam down tubes to the poles.
Insert small top oblique beams into the small top connector.
Drape the small canopy over the small top connector and secure corners.
Attach the finial to the small top connector.
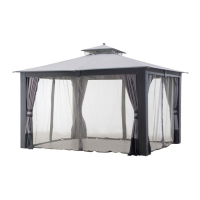
Place the big canopy onto the gazebo and attach the small top assembly.
Use knobs to attach slip covers to the middle of the crossbeams.
Spread out the big canopy and secure its corners to the down tubes.
Attach rings to netting/curtains and secure them onto the netting pipes.
Move the assembled item to its final location and secure it to the ground using stakes.
| Brand | Allen + Roth |
|---|---|
| Model | L-GZ815PST-C |
| Category | Outdoor Furnishing |
| Language | English |