2) Two Methods
a) Correct Aperture lor given Shutter
Speed
UsualIγγou set γour shutter speed first
,
based on the moving or stationarγ
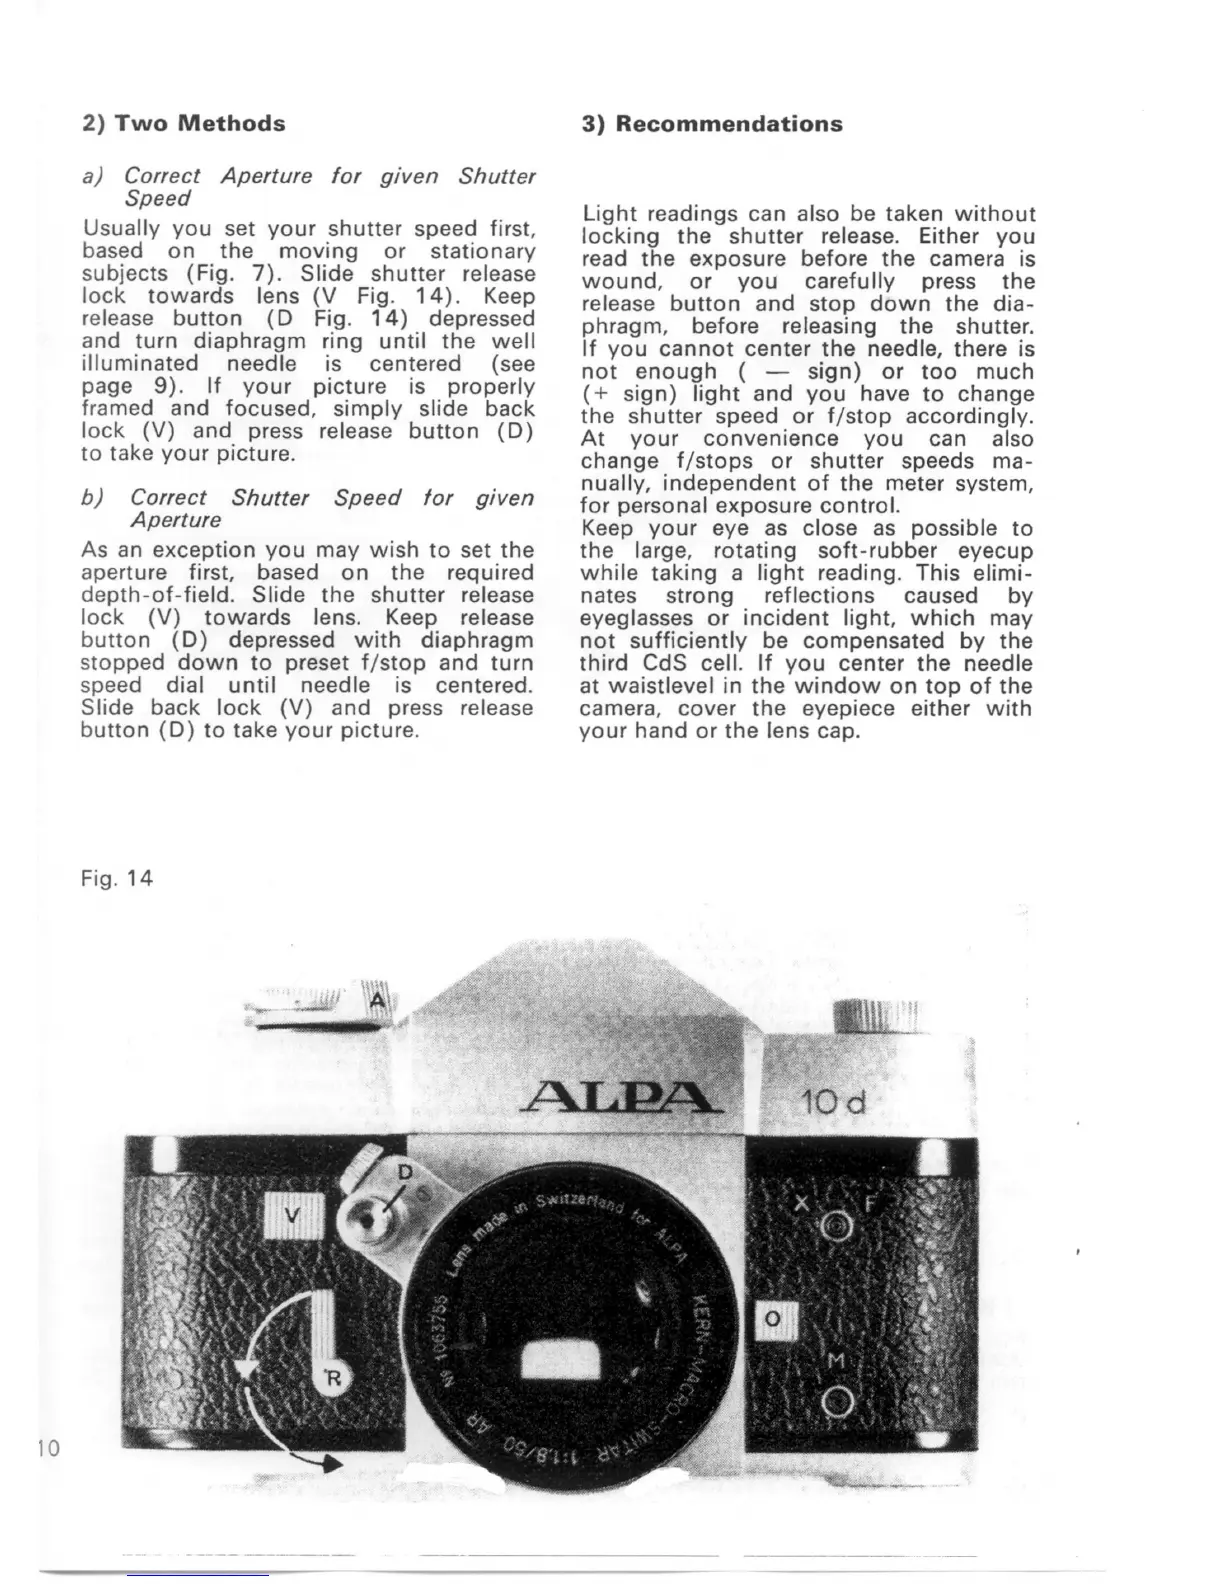
subjects (Fig. 7). Slide shutter release
lock towards lens (V Fig. 14). Keep
release button (D Fig. 14) depressed
and turn diaphragm ring until the well
illuminated needle is centered (see
page 9). Ifγour picture is properlγ
framed and focused
,
simply slide back
lock (V) and press release button (D)
to take your picture.
b) Correct Shutter Speed for given
Aperture
As an exceptio n γau maγwish to set the
aperture first
,
based on the required
depth-of-field. Slide the shutter release
lock (V) towards lens. Keep release
button (D) depressed with diaphragm
stopped down to preset f/stop and turn
speed dial until needle is centered.
Slide back lock (V) and press release
button (D) to take γour picture.
Fig. 14
3) Recommendations
Light readings can also be taken without
locking the shutter release. Either you
read the exposure before the camera is
wou nd
,
or you carefu IIγpress the
release button and stop down the dia-
phragm
,
before releasing the shutter.
Ifγou cannot center the needle
,
there is
not enough
(一
sign) or too much
(+
sign) light and γau have to change
the shutter speed or f/stop accordinglγ-
Atγour convenience γou can also
change f/stops or shutter speeds ma-
nuallγ
,
independent of the meter system
,
for personal exposure contro
l.
Keep γour eγe as close as possible to
the large
,
rotating soft-rubber eγecup
while taking a light reading. This elimi-
nates strong reflections caused by
eγeglasses or incident light
,
which maγ
not sufficientlγbe compensated bγthe
third CdS cel
l.
Ifγau center the needle
at waistlevel in the window on top of the
camera
,
cover the eγepiece either with
γour hand or the lens cap.
10