!過"'........:.....
i'
4
盟國~丸
1..;:
",-
a
圖"
e
Fig. 6
Fig. 7
,
魚
、
、
.
•
r
、
、../
groundglass or with the rangefinder is
impractica
l.
When taking flash pictures
,
the available light maγbe so dim that
groundglass focusing can become diffi-
cult
,
especia
l!
γif the lens is stopped
down to a smaller aperture. In sports
photographγγou frequentlγhave no
time to do anγfocusing at al
l.
Location of the film plane is visibly indi-
cated bγthe exacting calibration on
camera top
,
to the right of the reflex-
pns
口
1.
D. LOADING AND
UNLOADING
1) Loading
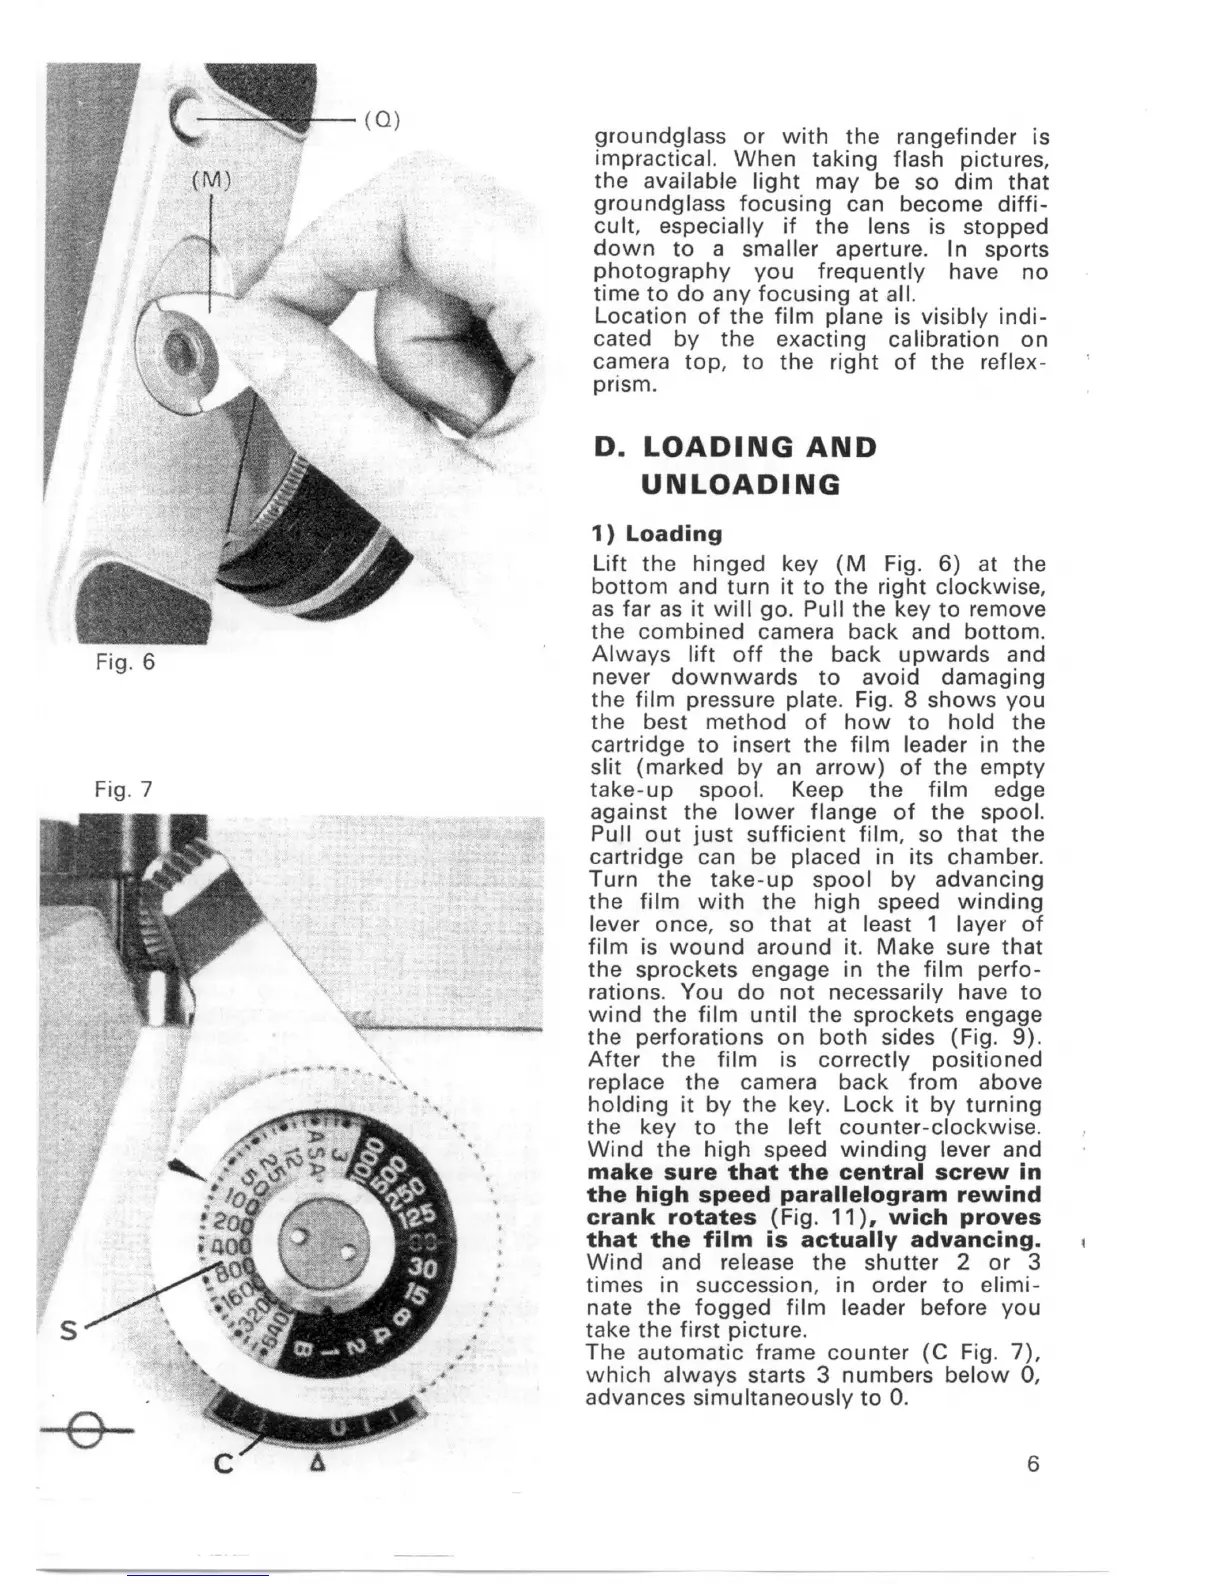
Li
ft the hinged keγ(M Fig. 6) at the
bottom and turn it to the right clockwise
,
as far as it will go. Pull the keγto remove
the combined camera back and bottom.
Alwaγs lift off the back upwards and
never downwards to avoid damaging
the film pressure plate. Fig. 8 shows γou
the best method of how to hold the
cartridge to insert the film leader in the
slit (marked bγan arrow) of the empty
take-up spoo
l.
Keep the film edge
against the lower flange of the spoo
l.
Pull out just sufficient film
,
so that the
cartridge can be placed in its chamber.
Turn the take-up spool bγadvancing
the film with the high speed winding
lever once
,
so that at least 1 laγer of
film is wound around i
t.
Make sure that
the sprockets engage in the film perfo-
rations. You do not necessarilγhave to
wind the film until the sprockets engage
the perforations on both sides (Fig. 9).
After the film is correctly positioned
replace the camera back from above
holding it bγthe keγ. Lock it bγturning
the keγto the left counter-clockwise.
Wind the high speed winding lever and
make sure that the central screw in
the high speed parallelogram rewind
crank rotates (Fig. 11)
,
wich proves
that the film is actually advancing.
Wind and release the shutter 2 or 3
times in succession. in order to elimi-
nate the fogged film leader before you
take the first picture.
The automatic frame counter (C Fig. 7)
,
which alwaγs starts 3 numbers below 0
,
advances simultaneously to 0.
6