______________________________________________________________________
Alpha ESS Co., Ltd.
Page 15 of 29
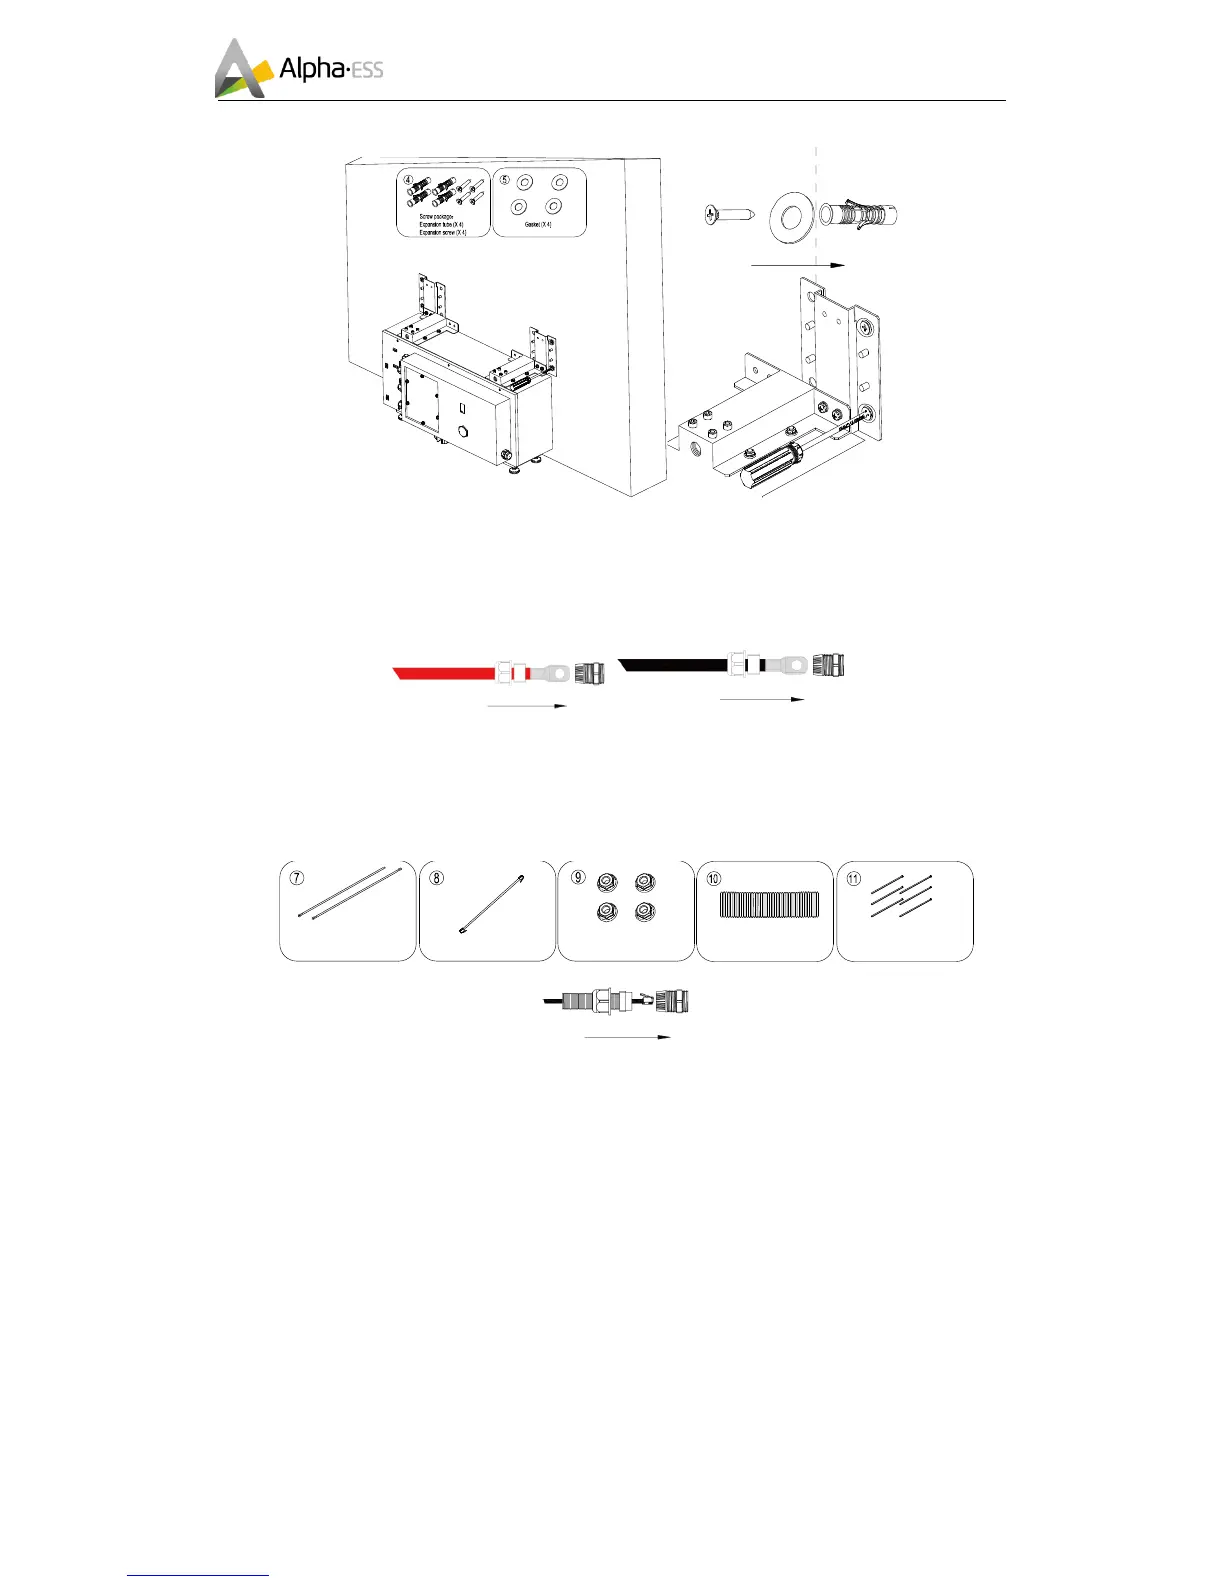
Step 5: Insert the expansion tube into the drilled hole. Pass the expansion screw through the
gasket and lock with a screwdriver. M4856-P is stackable with maximum of 4 batteries in
one row.
Step 6.1: Battery power cable connection sequence:
Go through the waterproof cap→ go through the sealing ring→ go through the joint, fixed to
the copper bar with M5 nut inside of the battery.
Step 6.2: Battery
communication cable
connection sequence:
The RJ45 connector of the
communication cables shall go
through the waterproof cap → go
through the sealing ring→go
through the joint and be inserted in
to the COM port inside of the
battery.
1. The waterproof connector is rotated counterclockwise
according to the installation procedure to remove the plug.
2. Use a screwdriver to remove the maintenance cover
before wiring.
3. All air switches are set to disconnect at the factory.
Please check before wiring.
4. The waterproof joint seal should be confirmed whether
it is inserted into the plastic claw ring during installation.


 To Next Page