18
Alpha CD13R, 18R, 24R - Commissioning
When commissioning the boiler, ensure the Benchmark Checklist is completed.
5.1 FILL THE SYSTEM
1. To remove the air - Vent each radiator in turn, starting with the lowest in the system.
2. It is important that the external pump is properly vented to avoid it running dry and damaging its bearings. Unscrew and remove
the cap from the centre of the pump. Using a suitable screwdriver rotate the exposed spindle about half a turn, then replace
the cap.
3. Refer to Sections 3.8, 3.9 and 3.10 for filling and flushing the system.
4. Ensure that the condensate trap has been filled with water. Refer to Section 4.5, paragraph 4.
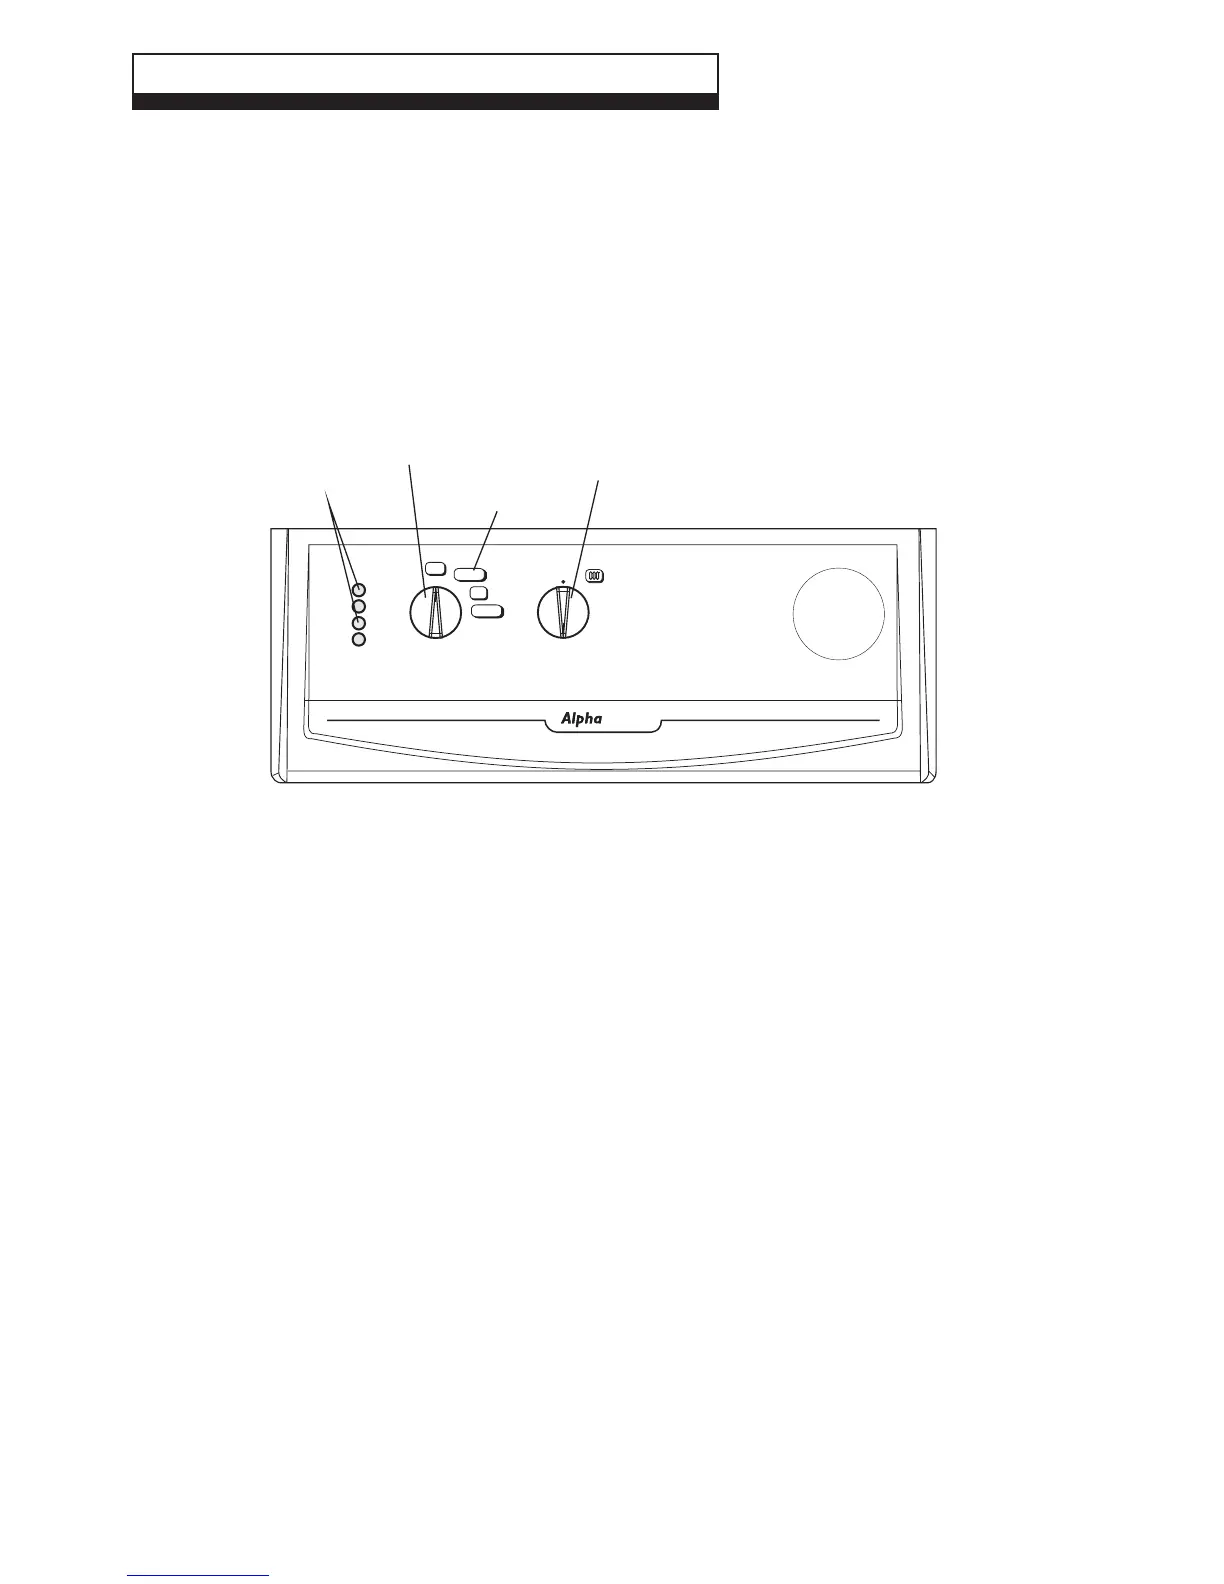
5.2 BOILER CONTROLS - Fig. 22
5 COMMISSIONING
Fig. 22
5.3 TEST FOR GAS SOUNDNESS AND PURGE THE SUPPLY
1. With the boiler gas service cock closed (slot at right angles to valve). Pressure test the gas supply and inlet pipework
connection to the boiler gas service cock for soundness in accordance with BS 6891.
2. Loosen the gas inlet pressure test point screw on the gas valve (see Fig. 24). Ensure the gas supply is on and open the
boiler service cock to purge in accordance with BS 6891.
3. Retighten the test point screw and test for gas soundness. Close the boiler gas service cock.
5.4 INITIAL LIGHTING - Refer to Fig. 22
1. Ensure that the gas and electrical supplies to the boiler are off.
2. Turn on the gas and electrical supplies to the boiler.
3. Ensure all external controls are calling for heat.
If the optional Clock is fitted, set the time and ensure the Clock is in an 'on' mode.
4. Set the central heating thermostat to maximum.
5. Set the selector switch to 'ON'. The boiler will now run. The external pump will start, the fan will start and the main gas
valve solenoid will open allowing the main burner to light.
5.5 CHECK THE BURNER PRESSURES - Figs. 23, 24
Turn the boiler off. Remove the two pressure test point screws at the top of the boiler and connect a differential pressure gauge
to P1 and P2 as shown in Fig 23. Allow the boiler to run for 10 minutes and check the differential burner pressures.
1. Set the selector switch to 'ON'.
2. The burner will light at the ignition rate and will increase to the factory pre-set maximum output after approximately 4 minutes.
Central
HeatingThermostat
Frost
Thermostat position
Selector Switch
0
Indicator
Neons
1
2
3
1
2
3
4
5
6
7
8
9
RESET
ON
OFF
FROST
A
D
B
C
SELECTOR THERMOSTAT
CD18R